
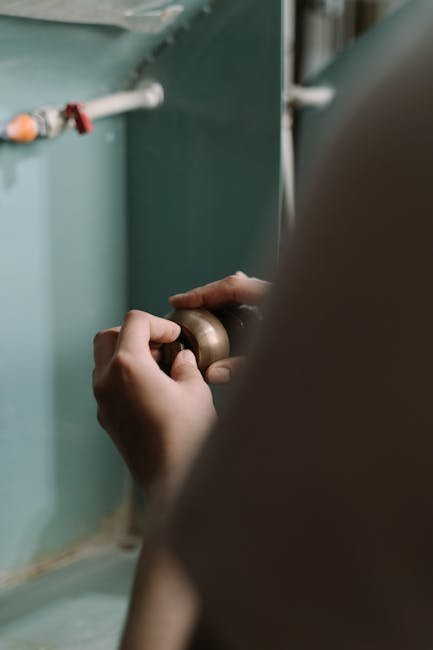
Understanding the plumbing beneath your kitchen sink is one of the most valuable DIY skills a homeowner can develop. That cramped, dark cabinet hides a system that delivers fresh water and removes waste — and when something goes wrong, knowing how it works saves you time, money, and a soggy floor. This guide breaks down every component, walks you through a full installation, and gives you the confidence to tackle repairs yourself.
Decoding Your Kitchen Sink Plumbing: Key Components and Their Roles
Every under-sink plumbing system consists of two distinct networks: the supply side that brings water in and the drain side that carries waste out. Each component has a specific job, and understanding these roles is the foundation of any successful DIY project.
Water Supply Lines: Bringing Lifeblood to Your Faucet
The supply lines connect your home's main water pipes to the faucet. You will always find two lines: one for hot water and one for cold. Most modern homes use flexible braided stainless steel hoses, which resist bursting better than older plastic or rubber versions. If your home was built before the 1990s, inspect these lines carefully — older materials can fail without warning. The supply lines attach to the shut-off valves at one end and the faucet inlets at the other. When you experience low water pressure or a dripping faucet, checking for kinks or worn washers in these lines should be your first step. For a deeper look at how these valves operate, the section on water valves under kitchen sink covers common issues and replacement steps.
The Faucet and Its Inner Workings
The faucet is your control center. Inside the body, cartridges or ceramic discs regulate water flow and temperature. When a faucet drips, it is almost always a worn cartridge or a degraded rubber seal. Modern faucets use quarter-turn ceramic discs that last significantly longer than the old compression-style valves. If you are installing a new faucet, pay close attention to the mounting hardware — a loose base will wobble and eventually leak.
Drainage System: From Sink to Sewer
Wastewater leaves the sink through the drain flange, passes through the strainer basket, and enters the tailpiece — the straight vertical pipe below the sink. From there it travels into the P-trap and then out to the wall drain. Every connection in this chain must be watertight, and the entire drain line must slope downward at a consistent angle to prevent standing water.
The Indispensable P-Trap: More Than Just a Curve
The P-trap is the curved section of pipe that holds a small amount of water at all times. That standing water creates a seal that blocks sewer gases from rising into your kitchen. If you smell rotten eggs under your sink, your P-trap has probably dried out — common after returning from vacation. Simply running water for a minute refills it. The P-trap also catches rings, silverware, and other dropped items before they can clog the main drain. When you need to retrieve something, the slip nuts on either end make disassembly straightforward. For detailed instructions on removing and reinstalling this component, the guide on how to install p trap under kitchen sink walks through the process with clear steps.

Shut-Off Valves: Your Emergency Control
Every sink should have dedicated shut-off valves on both the hot and cold supply lines. These small valves let you stop water flow to the sink alone without shutting down the entire house. Turn them clockwise to close, counterclockwise to open. If the valve handle feels stiff or leaks when you turn it, the internal stem may be corroded. Replacing a faulty shut-off valve is a simple repair that prevents a small problem from turning into an emergency. If you cannot find these valves under your sink, check the basement or crawlspace — the main water shut-off for the house is your last resort.
Optional Components: Garbage Disposals and Dishwasher Drains
Many kitchens include a garbage disposal mounted directly under the sink drain. The disposal grinds food waste and pushes it through the drain line. When installing a disposal, ensure the drain outlet aligns with your P-trap and that all mounting rings are seated correctly. Dishwashers typically drain into the sink plumbing through a dedicated hose connected to a port on the disposal or a fitting on the tailpiece. The hose must form a high loop secured to the underside of the countertop — this prevents contaminated water from siphoning back into the dishwasher. For a complete visual of this setup, the plumbing under kitchen sink diagram with dishwasher article shows exactly how these connections work together.
Materials and Tools: Equipping Yourself for Success
Using the wrong materials or skipping the proper tool leads to leaks, stripped threads, and unnecessary frustration. Invest in quality components and the right equipment before you start.
Common Plumbing Materials Under the Sink
| Material | Best Use | Key Characteristics |
|---|---|---|
| PVC (polyvinyl chloride) | Drain lines | Rigid, affordable, easy to cut with a hacksaw |
| PEX (cross-linked polyethylene) | Water supply lines | Flexible, resists freezing, connects with push-fit or crimp rings |
| CPVC (chlorinated polyvinyl chloride) | Hot water supply | Handles higher temperatures than standard PVC |
| Braided stainless steel | Supply lines to faucet | Durable, burst-resistant, available in standard lengths |
| Brass fittings | Valve connections | Corrosion-resistant, used for shut-off valves and adapters |
You will also need plumber's tape (PTFE tape) for threaded connections, plumber's putty for sealing flanges, and silicone-based gaskets for slip-nut joints. Avoid using plumber's putty on plastic parts — it can cause cracking over time.
Essential Tools for Under-Sink Plumbing
- Adjustable wrenches (two) — one to hold the fitting, one to tighten the nut
- Basin wrench — reaches the awkward nuts holding the faucet in place
- Pipe cutter — gives clean, square cuts on PVC and PEX
- Hacksaw — for cutting metal pipes or tight spaces
- Bucket and rags — for catching residual water
- Flashlight or headlamp — under-sink spaces are notoriously dark
- Safety glasses and gloves — debris and sharp edges are common
- Plumber's snake — for clearing clogs beyond the P-trap
Navigating the Under Kitchen Sink Plumbing Diagram
A plumbing diagram is a simplified drawing that shows how every component connects. Learning to read one lets you plan your work, identify problems, and communicate clearly with a professional if needed.
Understanding Plumbing Symbols
Most diagrams use standard symbols: solid lines represent supply pipes, dashed lines represent drain pipes, and circles with crosshairs indicate valves. Traps are drawn as a U-shape, while tees and elbows show where pipes split or turn. Once you recognize these symbols, any diagram becomes readable regardless of the source.
Tracing Water and Waste Flow
Water enters through the supply lines, passes through the shut-off valves, and reaches the faucet. After use, wastewater exits the sink bowl through the drain flange, drops down the tailpiece, curves through the P-trap, and flows into the wall drain. The dishwasher and garbage disposal add extra branches to this path, but the fundamental flow pattern remains the same.
Identifying Connection Points and Dependencies
The diagram also shows where components depend on each other. For example, the dishwasher drain hose must connect after the P-trap to prevent sewer gas from entering the appliance. The garbage disposal requires a dedicated electrical outlet and a drain line sized to handle food particles. Understanding these relationships prevents mistakes that could require tearing out completed work. If your system seems unusually configured, the diagram of plumbing under the kitchen sink offers a comprehensive reference for standard layouts.
Preparing for Installation: Setting the Stage for Success
Rushing into an installation without proper preparation is the most common DIY mistake. Take these steps seriously, and the actual work will go smoothly.
Step 1: Isolate the Water Supply
Locate the shut-off valves under the sink and turn them clockwise until they stop. Open the faucet to confirm no water flows. If you have no shut-off valves under the sink, you must close the main water valve for the entire house — this is located near the water meter, typically in a basement or utility room. Plan for this extra step, as it will affect other water use in the home during your work.
Step 2: Clear the Workspace
Remove everything from the cabinet: cleaning supplies, trash bins, storage containers. Lay down old towels or a shallow plastic bin to catch drips. Having a clear, dry space to work prevents dropped tools from disappearing into dark corners and gives you room to move.
Step 3: Plan and Measure Meticulously
Measure the distance from the sink drain outlet to the wall drain stub-out. Measure the height of your new P-trap and compare it to the available vertical space. Check that your supply lines are long enough to reach from the shut-off valves to the faucet without stretching tight. A pencil sketch with these measurements on it will save you multiple trips to the hardware store.
Step-by-Step Under-Sink Plumbing Installation Guide
This procedure assumes you are installing a standard dual-basin sink with a garbage disposal and dishwasher connection. Adjust as needed for your specific configuration.
Installing Drain Pipes
- Connect the tailpieces to each sink basket. Ensure the rubber gasket sits flat between the basket flange and the tailpiece.
- Assemble the P-trap by hand-tightening the slip nuts onto the U-bend. Do not use tools yet — you need the joint to be slightly loose for alignment.
- Connect the P-trap outlet to the wall drain stub-out using a coupling or extension pipe. The entire assembly must slope downward toward the wall at approximately 1/4 inch per foot.
- Tighten all slip nuts with a wrench. Apply gentle pressure — overtightening can crack PVC or crush the rubber gasket.
Connecting Water Supply Lines
- Attach the flexible supply lines to the faucet inlets. Hand-tighten, then give each nut a quarter turn with a wrench.
- Connect the other ends to the corresponding shut-off valves. Ensure the hot line goes to the hot valve and the cold line to the cold valve. Crossed connections will still work but waste energy heating cold water.
- Check that the supply lines are not twisted, kinked, or pressed against sharp edges inside the cabinet.
Integrating Optional Components
- Garbage disposal: Mount the disposal unit to the sink flange according to the manufacturer's instructions. Most units use a three-ring mounting system — twist the disposal clockwise until it locks. Connect the drain outlet to your P-trap assembly using a tee fitting.
- Dishwasher: Attach the dishwasher drain hose to the disposal's inlet port or a dedicated tailpiece fitting. Secure the hose in a high loop under the countertop using a zip tie or clip. This simple step prevents backflow and is required by most plumbing codes.
- Air gap: Some local codes require an air gap device mounted on the countertop. If your area requires one, install it according to the manufacturer's diagram before connecting the dishwasher hose.
Securing All Connections
Go back over every joint and fitting. Pull gently on each pipe to confirm it is seated properly. Look for gaps between the rubber gasket and the pipe surface. If a slip nut feels loose, tighten it slightly more — but stop the moment you feel resistance increase sharply, as that indicates the threads are fully engaged. For a complete walkthrough of replacing existing pipes, the guide on how to replace the pipes under a kitchen sink addresses common challenges and solutions.
Testing and Troubleshooting: Ensuring a Leak-Free System
Testing is not optional. A small drip left unchecked can cause cabinet rot, mold growth, and expensive water damage.
The Leak Test: A Watchful Eye
- Turn the shut-off valves halfway open. Listen for hissing sounds and watch every connection for drips.
- Open the faucet and let cold water run for two minutes. Check all supply line connections, the P-trap slip nuts, and the garbage disposal mounting.
- Switch to hot water and repeat the inspection. Heat can cause fittings to expand, revealing leaks that cold water hides.
- Run the dishwasher through a short cycle. Check the drain hose connection and the air gap if installed.
If you find a drip, tighten the affected fitting by a quarter turn and test again. If the leak persists, disassemble the joint, inspect the gasket for damage, and reassemble with a fresh plumber's tape wrap on threaded connections.
When to Call a Professional
Some situations require expertise beyond a DIY weekend project. Call a licensed plumber if you encounter:
- Cast iron or galvanized steel drain pipes that need cutting or joining
- Sewage odors coming from the drain after the P-trap is full
- Water hammer — loud banging when the faucet shuts off
- Persistent leaks that return after tightening
- Signs of widespread mold or water damage inside the cabinet
A professional can also inspect the overall condition of your plumbing and identify issues that are not yet visible. If you decide to hire help, understanding the terminology in this guide will let you describe the problem accurately and avoid unnecessary charges.
Conclusion
The plumbing under your kitchen sink is a straightforward system once you know what each part does and how they fit together. By learning the components, preparing thoroughly, and following a methodical installation process, you can handle the most common repairs and upgrades yourself. Start with a single project — replace a leaking P-trap or swap out an old faucet — and build your confidence from there. For a more complete picture of the entire drain assembly, the overview of kitchen pipes under sink connects this information to the wider plumbing system in your home.
Frequently Asked Questions
What is the most common cause of a leak under the kitchen sink?
Loose slip nuts on the P-trap account for most leaks. The rubber gasket inside the nut compresses over time, and a simple quarter-turn with a wrench usually stops the drip. Always check these connections first before disassembling anything.
Do I need plumber's putty for every drain connection?
No. Use plumber's putty only on the sink flange where it meets the basin. For threaded connections on supply lines and slip nuts on drain pipes, use plumber's tape or the rubber gasket that came with the fitting. Plumber's putty can weaken plastic parts over time.
Why does my sink drain smell even though I clean it regularly?
A dry P-trap is the most likely cause. If you have not used the sink for several days, the water seal evaporates and allows sewer gas to rise. Run water for 30 seconds to refill the trap. If the smell returns quickly, the trap may have a crack or a loose connection.
Can I use PVC pipe for both supply and drain lines?
PVC is suitable only for drain lines. Supply lines carry pressurized water and require materials rated for that pressure — typically PEX, copper, or braided stainless steel. Using PVC on the supply side can cause catastrophic failure.
How often should I replace the supply lines under my sink?
Replace braided stainless steel supply lines every five to eight years, or immediately if you see any bulging, rust, or cracks. The older plastic or rubber lines that came with many homes should be replaced as soon as possible — they are a common cause of sudden flooding.
What is the high loop for a dishwasher drain?
The high loop is a section of the dishwasher drain hose that is secured to the underside of the countertop at a point higher than the sink drain connection. This prevents dirty sink water from flowing backward into the dishwasher. Most plumbing codes require it, and it takes only a zip tie to install.
