Are you dealing with a leaky kitchen sink or slow drainage? It might be time to replace the pipes under your kitchen sink.
Ignoring this problem can lead to bigger issues like water damage and costly repairs. But don’t worry—replacing those pipes is easier than you think. You’ll learn simple steps to fix your plumbing quickly and save money. Keep reading to discover how you can take control of your kitchen sink’s health and avoid unnecessary headaches.
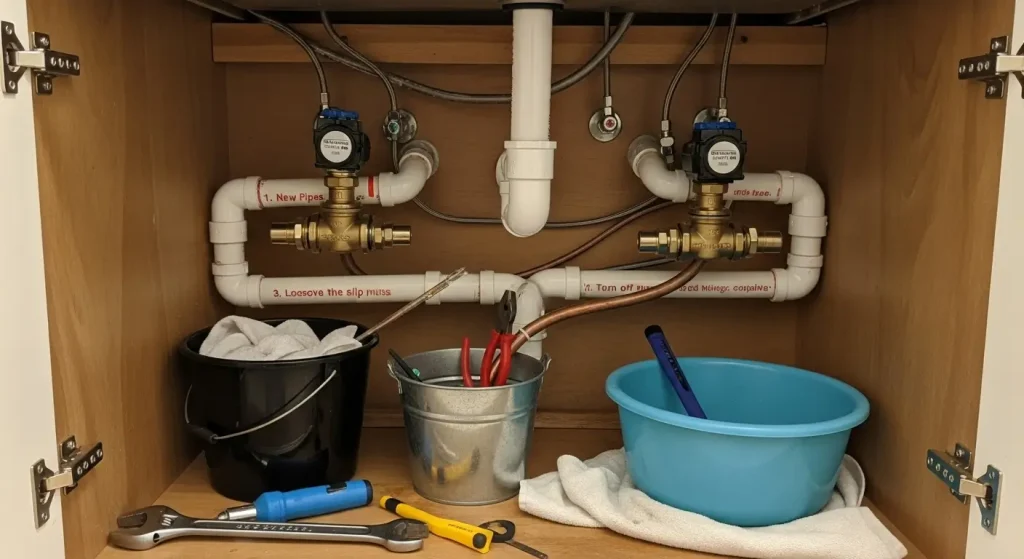
Tools And Materials Needed
Replacing pipes under your kitchen sink requires the right tools and materials to make the job smooth and effective. Without these essentials, you might face leaks, delays, or even damage to your plumbing system. Knowing exactly what to gather beforehand saves you time and frustration.
Essential Tools
Start with a basic set of plumbing tools. A pipe wrench or adjustable wrench is crucial for loosening and tightening pipe fittings. You’ll also need a basin wrench to reach those tight spaces under the sink easily.
A pipe cutter or hacksaw helps you cut old pipes cleanly. Don’t forget plumber’s pliers—they give you extra grip when twisting stubborn parts. Having a bucket nearby prevents water spills from making a mess.
Types Of Pipes
Understanding the types of pipes you’ll be working with is key. Most kitchen sinks use PVC, copper, or PEX pipes. PVC is lightweight and easy to cut, making it popular for drainage.
Copper pipes are durable but require careful handling and sometimes soldering. PEX pipes are flexible and simpler to install but need specific fittings. Do you know which pipe type fits your sink’s plumbing system?
Sealants And Tape
Sealants and tape ensure your connections stay watertight. Teflon tape (also called plumber’s tape) is wrapped around threaded pipe ends to prevent leaks. It’s inexpensive and easy to apply.
Pipe joint compound is another option that creates a strong seal on metal connections. For PVC pipes, use solvent cement to bond fittings securely. Choosing the right sealant can make the difference between a drip-free sink and a recurring problem.
Preparing The Workspace
Preparing the workspace is vital before replacing pipes under the kitchen sink. A clean and safe area makes the job easier and prevents accidents. Proper preparation saves time and reduces stress during the process.
Shutting Off Water Supply
Turn off the water supply to avoid leaks and flooding. Locate the shutoff valves under the sink and turn them clockwise until tight. If there are no local valves, turn off the main water supply for the house. Open the faucet to release any remaining water in the pipes.
Clearing The Area
Remove all items stored under the sink. This gives you space to work comfortably and access the pipes easily. Wipe down the cabinet floor to remove dirt and moisture. Use a flashlight to check for hidden leaks or damage before starting.
Gathering Safety Gear
Wear safety goggles to protect your eyes from debris and splashes. Use gloves to shield your hands from sharp edges and chemicals. Keep a bucket or container nearby to catch any water left in the pipes. Have towels ready to clean up spills quickly.
Removing Old Pipes
Removing old pipes under the kitchen sink requires care and attention. Start by preparing the area. Clear out items from under the sink to give yourself space. Wear gloves to protect your hands from dirt and sharp edges. Turn off the water supply to avoid leaks during removal. Old pipes may be stuck or damaged, so patience is key. Proper removal helps ensure a smooth replacement process.
Disconnecting Drain Components
Locate the drain components connected to the sink. Use a wrench or pliers to loosen slip nuts. Turn counterclockwise to unscrew. Keep a bucket below to catch any water. Remove the tailpiece, drain pipes, and any connectors carefully. Avoid using excessive force to prevent damage. Keep track of all parts for reassembly or replacement.
Dealing With Corroded Parts
Old pipes often have rust or corrosion. Apply a penetrating oil to stuck nuts and fittings. Let it sit for several minutes to loosen the corrosion. Tap lightly with a hammer if parts remain tight. Use a pipe wrench for better grip on stubborn areas. Replace any parts that are too corroded or cracked. Corrosion can cause leaks and should not be reused.
Handling Traps And Fittings
The trap is the curved pipe under the sink. It holds water to block sewer gases. Remove the trap by loosening the slip nuts. Inspect the trap for clogs or damage. Clean or replace the trap as needed. Check all fittings for wear or cracks. Keep fittings organized to ensure proper reinstallation. Proper handling prevents leaks and odors later.

Credit: www.reddit.com
Measuring And Cutting New Pipes
Measuring and cutting new pipes under your kitchen sink is a task that demands precision and care. Getting these steps right ensures a leak-free fit and smooth water flow. If your measurements are off or cuts are uneven, you might face repeated repairs or water damage.
Taking Accurate Measurements
Start by turning off the water supply and removing the old pipes carefully. Use a flexible tape measure to note the exact length needed from one connection point to another. Don’t forget to measure the diameter of the pipes; matching this is crucial for a proper seal.
Double-check your measurements. A small mistake can cause problems when installing the new pipes. Have you ever tried fixing something only to find the replacement part didn’t fit? Avoid that frustration by measuring twice, cutting once.
Choosing The Right Pipe Material
Pipe materials vary, and choosing the right one affects durability and ease of installation. Common options include PVC, copper, and PEX. PVC is lightweight and cost-effective, copper offers longevity but requires soldering, while PEX is flexible and easy to work with.
Consider your kitchen’s water pressure and temperature needs. If you’re replacing old pipes, matching the material type can save you time and headaches. What kind of pipe material feels right for your skill level and budget?
Cutting Techniques
Use a pipe cutter or a fine-toothed hacksaw for clean cuts. A pipe cutter often provides a smoother edge, reducing the need for sanding. Always cut straight to avoid leaks and ensure a tight fit.
After cutting, deburr the edges with sandpaper or a deburring tool. This step prevents damage to seals and fittings. Have you noticed how a rough edge can ruin a good installation? Taking a moment here pays off in long-term reliability.
Installing New Pipes
Installing new pipes under the kitchen sink requires care and precision. Proper installation ensures no leaks and smooth water flow. Each step must be done correctly to avoid future problems. This section explains how to fit pipes, apply sealants, and secure connections safely.
Fitting Pipes Together
Begin by matching pipe ends with the correct fittings. Pipes must align without force. Use gentle pressure to push pipes into connectors. Check that pipes fit snugly to avoid gaps. Avoid twisting pipes too hard, which can cause cracks.
Applying Sealants
Sealants prevent leaks at pipe joints. Use plumber’s tape or pipe joint compound on threaded connections. Wrap tape clockwise around threads three to four times. Apply pipe joint compound with a brush if needed. Allow the sealant to dry slightly before assembly.
Securing Connections
Tighten all connections using adjustable pliers or a wrench. Do not overtighten, which can damage fittings. Check each joint for firm hold. Use pipe clamps or brackets to hold pipes in place. Secure pipes to prevent movement and reduce stress on joints.

Credit: www.amazon.com
Testing For Leaks
Testing for leaks is a key part of replacing pipes under the kitchen sink. It ensures the new pipes work well and prevent water damage. Small leaks can cause big problems over time. Checking carefully saves time and money later. Follow simple steps to find any leaks after installation.
Turning Water Back On
Start by slowly turning the water supply valve back on. This allows water to flow into the new pipes. Watch closely for any sudden drips or sprays. Turn on both hot and cold water taps to test all lines. Keep a towel nearby to catch small leaks.
Inspecting Joints
Look at each pipe joint carefully. These spots often cause leaks if not sealed properly. Use a flashlight to see tight areas under the sink. Check around washers, connectors, and fittings. Feel with your hand for moisture or wetness. Tighten any loose connections using a wrench.
Troubleshooting Common Issues
Leaks may happen from several common problems:
- Loose fittings that need tightening
- Damaged washers or seals
- Cracked or bent pipes
- Wrong pipe size or type
Fix small leaks by tightening or replacing parts. For major damage, consider consulting a plumber. Testing well now avoids costly repairs later.
Maintenance Tips
Maintaining the pipes under your kitchen sink is crucial to avoid unexpected water damage and costly repairs. Simple habits and regular checks can extend the life of your plumbing and keep your kitchen running smoothly. Here are some practical tips to help you stay ahead of potential problems.
Preventing Future Leaks
Leaks often start small but can lead to big issues if ignored. Avoid placing heavy items or sharp tools directly on pipes, as they can cause cracks or dents over time. Also, be mindful of what goes down the drain—grease and food scraps can clog pipes, increasing pressure and the risk of leaks.
Using a strain filter can help catch debris before it enters the pipes. If you notice any dampness or discoloration under the sink, act quickly to tighten connections or replace worn washers. Have you checked the condition of your pipe joints recently?
Regular Inspections
Make it a habit to look under your sink every few months. Look for signs like moisture, corrosion, or mold, which indicate hidden leaks. Running your hand along pipes can reveal sticky or wet spots you might miss with just your eyes.
Keep a flashlight handy for better visibility in dark cabinets. Taking photos during inspections can help you track changes over time. This small effort can save you from major headaches later on.
When To Call A Professional
Some plumbing issues require expert knowledge and tools. If you detect persistent leaks, strange noises, or foul smells, it’s time to reach out to a plumber. Attempting complicated repairs without experience can worsen the problem and increase costs.
Emergency situations, like water pooling or a sudden burst pipe, call for immediate professional help. Trusting a professional ensures the job is done safely and correctly. How confident are you in handling your kitchen plumbing issues on your own?

Credit: www.youtube.com
Frequently Asked Questions
How Do I Replace Pipes Under My Kitchen Sink?
First, turn off the water supply. Remove old pipes carefully. Measure and cut new pipes to fit. Connect new pipes securely. Turn water back on and check for leaks.
What Tools Are Needed To Replace Kitchen Sink Pipes?
You need a pipe wrench, pliers, a bucket, plumber’s tape, and a hacksaw. These tools help remove and install pipes safely and efficiently.
How Long Does It Take To Replace Kitchen Sink Pipes?
Replacing pipes typically takes 1 to 2 hours. Time depends on pipe type, sink design, and your experience. Proper preparation speeds up the process.
Can I Replace Kitchen Sink Pipes Myself?
Yes, if you have basic plumbing skills and tools. Follow safety steps and instructions carefully. Otherwise, consider hiring a professional plumber to avoid damage.
Conclusion
Replacing pipes under your kitchen sink can save you from leaks and water damage. Use the right tools and materials for a smooth job. Take your time and follow each step carefully. Check for leaks after finishing the work. Regular pipe maintenance keeps your kitchen safe and dry.
Simple repairs can prevent costly problems later. Stay patient and confident—you can handle this project. Clean, sturdy pipes help your kitchen run better every day.

Hi, I’m Daniel Harper, a senior editor here at KitchenBucks.com. For over 10 years, I’ve been exploring kitchen gadgets and appliances to help people find tools that truly add value without breaking the bank. I love simplifying product choices so you can focus more on cooking and less on worrying about what to buy. When I’m not reviewing the latest gadgets, you’ll usually find me experimenting with coffee brewing or firing up the grill for a weekend barbecue.