
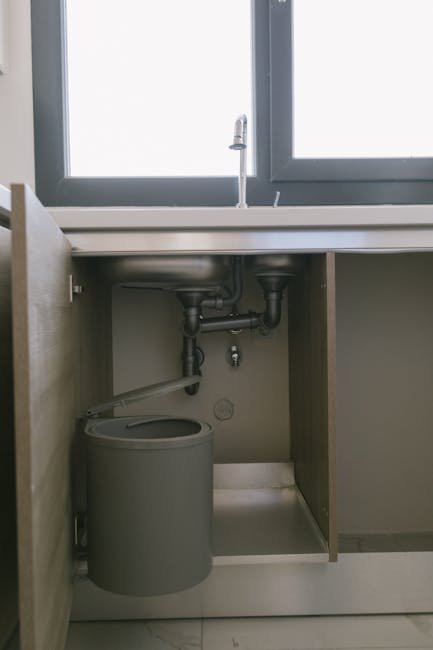
The cramped cabinet beneath your kitchen sink hides a precise network of supply lines, traps, and vents. When a connection weeps or the drain gurgles, knowing the layout turns panic into a 20-minute fix. This expert guide rebuilds the system from first principles, gives you a clear diagram, and walks through maintenance, troubleshooting, and code-smart upgrades. In practice, most homeowners can handle the majority of under-sink issues once they understand what each part does and where it sits.
Anatomy of Under-Sink Plumbing
Every standard kitchen sink pairs two independent systems: a pressurized supply side and a gravity-driven drain side. The supply brings hot and cold water from the municipal line or well to your faucet. The drain carries wastewater out through a trap that blocks sewer gas, then ties into the home’s main stack. For a printable reference, our labeled schematic breaks down each fitting before you reach for a wrench.
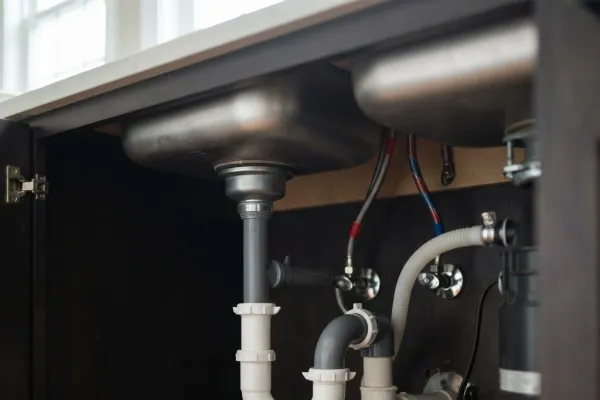 Labeled overview of supply and drain subsystems.
Drain System Components
The drain side starts at the strainer basket inside the basin. That basket sits in a drain flange sealed with plumber’s putty. Below it, a tailpiece drops vertically 6–10 inches to the P-trap. The P-trap’s U-bend holds a water seal roughly 2–4 inches deep—this is the barrier that stops methane and hydrogen sulfide from entering your kitchen. From the trap, a drain arm slopes downward at minimum ¼ inch per foot toward the wall. A tee fitting often joins a second basin or the dishwasher discharge. Finally, the line connects to a vent that rises through the roof, equalizing pressure so water flows freely.
Water Supply System Components
On the supply side, two shut-off valves mounted on the wall or floor control hot (left) and cold (right) feeds. Modern braided stainless steel supply lines run from those valves to the faucet inlets. Older homes may still have chromed copper or rubber tubing; both are ripe for replacement. The faucet body connects via threaded compression fittings, and a properly seated rubber washer prevents slow drips that creep down the cabinet back wall.
Common Pipe Materials
| Material | Typical Use | Practical Notes |
|---|---|---|
| PVC (white) | Drain pipes | Cheap, easy slip-nut assembly, resists rust |
| ABS (black) | Drain pipes | Slightly tougher than PVC, same joint method |
| Copper | Older supply/drain | Durable but solder joints can pinhole with age |
| Braided stainless | Supply lines | Current standard, flexible, burst-resistant |
| Chrome brass | Exposed trap | Decorative, pricier, same function as PVC |
In practice, post-2010 renovations almost universally use PVC drains and braided supplies. If you spot black rubber supply hoses—common in homes built before the mid-2000s—schedule a swap before they split.
How to Read the Under-Sink Diagram
A good diagram is not just pretty art. Trace the cold supply from wall valve to faucet left inlet; trace hot to right. Follow the drain from flange down tailpiece, through the trap curve, then along the arm to the wall. Note the vent stub upward. When you label your own photo with these names, troubleshooting becomes a match-the-leak game rather than guesswork.
Essential Components Demystified
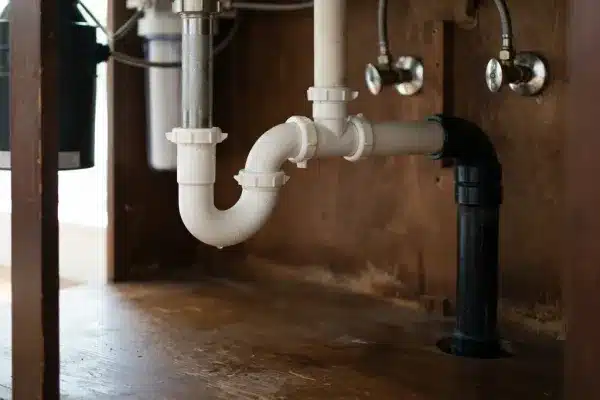 Close-up of trap, valves, and flexible supply hoses.
P-Trap Function and Pitfalls
The P-trap is the workhorse. Its curve catches dropped rings and heavy food particles, and its water seal blocks odors. A common mistake is cranking PVC slip nuts until they crack; hand-tight plus a quarter turn with channel locks is enough. If a sink sits unused for weeks, the seal evaporates—run water 30 seconds to refill. Loose slip nuts from disposal vibration cause slow drips at the trap bottom; tighten gently and replace the washer if deformed.
Shut-Off Valves: Emergency Control
These small valves save floors. Quarter-turn ball valves are superior to multi-turn stems because they fully close in one motion. Before any repair, learn to isolate the line to avoid floods. Exercise valves every few months; seized handles mean the internal washer has failed and the valve needs replacement. A slight weep at the handle indicates a loose packing nut—snug it ¼ turn, but plan a swap if it persists.
Supply Lines: Hidden Risk
Braided stainless lines rated for household pressure still fatigue. Feel them monthly: a bulging jacket or rust specks at the nut signal end-of-life. Electrolysis from mixing steel and copper without a dielectric union causes corrosion at fittings. Replace any line older than 10 years on principle—the small part cost beats a major floor claim.
Garbage Disposal Integration
Disposals mount to a reinforced flange and discharge into the drain before the trap. A dedicated GFCI circuit is required by electrical code. If the unit hums but won’t grind, the impeller is jammed—use the hex key under the housing to free it. Fibrous scraps like celery wrap the plate; run cold water 30 seconds after use. Because the dishwasher drains into the same line, periodic dishwasher filter upkeep avoids backups that mimic sink clogs.
Understanding Venting Under the Kitchen Sink
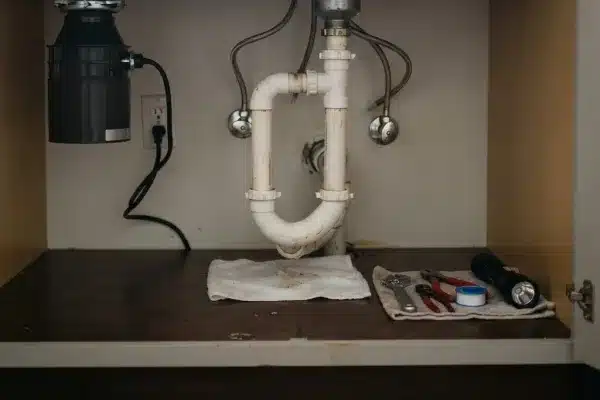 Vent path and air admittance valve positioning illustrated.
Venting is the silent partner. Without it, draining water siphons the P-trap dry and lets gas rise. Signs of vent trouble include gurgling, slow drains despite clear pipes, and bubbles from the basin. In island sinks where roof penetration is impossible, an air admittance valve (AAV) mounted above flood level offers a code-accepted alternative in many jurisdictions. Loop vents achieve similar pressure relief without penetrating the roof. Always verify local amendments before installing mechanical vents. Following EPA recommendations helps keep potable water safe from cross-contamination when modifying vents.
Common Kitchen Sink Plumbing Problems and Solutions
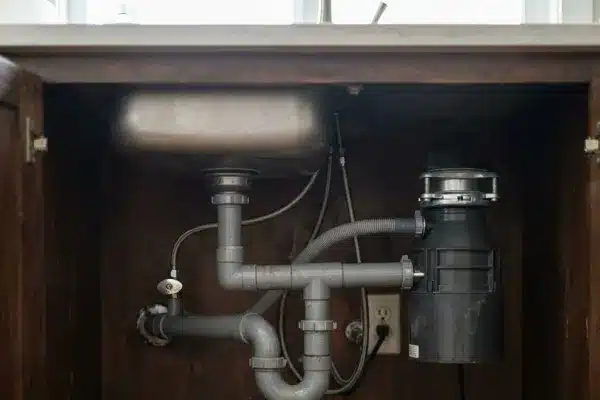 Typical failure points highlighted inside the cabinet.
Leak Detection and Repair
Leaks cluster at slip nuts, valve stems, and flange putty. Dry everything, then place paper towels at each joint and run water two minutes—first wet spot is your culprit. Never silicone a leak; it hides corrosion. When you notice a wet connection, our tutorial on stop the leak shows exact reseating steps. Replace worn washers with matching PVC or rubber, and reapply fresh plumber’s putty under the flange if the cabinet top shows staining.
Clearing Clogs and Slow Drains
Start mild: boil water (not with disposal running), then plunger with overflow blocked. Baking soda plus vinegar dissolves biofilm. If still slow, remove the trap into a bucket—most clogs sit right in the bend. Beyond that, a hand snake breaks main-line obstructions. Skip chemical cleaners; their heat warps PVC and kills gaskets. If a sewer-like scent appears, check our page on musty cabinet odors for cleanup of hidden mold behind the pipes.
Eliminating Unpleasant Odors
Dry trap, biofilm, disposal residue, or cracked waste arm each smell different. Refill unused traps weekly. Scrub the trap with dish soap and a bottle brush quarterly. Grind ice and lemon to clean the disposal chamber. For musty—not sewer—scents, find the slow leak feeding cabinet mold. A hairline crack in the drain arm can vent gas without visible drips; feel for airflow while water runs.
Tools and Safety for Under-Sink Work
A basic kit: flashlight, adjustable wrench, channel locks, bucket, paper towels, Teflon tape, and a sturdy step stool. Wear eye protection when loosening old joints; debris can fly. Any electrical device under the sink—disposal, instant-hot, or recirculator—must plug into GFCI. The National Fire Protection Association publishes the NEC, which mandates GFCI protection near water. Kill power at the breaker if you touch wiring. Close both shut-offs and open the faucet to bleed pressure before loosening supply nuts.
Maintenance for Longevity and Prevention
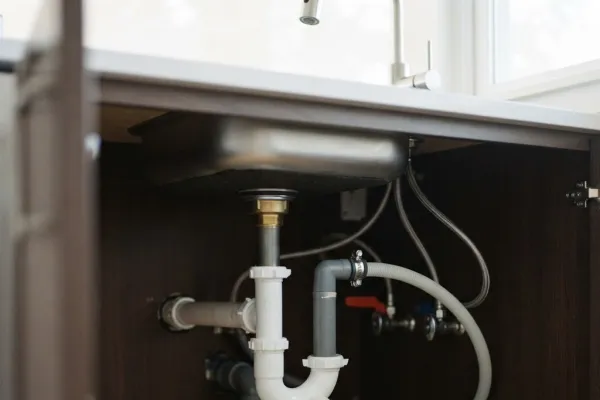 Inspection checklist for pipes, valves, and connections.
Monthly Inspection Routine
Spend 10 minutes: check cabinet floor for warping, slip nuts for moisture, supply braid for rust, valve handles for stiffness, and pipe surfaces for mineral crust. Document with a phone photo so slow changes are obvious.
Seasonal Deep Care
Every three months, exercise shut-offs, flush a gallon of hot water per drain, and tighten loose slip nuts by hand. Annually, swap supply lines past 10 years, pull and inspect the trap for thinning, and check disposal flange rust. Explore our resource center for more kitchen DIY guides that pair with this checklist.
Upgrading Outdated Components
If your home predates modern codes, convert rubber supplies to braided stainless, multi-turn valves to quarter-turn ball types, and steel drains to PVC. Add an AAV where venting is missing. These upgrades pay back in avoided emergency calls.
When to Call a Licensed Plumber
DIY ends where hidden rot, main-stack blockage, or permit-required vent changes begin. If you remove a trap and find corroded cast-iron behind the wall, or if multiple fixtures back up together, that’s a whole-house issue. Honest trade-off: a diagnostic visit beats tearing out a cabinet you mis-repaired. Use your inspection logs to show the pro exactly when the leak started.
Frequently Asked Questions
What is the purpose of the U-shaped pipe under the sink?
That is the P-trap. It holds a small amount of standing water that creates an airtight seal, preventing sewer gases from entering your kitchen. Without it, every drain in your house would release methane and other harmful gases through your sink.
How do I know which shut-off valve is hot and which is cold?
By standard convention, hot water is on the left and cold is on the right. Many valves also use color coding (red for hot, blue for cold), but this is not universal. If you are unsure, run the faucet on hot for 30 seconds and feel which supply line warms up.
Why does my sink gurgle when the washing machine drains?
This indicates a shared vent or drain line issue. The washing machine pushes a large volume of water rapidly, which can overwhelm a shared drain and create a vacuum that siphons your sink's P-trap. If the gurgling is new, your vent may be partially blocked, or the main drain may be slowing.
Can I use chemical drain cleaners in a kitchen sink?
For occasional use, they work. For regular clog prevention, they cause more harm than good. The heat generated by chemical reactions can soften PVC joints, and the caustic residue damages rubber gaskets. Mechanical cleaning is safer for your pipes and more effective for most clogs.
Should I replace my supply lines even if they look fine?
Yes, if they are more than 10 years old. Braided stainless lines have a finite lifespan due to vibration fatigue and oxidation of the inner tube. Replacing them on a schedule is cheap insurance compared to the cost of a burst line while you are away from home.
Conclusion
Understanding the plumbing under your kitchen sink turns a dark cabinet into a manageable system. With the diagram in hand, monthly checks, and timely upgrades, you prevent most disasters. Start a 10-minute inspection this weekend—that small habit is the most effective insurance against unexpected water damage. Keep the labeled schematic saved on your phone so the next drip is a quick fix, not a crisis.
