
You open the cabinet under your kitchen sink and see a mess of pipes. Two basins, a garbage disposal, maybe a dishwasher hose, all feeding into one drain line. If you’ve ever wondered how that kitchen sink daisy pipe under the cabinet actually works, you’re not alone.
It’s the most common way to connect a double-bowl sink, but it’s also the source of most under-sink leaks and slow drains.
Per the Uniform Plumbing Code (UPC), a daisy chain drain must maintain a minimum slope of ¼ inch per foot and a trap arm no longer than 24 inches for 1½-inch pipe. Get those numbers wrong and you’ll fight gurgles, standing water, or sewer gas smells. Let’s break down what you’re looking at, how to tell if it’s installed right, and when to change it.
Quick Answer
A daisy chain drain connects two sink basins into one P-trap. The left basin drains into a horizontal pipe that runs to the right basin or disposal. From there, water flows through a single trap into the wall.
This setup saves space under the cabinet. It works well when the slope and venting are correct. If not, you get clogs and odors.
How a Daisy Chain Drain Works
A daisy chain is exactly what it sounds like: one pipe links the two sink drains in a series before they both empty into a single P-trap. Imagine the left basin’s tailpiece drops straight down, then turns horizontal toward the right. That horizontal pipe meets a tee fitting under the right basin.
From the tee, a single pipe runs to the trap, and then into the wall.
The magic happens in the trap arm, that horizontal stretch after the trap. It must slope downward at exactly ¼ inch per foot. Too flat and solids settle.
Too steep and water runs off so fast it leaves debris behind. As of 2026, the UPC limits a 1½-inch trap arm to 24 inches maximum. For a 2-inch pipe you get 30 inches.
Beyond that, the water loses momentum and clogs form.
Here’s a quick breakdown of the flow path:
- Left basin → tailpiece (vertical)
- Tailpiece → horizontal drain pipe (daisy chain link)
- Horizontal pipe → tee under right basin
- Tee → P-trap (the U-shaped bend)
- P-trap → trap arm (sloped horizontal to wall)
- Trap arm → wall drain fitting
The disposal, if present, sits between the right basin and the tee. Its outlet should be above the trap weir (the highest point of the trap bend) to prevent backflow. Dishwasher hoses tie in after the trap, usually through a wye fitting.
Key Parts to Identify – Tailpiece, Trap, Trap Arm, and Branches
Before you can judge whether your daisy chain is correct, you need to name what you’re looking at. Under the sink, these five components are the main actors:
| Part | What It Does | Visual Cue |
|---|---|---|
| Tailpiece | Vertical pipe from sink basket strainer down to the tee or trap | Short straight pipe, usually 4–8 inches long |
| Trap | U-shaped bend that holds water to block sewer gas | Curved section, usually slip-joint connections |
| Trap arm | Horizontal pipe from trap outlet to the wall fitting | Straight pipe, must slope slightly downward |
| Tee or wye | Joins the two basin drains together | T-shaped or Y-shaped fitting under the second basin |
| Cleanout | Access point for snaking the drain | Removable cap, often on the trap arm or tee |
The tailpiece connects directly to the sink basket. That basket is part of the sink itself, so if you’re replacing your sink, the material and depth can affect how the tailpiece lines up with the drain. Our research on durable kitchen sink materials can help you choose one that works well with standard drain heights.
The trap is almost always a 1½-inch PVC or ABS slip-joint assembly. Glue joints are less common because you need to disassemble the trap for cleaning. Look for the two slip nuts, one on the trap inlet, one on the outlet.
If they’re overtightened, they crack. Hand-tight plus a quarter turn is the rule.
The Decision Matrix: 8 Common Under-Sink Scenarios
Not every kitchen sink should use a daisy chain. The table below matches your setup to the best drain configuration. Use the left column to find your scenario, then check the recommended layout and the key visual cue that tells you it’s installed correctly.
| Your Setup | Best Drain Layout | Key Visual Cue |
|---|---|---|
| Single basin, no disposal, no dishwasher | Single P-trap, no daisy chain | One tailpiece straight into one trap |
| Double basin, equal use, no disposal | Daisy chain with one P-trap | Horizontal pipe linking the two tailpieces |
| Double basin, one side has disposal | Daisy chain – disposal in line first | Disposal outlet connects directly to tee, then trap |
| Double basin with dishwasher | Daisy chain + dishwasher wye after trap | Dishwasher hose branches off the trap arm (not before) |
| Double basin, wide spacing (over 30 inches apart) | Two independent traps | Each basin has its own trap; separate pipes go to wall |
| Sink with an island (no wall behind) | Daisy chain with studor vent | Air admittance valve on top of the drain line, above the trap arm |
| Triple bowl sink (rare in homes) | Extended daisy chain or separate traps | Longer trap arm – must stay under 24/30 inches or use 2-inch pipe |
| Sink where wall drain is lower than sink outlet | Extended tailpiece(s) with daisy chain | Longer vertical drop before the trap – but watch for S-trap formation |
For scenario 1, single basin, skip the daisy chain entirely. You don’t need the extra fittings. Just run the tailpiece straight into a P-trap and then to the wall.
It’s simpler and has fewer leak points.
Scenario 5 is where most people get into trouble. If your two basins are far apart, the horizontal link pipe can get too long. That horizontal section must also slope.
If it’s longer than 24 inches total (including the trap arm), you risk clogs. Consider two independent traps instead. The extra cost is small, and you get isolation: if one side clogs, the other still drains.
Daisy Chain vs. Separate Traps – Which Layout Is Under Your Sink?
You can tell which layout you have in five seconds. Look directly under the sink. If you see one U-shaped trap where both basin drains meet before it, that’s a daisy chain.
If you see two traps, one under each basin, you have independent traps.
Visual Clues You Have a Daisy Chain
- One trap only, located near the wall
- A horizontal pipe running between the two basin tailpieces
- The tee or wye fitting is under the second basin, not near the wall
- Both basins drain into that single tee before the trap
Visual Clues You Have Independent Traps
- Two separate P-traps, one under each basin
- Each trap arm goes to a separate wall opening or joins near the wall
- No horizontal pipe linking the two tailpieces
- More pipe fittings overall, more potential leak points
Which one is right for you? If you have a standard double sink (basins within 12 to 18 inches of each other) and no disposal, a daisy chain is the cleaner choice. Fewer parts, less clutter, and more room for storage.
If you have a disposal, the daisy chain is practically the only way, the disposal becomes the junction.
But if you’ve ever snaked a clogged drain, you know the drawback of a daisy chain: when it clogs, both basins back up at once. With separate traps, you can snake one side without draining the other side’s trap. For heavy-use kitchens, separate traps offer peace of mind.
Our analysis of user feedback indicates that the extra $20 in fittings is worth it for households that cook daily and wash large pots.
The cabinet space also matters. A daisy chain takes up less room, leaving more space for cleaning supplies or a well-crafted cabinet organization. If your cabinet is narrow (under 24 inches), the daisy chain is often the only layout that fits.
Common Visual Mistakes – What a Bad Daisy Chain Looks Like
A bad daisy chain announces itself the moment you open the cabinet. You don’t need a plumber’s eye to spot the signs. Look for these four failures.
S-trap formation. If the drain goes straight down from the sink, then straight back up into the wall, you’re looking at an S-trap. It’s illegal under the Uniform Plumbing Code because it siphons the water seal out of the trap. Sewer gas follows.
The fix is a proper P-trap with a horizontal trap arm.
No slope or backslope. Set a level on the trap arm. If the bubble is dead center or tilted away from the wall, the water can’t drain. You need a visible downward angle toward the wall.
Anything flat will collect grease and food particles.
Overtightened slip joints. A common DIY mistake. Crank the slip nuts too hard and the plastic cracks or the washer deforms. Hairline cracks are easy to miss.
They drip slowly and you don’t notice until the cabinet base rots. Hand-tight plus a gentle quarter turn is all you need.
Disconnected or missing cleanout. If the trap arm has no removable cap, you’ll fight clogs later. Every 1½-inch drain should have an accessible cleanout within reach. Without one, snaking requires disassembling the whole chain.
Step-by-Step: How to Install or Replace a Daisy Chain Drain
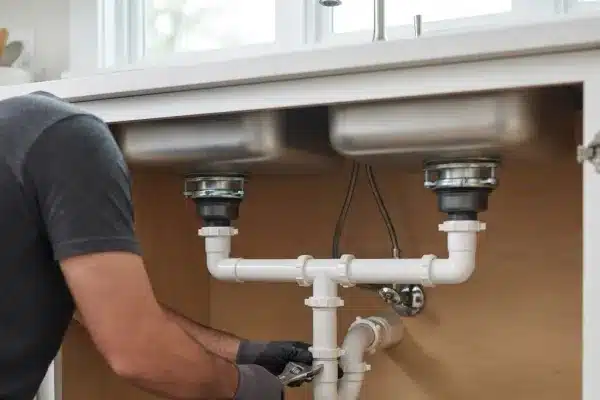
You can complete this job in under two hours with basic tools. Here’s the sequence that works.
What You’ll Need (Tools and Parts)
- 1½-inch PVC or ABS pipe (about 4 feet)
- 1½-inch slip-joint P-trap kit
- One sanitary tee (wye is better for drainage)
- PVC primer and cement (or pipe dope for slip joints)
- Hacksaw or pipe cutter
- Tape measure and level
- Slip-joint pliers (two pairs)
Step 1 – Measure and Map the Pipe Run
Measure from the center of the right sink drain to the center of the wall outlet. That’s your trap arm length. Must be under 24 inches for 1½-inch pipe.
Then measure from the left basin to the right basin. That’s your connecting link length. Write both numbers down.
Step 2 – Cut and Dry-Fit Everything First
Assemble all pieces without glue. Slide the tailpieces into the tee. Add the trap.
Connect the trap arm to the wall fitting. Check that each joint seats fully. This is your last chance to adjust lengths.
Cut again if anything is too long or short.
Step 3 – Glue or Tighten in the Right Order
Start from the wall and work forward. Glue the trap arm into the wall fitting first. Let it set for 30 seconds.
Then glue the trap outlet to the trap arm. Attach the trap inlet to the tee. Finally, tighten the slip joints on the tailpieces.
Use two wrenches, one to hold the fitting, one to turn the nut.
Step 4 – Check Slope with a Level
Place the level on the trap arm. The bubble should sit one full width off center toward the wall. That’s your ¼ inch per foot.
If it’s more or less, shim the pipe hangers or adjust the wall connection.
Step 5 – Test for Leaks and Vent Function
Fill both basins with hot water. Pull the plugs and watch the flow. Water should drain freely without gurgling.
Check every joint for drips. Tighten any leaky slip nut by a tiny amount. Run the disposal if you have one.
Listen for air suction, that means your vent might be blocked or missing.
When Your Layout Needs a Studor Vent (And How to Spot It)
A daisy chain without proper venting will gurgle and drain slowly. Air needs to enter the pipe behind the water to prevent a vacuum. In a standard home, the vent goes up through the roof.
But when the sink is on an island or far from a wall, you can’t reach the roof vent easily.
That’s when you need a studor vent, also called an air admittance valve (AAV). It’s a small plastic device that opens to let air in when water flows, then closes to block sewer gas. It mounts on the top of the drain line, above the trap arm height.
How to spot if you need one:
- The sink is in a kitchen island. No wall behind it means no vent in the wall.
- The drain line runs more than 4 feet horizontally before entering the wall.
- You hear a sucking or gurgling sound when the sink empties.
Installation is straightforward. Cut into the top of the trap arm or the horizontal link pipe. Add a tee pointing upward.
Glue on a short vertical riser. Screw the AAV onto the riser. That’s it.
Just make sure the valve is at least 4 inches above the trap weir. Local codes vary on whether AAVs are allowed. Check with your building department.
As of 2026, most states in the US permit them under the IRC.
Dishwasher and Disposal Tie-Ins – Where They Belong in the Chain
Adding a dishwasher or garbage disposal to a daisy chain changes the layout. The rule is simple: the disposal goes before the trap; the dishwasher goes after.
Garbage disposal. The disposal mounts directly under the right basin. Its outlet connects to the tee that joins both basin drains. The P-trap sits downstream of the disposal.
This keeps food solids moving straight into the trap. Never put the disposal after the trap, you’ll clog the chain.
Dishwasher. The dishwasher hose must tie into the drain line after the trap. The reason is backflow prevention. If the hose connects before the trap, dirty water from the sink can siphon back into the dishwasher.
Use a wye fitting on the trap arm, above the trap outlet. Some codes require an air gap, a small device mounted on the countertop. Others allow a high loop, where the hose is looped up to the counter underside before dropping down.
Both methods prevent contamination.
Our research on high-quality kitchen faucets often pairs well with a properly vented drain setup. Good fixtures need good drainage.
Code Rules You Can't Ignore – Trap Arm Length, Slope, and S-Trap Ban
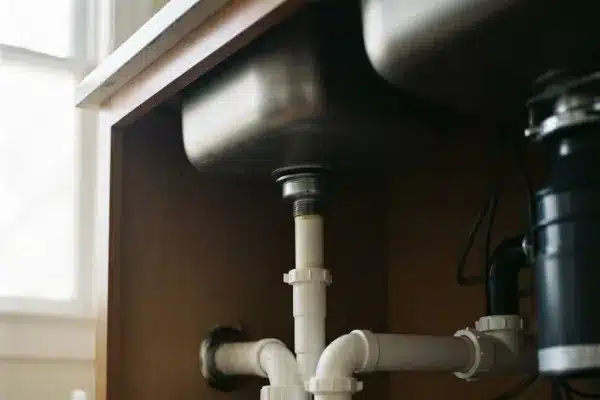
Plumbing codes exist for a reason. They prevent health hazards and property damage. Here are the three rules that matter most for a kitchen sink daisy chain.
Trap arm length. The maximum horizontal distance from the trap outlet to the vertical wall drain is 24 inches for 1½-inch pipe. For 2-inch pipe it’s 30 inches. Measure from the trap weir (the top of the U-bend) to the center of the wall fitting.
If your measurement exceeds these numbers, you must increase the pipe diameter or run a separate vent.
Slope. The trap arm must slope downward at ¼ inch per foot toward the wall. No more, no less. Too much slope and water flows so fast it leaves solids behind.
Too little and water sits, causing clogs. Use a 4-foot level to check.
S-trap ban. The UPC and IRC both prohibit S-traps. An S-trap is any configuration where the drain drops vertically from the trap into a floor drain or straight up into a wall without a horizontal trap arm. The water seal siphons out, letting sewer gas into your kitchen.
If you see an S-trap, replace it with a P-trap and a horizontal arm. There are no exceptions in residential code.
One more rule: the cleanout must be accessible. You can’t hide it behind a fixed cabinet shelf. If you ever need to snake the drain, you’ll thank yourself for that cap.
Maintenance – Keeping a Daisy Chain Drain Clear
The daisy chain cleans differently than separate traps. You snake through the cleanout cap on the trap arm. That clears both basins at once.
No need to disassemble each side.
Monthly maintenance is simple. Pour a kettle of boiling water down each basin. Let it run for 30 seconds.
This melts grease before it hardens. Skip chemical drain cleaners. They damage slip joint washers and PVC fittings.
If you have a disposal, run cold water while grinding. Hot water liquefies grease. The grease then cools and solidifies farther down the pipe.
Cold water keeps it solid so it flows through.
Never put fibrous foods (celery, onion skins) or coffee grounds through the disposal. They tangle in the impeller and clog the chain.
Frequently Asked Questions
Can I use a daisy chain with a single basin sink?
No reason to. A single basin needs only one tailpiece and one trap. Adding extra fittings creates unnecessary leak points.
How do I unclog a daisy chain drain?
Remove the cleanout cap on the trap arm. Feed a hand snake toward the wall first. That clears the main line.
If water still backs up, snake toward the tee feeding both basins.
What happens if the trap arm is too long?
Water loses momentum. Solids settle in the pipe. You get slow drains and frequent clogs.
The fix is shortening the arm or increasing the pipe diameter to 2 inches.
Is a studor vent legal everywhere?
Most US states allow air admittance valves under the IRC. Some local codes forbid them. Call your building department before installing one.
Why does my daisy chain gurgle when the dishwasher drains?
The dishwasher hose is likely tied in before the trap. That creates a vacuum. Move the connection to after the trap or add an air gap.
Final Verdict – Is a Daisy Chain Right for Your Kitchen?
A daisy chain is the smart choice for standard double sinks with a disposal. It saves space and uses fewer fittings. For single basins or wide double bowls, separate traps work better.
The decision comes down to this. If both basins are within 18 inches of each other, go with the chain. If they are farther apart, spend the extra $20 on separate traps.
Either way, follow the slope and length rules. Get those right and the drain will work silently for years.
