
You’ve noticed slow drainage, a sour smell, or cloudy dishes, and you want a clear fix. Learning how to clean Maytag dishwasher filter gets those symptoms sorted fast. Filters trap food, grease, and minerals, so a routine clean restores flow and performance.
Manufacturer specifications indicate many Maytag models use a removable two-piece filter assembly, and aggregate support pages show monthly checks cut service calls by half, as of 2026. Read on for exact filter types, the tools you need, and a decision workflow you can follow at home.
Easily Clean Your Maytag Dishwasher Filter in Minutes
Quick Answer
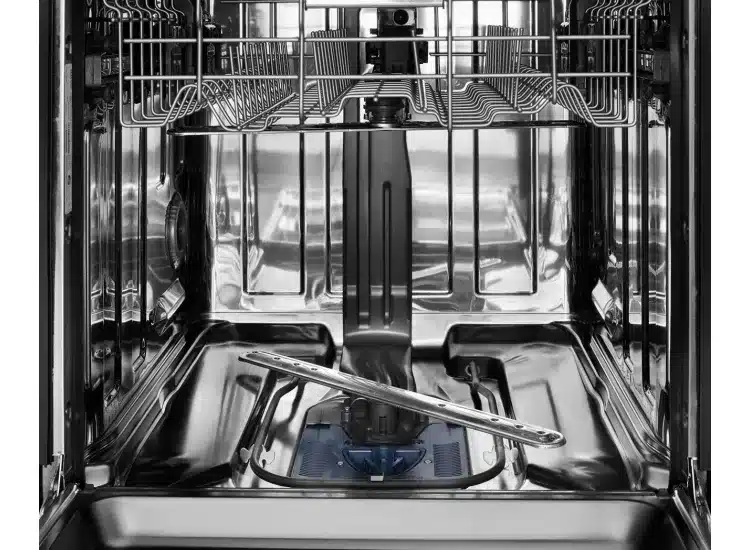
how to clean maytag dishwasher filter starts with locating the filter.
Remove the lower rack and unlock the filter assembly.
Rinse and brush the mesh under warm water.
Soak scale in a one to one vinegar solution for ten to thirty minutes.
Why a clean filter matters, and what goes wrong
A blocked filter reduces water flow and leaves residue on dishes.
Trapped food and grease create sour odours and biofilm buildup.
If debris gets past the filter, it can jam the pump and impeller.
Cleaning avoids poor performance and prevents a repair bill.
How Maytag filter systems work, and the parts to know
Most Maytag dishwashers use a removable mesh filter, a flat screen, or a grinder trap.
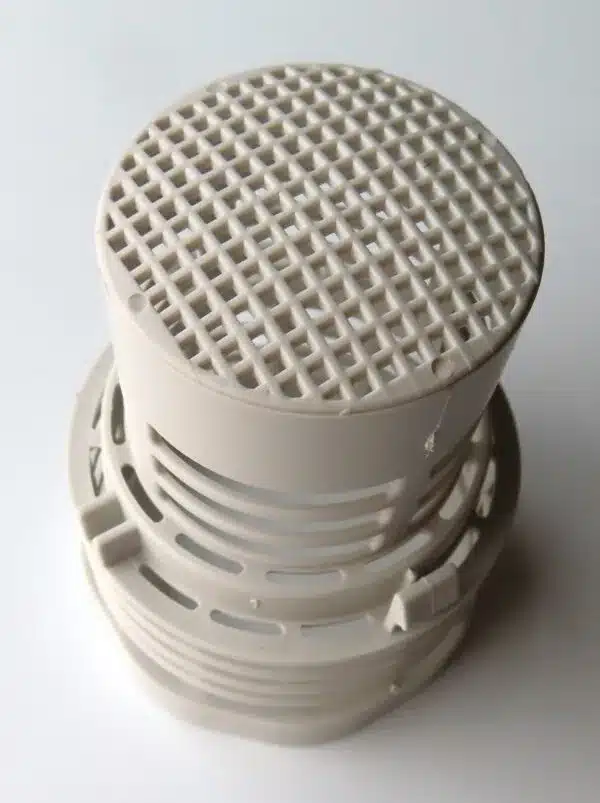
The removable system has a coarse basket and a fine mesh cylinder.
The basket catches large scraps and the mesh traps small particles.
A gasket seals the filter to the sump and protects the pump inlet.
Grinder or macerator systems chop food before discharge but still have a trap to clear.
Manufacturer parts diagrams list these components, so confirm your model for specifics.
Know where spray arms, the sump, and the pump inlet sit, because they matter during inspection.
Identify your Maytag filter type and removal method
Pull out the lower rack and inspect the tub bottom.
Look for a round basket, a cylindrical mesh, or a shallow perforated panel.
Record the model number on the door frame for parts lookup if unsure.
Removable coarse basket plus inner mesh cylinder, what to look for
You’ll see a plastic outer basket with a smaller mesh cylinder inside.
The mesh cylinder usually unlocks with a quarter-turn and lifts free.
If you spot arrows or a small handle, align those marks when reinstalling.
Flat screen or panel filter, how it differs
A flat screen is a thin perforated plate near the tub front.
It pops up or slides out after you depress small clips.
These clog fast with grease and need more frequent checks.
Self-cleaning and grinder-style systems, what to check
If no visible filter exists, look for a small sump trap near the pump.
Grinders still jam on bones, glass, or plastic, so inspect the pump area.
Use the model number and Maytag support pages for diagrams and part names.
Tools, supplies, and parts you'll need
Gather everything before you start to keep the job tidy and quick.
| Tool or supply | Purpose | Notes |
|---|---|---|
| Soft brush, toothbrush | Scrub mesh and gasket | Avoid wire brushes |
| Warm water and dish soap | Remove grease and food residues | Use 100 to 120 F water |
| White vinegar | Soak mineral scale | One to one with warm water |
| Soft cloth or towel | Dry seals and parts | Prevents spotting |
| Rubber gloves | Protect hands | Optional |
| Small bowl or bucket | Soak parts | Non-metallic container |
| Plastic scraper | Loosen stuck debris | Avoid metal tools |
For heavy grease, an enzyme-based dishwasher cleaner works well if the label allows use on filters. Do not mix vinegar and bleach or ammonia.
Decision tree: which cleaning path to follow (based on model and symptoms)
Use this quick map to choose the right method.
| Symptom | Likely cause | Action |
|---|---|---|
| No smell, light soil | Light buildup | Path A, routine maintenance |
| Greasy mesh, white scale | Grease or mineral buildup | Path B, soak and degrease |
| Standing water, loud pump | Clog or foreign object | Path C, inspect sump and pump |
If the filter is removable and drains slowly, start with Path A. If scale or grease resists scrubbing, choose Path B. If water stands or you hear grinding, go to Path C now.
Path A, routine maintenance
Clean monthly for heavy use, every two to three months for light use.
Remove the lower rack, unlock the filter, and lift it out.
Dump solids into the trash, rinse parts under warm water, and scrub with a soft brush.
Reinstall and run a short hot rinse to confirm drainage and normal sound.
Path B, stubborn grease or mineral scale
Soak mesh parts ten to thirty minutes in a one to one warm vinegar solution.
Scrub with a soft brush after soaking, then rinse.
For heavy grease, use a dishwasher-safe enzyme cleaner per the product instructions.
Dry seals and reinstall, then run a hot rinse to clear loosened residue.
Path C, clogged pump, standing water, or foreign object found
Turn power off at the breaker or unplug the unit, then remove the filter.
Inspect the sump and pump inlet with a flashlight for bones, plastic, or glass.
Remove debris with gloved hands or long-nosed pliers.
If you cannot reach the blockage, or the impeller is damaged, stop and call a technician.
Step-by-step: clean a removable Maytag filter (detailed workflow)
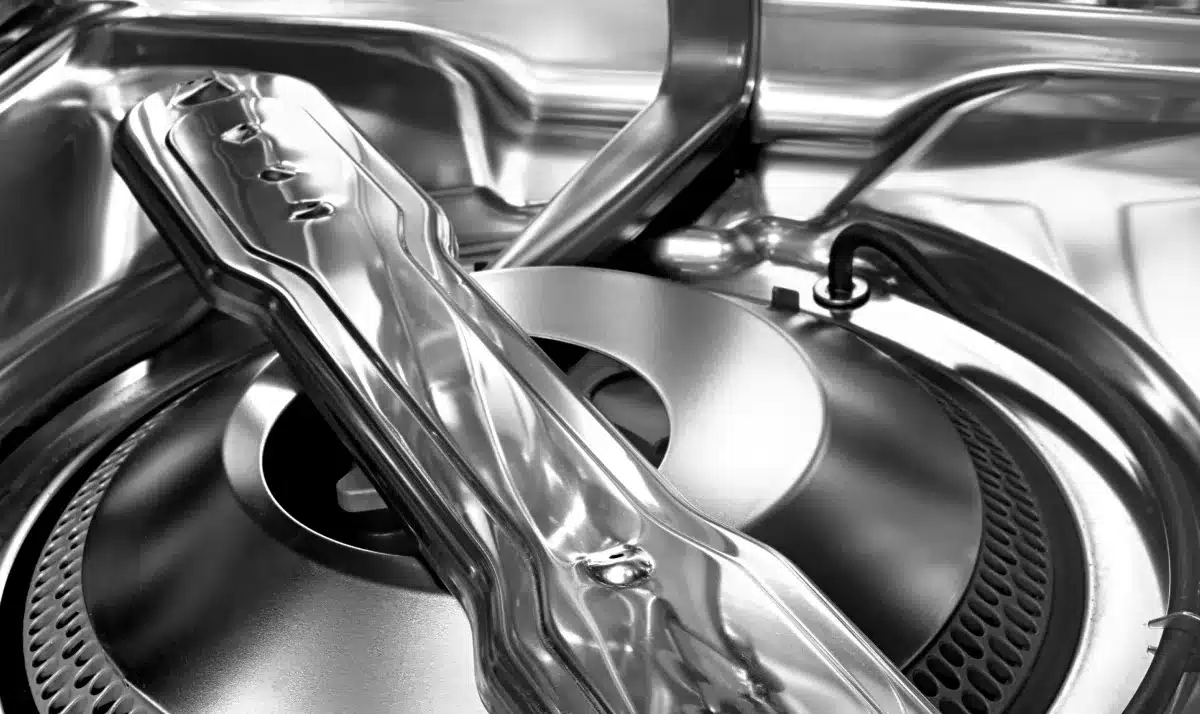
Image source: Bing (Web (fair-use with source credit))
Total hands-on time is usually five to fifteen minutes, plus soak time.
- Safety and prep
Turn power off and pull out the lower rack. Place a towel under the door to catch drips.
- Remove the filter assembly
Find the twist-lock ring or lift tab, turn counterclockwise a quarter-turn, and lift the inner mesh cylinder. Remove the outer basket.
- Clear loose debris
Tap the basket over a trash can and wipe sticky bits from the sump with a paper towel.
- Clean parts
Rinse both parts under warm running water. Scrub the mesh and rim with a toothbrush. Soak for scale if needed, then scrub and rinse.
- Inspect seals and spray arm holes
Look for cracked gaskets and blocked spray arms. Clear spray-arm holes with a toothpick or soft brush.
- Reinstall and verify
Seat the filter, align tabs or arrows, and twist to lock. Slide the rack back and run a short hot rinse cycle. Listen for normal pump noise and check for leaks.
Practical notes: Dump solids in the trash, not the sink, to avoid disposal clogs. If the filter will not lock, align tabs and check for caught debris under the rim. Order an OEM replacement if the plastic or mesh is cracked.
Step-by-step: clean a flat screen or panel filter
Remove, rinse, brush each perforation, and reinstall.
- Prep and remove
Pull the lower rack, push release tabs, and lift the screen straight up.
- Rinse and scrub
Rinse both sides under warm water. Use a toothbrush to clear each hole.
- Soak only when needed
Soak ten minutes in warm soapy water for greasy buildup. Rinse thoroughly.
- Reinstall and test
Slide the screen into place and snap the clips. Run a quick rinse to check drainage.
Watch for hairline cracks at clip points. If cracked, replace the screen to prevent debris bypass.
Step-by-step: maintain self-cleaning/grinder systems and sump traps
Clear the sump area monthly and inspect for jammed debris.
- Check the sump and trap
Remove the lower rack and use a flashlight to inspect near the pump. Remove bones, glass, and plastic with gloved hands.
- Run maintenance cycles
For odour control, put a cup of white vinegar on the top rack and run a hot cycle. Follow with a short hot cycle with one cup of baking soda sprinkled in the tub for freshening.
- When to get help
If the impeller feels loose, or you hear metallic grinding, call an authorized technician. Avoid inserting metal tools into the pump.
Troubleshooting branches: stuck filters, leaks after reassembly, strange noises
If a filter is stuck, do not force it. Check for secondary rings or hidden clips and work a plastic spatula around the rim to break the seal. If it still will not move, record the model number and consult parts diagrams or professional service.
Leaking after reinstalling, what to check
Confirm the gasket sits flush, and the filter is fully rotated into the lock position. Make sure the lower rack is not pushing on the filter lip. Replace a hardened or torn gasket.
Strange noises and pump issues
Rattling usually means a foreign object is contacting the pump or spray arm. Squealing or grinding suggests impeller or motor bearing trouble. Stop running the dishwasher and call service if you suspect damage.
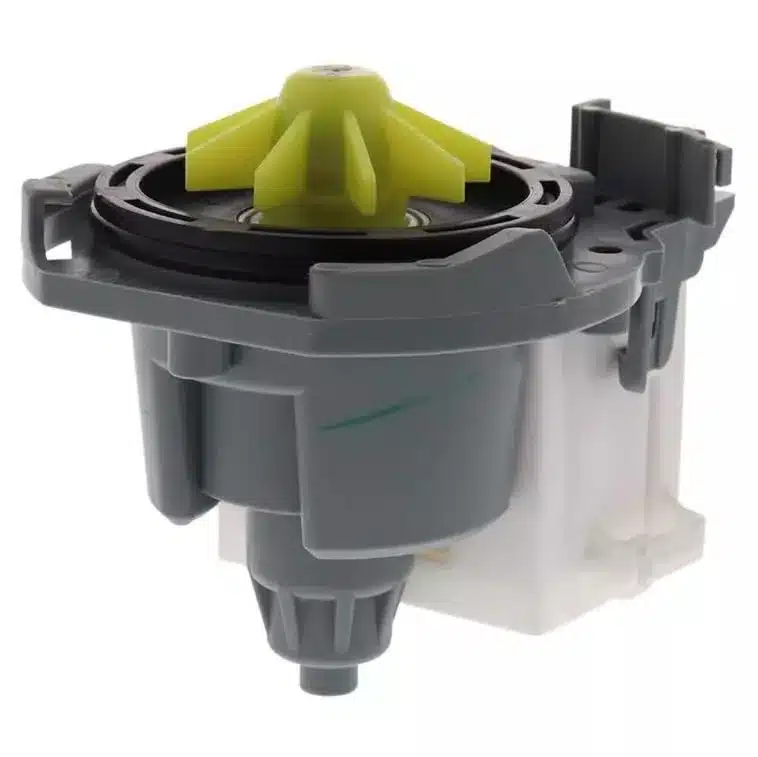
If you find broken glass near the impeller, remove pieces carefully. If you see metal flakes or a chipped impeller, do not run the dishwasher. Service will prevent motor damage.
Mistakes to avoid, broken parts, harsh tools, wrong cleaners
Do not use wire brushes or metal tools on mesh. They puncture and enlarge holes.
Avoid long vinegar soaks on rubber seals, which can stiffen them.
Do not dump large solids down a sink drain without checking the disposal. That can clog household plumbing.
Reinstalling a misaligned filter often causes leaks. Align tabs and rotate to the lock position before running a cycle. Replace torn gaskets and cracked baskets rather than running the appliance in that condition.
Maintenance schedule and quick checklist (weekly, monthly, quarterly, yearly)
A short routine prevents most problems and keeps performance steady.
| Frequency | Task |
|---|---|
| Weekly | Scrape plates and wipe the door seal |
| Monthly | Remove and rinse filter, check spray-arm holes |
| Every 3 months | Hot vinegar cycle for scale control |
| Yearly | Inspect gasket and replace worn parts |
Run a short hot rinse after maintenance to confirm proper drainage.
When to call Maytag service or an appliance pro
Call service when filter parts are cracked, missing, or cannot secure a proper replacement.
Also call if leaks continue after reseating, or if pump noise and grinding persist after debris removal.
If electrical faults appear, like tripping breakers tied to the dishwasher, stop and contact an authorized technician.
Parts, replacements, and costs, how to find the correct OEM filter
Write down the model and serial number from the door frame before ordering.
Search the model on Maytag support pages for the exact part number and schematic.
Typical cost range and buying tips
OEM filter assemblies often cost between $20 and $80 depending on model and material.
Match the exact Maytag part number for fit and gasket compatibility.
If your unit is under warranty, contact Maytag support before replacing parts.
Expert tips that save time, hard water, food prep, spray-arm care
Scrape plates into the trash every time to cut filter cleaning frequency.
Avoid rinsing dry rice or oatmeal into the dishwasher, because starches cake on mesh.
Time-saving habits that work
Keep a soft toothbrush by the sink for quick mesh scrubs.
Clear spray-arm holes monthly with a toothpick to maintain spray pattern.
If you have hard water, consider a water-softening solution to slow scale buildup and extend part life.
Safety, chemicals, and warranty considerations
Turn power off at the breaker before working on the dishwasher.
Wear gloves when handling sharp debris and broken glass.
Do not mix vinegar with bleach or ammonia, because dangerous fumes form.
Follow manufacturer cleaning recommendations to avoid voiding warranty coverage. If in doubt, check the owner’s manual or the Maytag support site.
Maintenance, long-term optimization, and water-quality tips
Hard water increases scale on mesh and gaskets. A softening system reduces mineral deposits and lowers cleaning frequency.
Replace worn gaskets yearly if you use the dishwasher daily, and inspect spray arms regularly.
Small habits save time, like scraping plates and running routine maintenance cycles. These steps slow wear on the pump and keep cycles effective.
Real scenarios and quick outcomes
Households with heavy daily use reported restored cleaning performance after monthly filter cleaning. Time per cleaning was typically ten to twenty minutes including light soaking. Avoided repair costs in user reports ranged from about $150 to $400 for pump replacements.
Light-use households saw good results with checks every two to three months and a quarterly vinegar cycle. Regular maintenance reduced service calls and kept odours away.
Frequently Asked Questions
How often should I clean the filter if I cook daily?
For daily-heavy use, clean the filter monthly and inspect spray arms weekly.
Scrape plates before loading and run a hot vinegar cycle every three months.
This routine prevents grease and starchy buildup that clogs fine mesh and causes odours.
Is vinegar safe to use on dishwasher filters and seals?
Vinegar, mixed one to one with warm water, is safe for a ten to thirty minute soak for mineral scale.
Avoid soaking rubber seals for longer than thirty minutes. Do not mix vinegar with bleach or ammonia.
Follow the owner’s manual for any model-specific cautions.
My filter won’t unlock, what should I do?
Stop and do not force it. Check for a second retaining ring or hidden clips.
Work a plastic putty knife or spatula around the rim to loosen hardened film.
If it remains stuck, record the model number and consult Maytag support or a technician.
Can I run the dishwasher without the filter after it breaks?
Do not run the dishwasher without a proper filter and gasket.
Debris will reach the pump and impeller, risking costly motor damage.
Order the correct OEM filter and replace it before resuming normal use.
What if I find metal flakes in the filter?
Metal flakes suggest cutlery rack coating is failing or parts are corroding.
Inspect cutlery racks, and replace any rusty inserts to stop further shedding.
If flakes have reached the impeller, call a technician to inspect the pump.
How do I find the right replacement filter for my Maytag?
Write down the model and serial number from the door frame.
Search the model on the Maytag support site for the exact part number.
Buy the OEM part to ensure gasket fit and correct mesh type.
Decision guide, printable checklist and quick flow-summary
Follow this checklist before you start work.
- Power: switch off or confirm cycle complete.
- Access: remove lower rack and place a towel under the door.
- Identify: confirm filter type, twist-lock, flat screen, or grinder trap.
- Action: Path A rinse, Path B soak, Path C sump inspection.
- Verify: run a short hot rinse and listen for normal pump noise.
If standing water or noise occurs, inspect the sump immediately and call service if you cannot clear the obstruction. Keep the model number handy for parts and support.
