
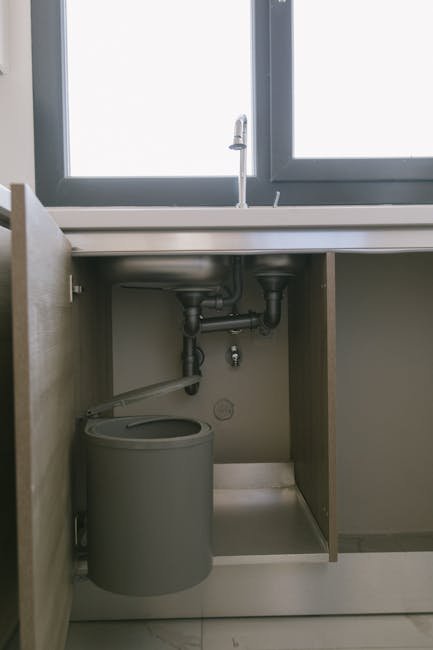
Peering under a kitchen sink with a dishwasher can feel like decoding a maze of pipes, hoses, and valves. But the system follows a repeatable pattern — once you recognize each component and how it connects, you can handle leaks, installations, and routine maintenance with confidence. This guide breaks every element down into clear, actionable parts. You’ll learn exactly what each piece does, how the whole drainage and supply system works together, and what to watch for to prevent problems before they start. Whether you’re a weekend DIYer or just want to understand what your plumber is explaining, this walkthrough gives you the practical knowledge to keep everything running smoothly.
Understanding the Complete Layout
The plumbing under a kitchen sink serves two main jobs: delivering fresh water (supply) and carrying away used water (drainage). Adding a dishwasher introduces a dedicated hot water feed and a separate drain path. The diagram below shows the typical arrangement.
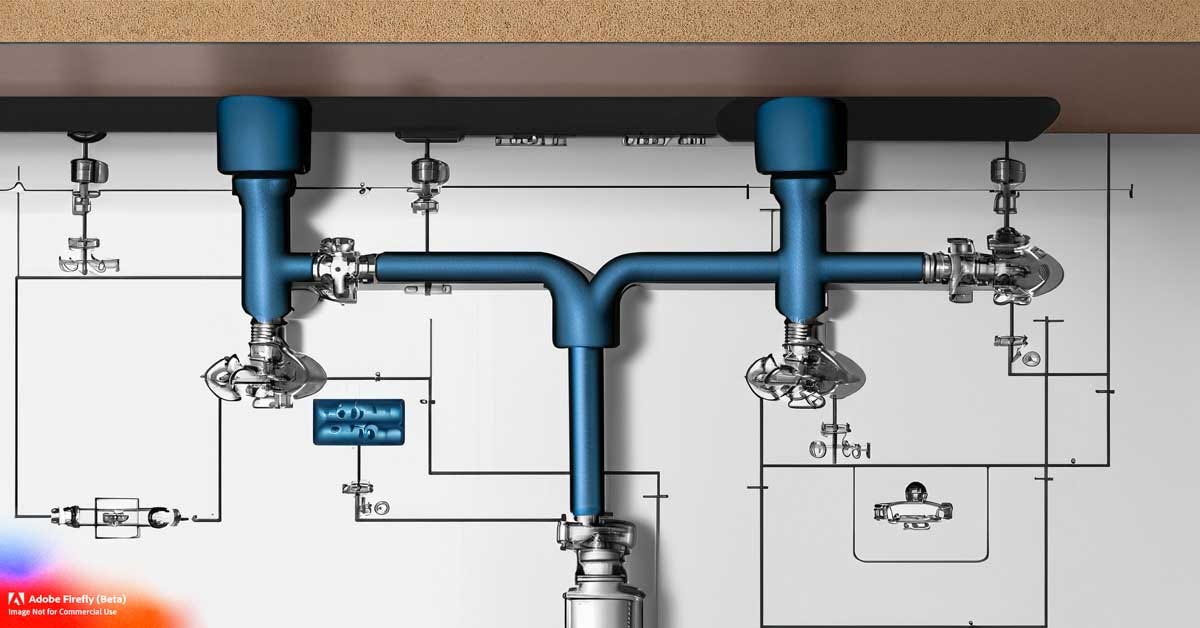
A standard under-sink layout: hot and cold supply lines, shut-off valves, P-trap, and the dishwasher drain hose connection via a branch tailpiece.
Key Components and Their Roles
- Faucet supply lines – Flexible braided hoses that carry hot and cold water from the shut-off valves to the faucet. Most are 3/8-inch compression fittings.
- Shut-off valves – Usually two (hot and cold). Turning them clockwise stops water flow to the sink or dishwasher without shutting off the whole house. Modern quarter-turn valves are more reliable than older multi-turn types.
- P-trap – The curved pipe under the drain that holds a small amount of water, creating a seal against sewer gases. Standard kitchen sink P-traps are 1.5 inches in diameter.
- Drain tailpiece – The straight vertical pipe from the sink basin down to the P-trap.
- Branch tailpiece – A T-shaped fitting that adds a side inlet for the dishwasher drain hose.
- Dishwasher drain hose – A flexible rubber hose (usually 5/8‑inch or 1‑inch diameter) that carries wastewater from the dishwasher to the sink drain system.
- Air gap or high loop – A physical barrier (air gap device) or a raised loop in the hose that prevents contaminated water from siphoning back into the dishwasher.
Water Supply Lines and Shut-Off Valves
Every kitchen sink with a dishwasher requires two supply lines: one hot, one cold. The hot water line typically splits to feed both the faucet and the dishwasher via a dedicated valve. The cold line supplies only the faucet. The shut-off valves are your emergency controls — if you ever need to replace a faucet or fix a leaky hose, turning those valves off saves you from draining the entire house. In practice, labeling each valve with a permanent marker (e.g., “faucet hot,” “dishwasher hot”) saves time during future repairs. For a deeper look at accessing and operating these valves, see our guide on turning off the water under the sink.
The Drainage System: P-Trap, Dishwasher Connection, and Venting
The drain path is where most confusion arises. Understanding the flow order makes installation and troubleshooting straightforward.
Flow sequence:
- Water from the sink basin drops into the drain tailpiece.
- It passes through the branch tailpiece, where the dishwasher drain hose connects.
- The combined flow enters the P-trap (the curved section that traps water).
- From the P-trap, wastewater moves into the wall drain line and eventually to the sewer or septic system.
Venting Essentials
Every drain system needs air to allow water to flow freely. Without proper venting, you’ll hear gurgling sounds, and water may drain slowly — sometimes backing up into the dishwasher. In most homes, a vent pipe runs from the sink drain up through the wall and out the roof. The vent must be clear of debris. If you notice slow draining after installing a new sink, check that the vent hasn’t been blocked during remodeling. A musty odor under the sink often signals a venting issue combined with trapped moisture.
Connecting the Dishwasher Drain Hose (High Loop vs. Air Gap)
The dishwasher drain hose must have a way to prevent backflow — dirty sink water flowing back into the dishwasher. Two common methods meet plumbing code requirements.
High Loop
Raise the hose as high as possible under the counter (at least 32 inches above the floor) and secure it with a zip tie or bracket. The loop creates a gravity barrier. This method is simple and works well, but the hose must not droop below the drain connection. Check it every few months — if the loop slips down, you lose the protection.
Air Gap
A small chrome or plastic device mounted on the sink deck or countertop. It provides a physical air break in the hose line. Many local codes mandate an air gap because it offers fail‑safe protection. Installation requires drilling a hole if one doesn’t already exist. The air gap’s outlet connects to the branch tailpiece or garbage disposal inlet.
How to connect:
- Attach the dishwasher drain hose to the air gap’s inlet (or directly to the branch tailpiece if using a high loop).
- Secure with a hose clamp — hand‑tighten, then give it a full turn with a screwdriver.
- If using a high loop, route the hose up under the counter and secure it before connecting to the drain.
A common mistake is letting the hose dip below the drain connection, which creates a siphon. That’s the number one cause of dirty dishes and foul odors in the dishwasher. For additional maintenance on the dishwasher itself — including filter care — check our step‑by‑step guide on cleaning inside a stainless steel dishwasher.
Step-by-Step Installation Guide
Whether you’re replacing a sink or adding a dishwasher for the first time, following a clear sequence prevents mistakes.
Prepare the Area and Gather Tools
Turn off the water supply at the shut‑off valves, then open the faucet to relieve pressure. Place a bucket and towels under the sink.
Tools you’ll need:
- Adjustable wrench
- Basin wrench (for tight spaces behind the sink)
- Slip‑joint pliers
- Pipe cutter or hacksaw (for PVC/ABS)
- Plumber’s tape (Teflon tape)
- Screwdrivers (flathead and Phillips)
- Safety glasses and gloves
Materials:
- PVC or ABS drain pipes and fittings (check local codes)
- Dishwasher drain hose (if not included)
- Hose clamps
- Plumber’s putty or silicone sealant
- Compression fittings for supply lines
Assemble the Drain Assembly
- Apply a thin ring of plumber’s putty under the sink strainer flange, then press it into the drain hole. Tighten the locknut underneath by hand, then use a basin wrench to snug it up — avoid overtightening, which can crack the sink.
- Attach the drain tailpiece to the strainer. Wrap the threads with plumber’s tape to prevent leaks.
- Install the branch tailpiece (the T‑fitting) if you’re connecting a dishwasher. This piece has a side inlet for the drain hose.
- Measure and cut the P‑trap pipe so it aligns with the wall drain outlet. Dry‑fit everything first to check angles. Then apply PVC cement (for glued joints) or tighten slip nuts (for compression fittings).
- Connect the P‑trap to the branch tailpiece and the wall drain pipe. Hand‑tighten slip nuts, then give them a quarter turn with pliers — overtightening can crack the nuts.
Connect the Dishwasher Drain Hose
- Attach the drain hose to the branch tailpiece inlet (or air gap outlet) using a hose clamp.
- Route the hose with a high loop (or through the air gap). Secure it with a zip tie.
- Check that the hose isn’t kinked or pinched behind the cabinet.
Secure the Water Supply Lines
- Connect the hot water line to the dishwasher valve. Use a 3/8‑inch compression fitting — wrap threads with plumber’s tape.
- Connect the cold water line to the faucet. Most modern faucets come with pre‑attached hoses; just connect them to the shut‑off valves.
- Tighten all fittings hand‑tight plus a quarter turn. Turn the water supply on slowly and check for leaks at every joint. If you see a drip, tighten slightly — but stop if the fitting deforms.
Electrical Considerations
Dishwashers require a dedicated 15‑ or 20‑amp circuit with GFCI protection. If you’re hardwiring, follow the manufacturer’s instructions and local electrical codes. Never work on electrical connections with wet hands or while standing on a wet floor. If you’re unsure, hire a licensed electrician. For related kitchen ventilation safety, our guide on installing a range hood duct covers similar electrical precautions.
Common Mistakes and How to Avoid Them
Improper Hose Routing
The most frequent cause of dishwasher odor and poor cleaning is a drain hose that dips below the drain connection. This creates a siphon that pulls dirty water back into the dishwasher. Always raise the hose to a high loop and secure it. If you have an air gap, ensure the hoses are attached tightly — many people forget to tighten the clip on the air gap outlet.
Loose Connections
Temperature changes and dishwasher vibrations can loosen slip nuts over time. Use a wrench to snug all fittings, but apply moderate force. Over‑tightening can crack plastic nuts or compress rubber washers too much, causing leaks. If you detect a persistent drip, our guide on fixing a leaking pipe under the kitchen sink will walk you through diagnosis and repair.
Neglecting Venting
A drain that gurgles or backs up when the dishwasher runs often points to a blocked vent. Check the vent pipe under the sink (if visible) and the roof vent stack. Debris, bird nests, or even paint can clog vents. If you suspect a problem but can’t reach the roof vent, call a plumber.
Maintenance and Troubleshooting
Preventing Clogs and Odors
Kitchen sink clogs usually come from grease, food scraps, and soap scum. Use a drain strainer to catch solids. Never pour grease down the drain — it solidifies and traps debris. Once a month, flush the drain with a mixture of hot water, baking soda, and vinegar to break down buildup.
If a musty smell develops, check for slow leaks. Even a tiny drip can grow mold inside the cabinet. Our article on musty odors under the kitchen sink explains how to locate and eliminate the source.
Checking for Leaks Regularly
Inspect under the sink every three months. Look for:
- Damp spots on the cabinet floor
- Rust or corrosion on metal fittings
- Water stains on cabinet walls
- Musty odors
Catch a leak early before it warps the cabinet or causes mold.
Cleaning the Dishwasher Filter
A clogged dishwasher filter restricts water flow and can cause backups that affect the sink drain. Remove the filter (located at the bottom of the tub) and rinse it under warm water. Use a soft brush for stubborn debris. For Kenmore models, see our dedicated guide on cleaning a Kenmore dishwasher filter.
Upgrading Your Under‑Sink Plumbing
Modern components offer durability and convenience. If you’re remodeling or dealing with recurring problems, consider these upgrades.
- Quarter‑turn shut‑off valves – More reliable than older multi‑turn valves. Replace any valve that feels stiff or won’t close fully.
- Brass P‑trap – More durable than PVC, especially under sinks where hot water is frequent. Cost is higher, but it’s less likely to crack.
- Smart leak detectors – Place one under the sink; they sound an alarm or shut off the water when moisture is detected.
- Air gap retrofit – If your current setup uses only a high loop, adding an air gap meets modern code requirements and eliminates backflow risk completely.
Staying Code Compliant
Most jurisdictions require:
- An air gap (or approved high loop) for dishwasher drain connections.
- P‑trap diameter of 1.5 inches for kitchen sinks.
- Vent within 4–5 feet of the trap.
- Accessible shut‑off valves (not blocked by stored items).
- Drain pipes sloped 1/4 inch per foot toward the main drain.
If you’re planning a major renovation, check with your local building department. Non‑compliant plumbing can cause issues during home inspection and may affect insurance.
Frequently Asked Questions
What does a kitchen sink plumbing diagram with dishwasher show?
It illustrates the path of water supply lines from the shut‑off valves to the faucet and dishwasher, and the drainage path from the sink and dishwasher through the branch tailpiece, P‑trap, and vent system. The diagram helps you locate each component and understand how they interconnect.
How is the dishwasher drain hose connected under the sink?
The hose connects to a side inlet on the branch tailpiece (or to a garbage disposal inlet if one is installed). A hose clamp secures the connection. The hose must be routed with a high loop or through an air gap to prevent siphoning.
Do I need a garbage disposal to install a dishwasher?
No. You can connect the dishwasher drain hose directly to a branch tailpiece. The setup is straightforward and common in kitchens without disposals.
Why is my dishwasher leaving food on dishes?
Check the drain hose first — if it’s too low, dirty sink water may flow back in. Next, clean the dishwasher filter and inspect the spray arms for clogs. If the issue persists, the wash pump may need service.
Conclusion
The plumbing under your kitchen sink with a dishwasher is a predictable system of supply lines, a P‑trap, a drain hose, and a vent. Understanding each part — and how they connect — gives you the confidence to tackle minor repairs, spot early warning signs, and communicate clearly with a professional when needed.
Start by inspecting your own setup. Grab a flashlight and look under the sink. Trace the supply lines to the shut‑off valves. Check the dishwasher drain hose path. Locate the vent pipe. Thirty minutes of curiosity now can save hours of repair work later.
For a complete visual reference that shows every connection in a single view, save our detailed plumbing under kitchen sink diagram to your bookmarks. It’s a practical tool for any future project. And remember, a little preventive maintenance — tightening connections, cleaning the filter, and watching for leaks — keeps your kitchen running smoothly for years.
For more on water‑efficient fixtures and proper installation, the U.S. Environmental Protection Agency’s WaterSense program offers resources at https://www.epa.gov/watersense.
