

Keeping your stainless steel refrigerator looking sleek, spotless, and free from smudges is often a higher priority than people realize. A gleaming fridge enhances your kitchen's aesthetic, radiating a sense of cleanliness and care throughout your home. While stainless steel is prized for its modern look, it can be notoriously stubborn when it comes to fingerprints, water spots, and streaks. Fortunately, achieving that showroom shine is far from impossible.
This comprehensive guide will walk you through the most effective methods, essential supplies, and crucial tips to ensure your stainless steel fridge always looks its best, without resorting to harsh chemicals or complicated techniques. We'll cover everything from daily touch-ups to deep cleaning, ensuring both the exterior and interior maintain their pristine condition.
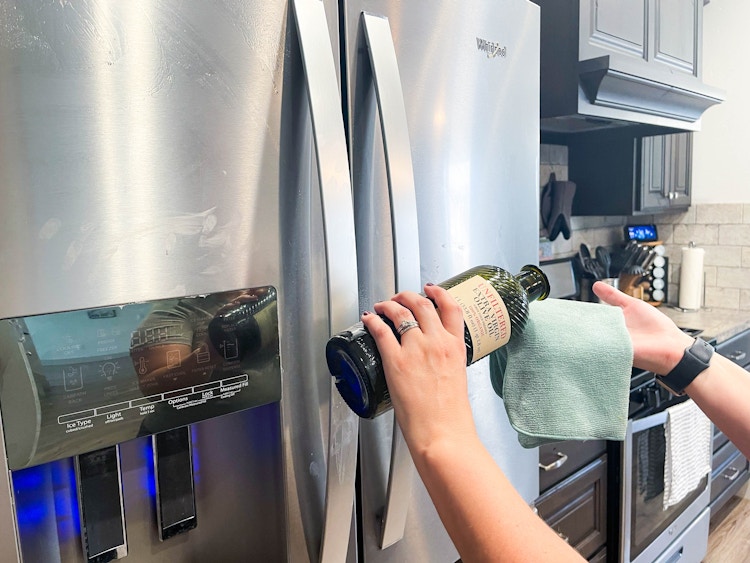 A perfectly clean stainless steel fridge door stands out in a modern kitchen.
Essential Supplies for a Sparkling Finish
To achieve optimal results and avoid damaging your appliance, gathering the right cleaning supplies is paramount. Using appropriate materials ensures a streak-free, polished look without weakening the protective layer of your stainless steel.
Gentle Cleaning Agents
- Mild Dish Soap: A few drops of your favorite mild dish soap are excellent for cutting through grease and grime. Look for formulations free from harsh dyes or strong fragrances.
- Warm Water: The base for most cleaning solutions, warm water helps to dissolve dirt and residues effectively.
- White Vinegar: A natural disinfectant and degreaser, white vinegar is invaluable for tackling fingerprints and water spots. Its acidity helps break down mineral deposits without being overly harsh.
- Baking Soda: For tougher stains or sticky residues, baking soda mixed with water creates a gentle abrasive paste that lifts grime effectively.
- Rubbing Alcohol (Isopropyl Alcohol): Effective for removing sticky residues or stubborn smudges. Use sparingly and ensure it's fully diluted or immediately wiped away.
Application Tools
- Microfiber Cloths: These are your best friends for stainless steel. Their soft, absorbent texture is lint-free and incredibly effective at cleaning, polishing, and buffing without scratching. Have several on hand – one for cleaning, one for rinsing, and one for drying/buffing.
- Soft Sponges: For areas with more stuck-on food, a non-abrasive sponge can be useful. Always ensure it's a soft variety and never use abrasive scrubbing pads.
- Spray Bottles: Essential for diluting and applying vinegar, water, or mild soap solutions evenly. Ensure they are thoroughly cleaned before use.
- Small Bowl or Bucket: Useful for mixing larger batches of cleaning solutions, especially when cleaning shelves and drawers.
For Polishing and Shine
- Olive Oil or Mineral Oil: A tiny amount, applied with a microfiber cloth after cleaning, can restore and enhance the natural sheen of stainless steel, acting as a protective barrier.
Preparing Your Fridge for Cleaning
Before you begin scrubbing, proper preparation ensures a smoother, more efficient, and safer cleaning process. Taking these steps beforehand prevents accidental damage and makes the cleaning itself much easier.
Step 1: Empty the Fridge
The first, and perhaps most critical, step is to completely empty your refrigerator. This allows you unrestricted access to every surface, shelf, and drawer. It's also an excellent opportunity to check expiration dates, discard any expired items, and give your stock a quick organization. Move perishables to a cooler or insulated bag to maintain their temperature while you work.
Step 2: Unplug the Appliance
For safety, especially if you’re doing a deep clean or dealing with any electrical components, it’s wise to unplug your refrigerator. This prevents accidental activation of the ice dispenser or water filter system and eliminates any risk of electrical shock.
Step 3: Protect Your Flooring
Place towels or an old mat on the floor in front of your fridge to catch any drips or spills that might occur during the cleaning process. This protects your kitchen floor from water damage or potential staining from cleaning solutions.
Step 4: Identify Problem Areas
Take a moment to scan the exterior and interior for specific challenges: stubborn food stains, dried-on spills, deep fingerprints, or areas of discoloration. Knowing what you’re up against will help you select the most appropriate cleaning method or solution for each issue.
Cleaning the Stainless Steel Exterior: Achieving a Streak-Free Gleam

The exterior of your refrigerator is the most visible part, and keeping it free from smudges is key to maintaining a polished kitchen. The key here is to always work with the grain of the steel.
Gentle Wipe-Down for Dust and Smudges
Start by using a dry or slightly damp microfiber cloth to gently wipe down the entire exterior surface, always following the direction of the stainless steel grain. This removes loose dust and light smudges. For more persistent fingerprints, move on to a mild cleaning solution.
The Vinegar and Water Method (Top Choice)
- Mix Solution: Combine equal parts white vinegar and warm water in a spray bottle.
- Apply: Lightly mist the solution onto a clean microfiber cloth (never spray directly onto the fridge, as excess liquid can seep into crevices).
- Wipe: Gently wipe down the stainless steel surface, moving in the direction of the grain. You should see fingerprints and smudges disappear.
- Rinse (Optional but Recommended): For a truly spot-free finish, dampen a clean microfiber cloth with plain water and wipe down the surfaces again, still following the grain.
- Dry and Buff: Immediately use a dry, clean microfiber cloth to thoroughly dry the surface. Buff gently in the direction of the grain to restore the natural shine and ensure no water spots remain.
For Stubborn Grime or Grease
If mild solutions aren't cutting through tougher grease or sticky residues:
- Mild Soap Solution: Mix a few drops of mild dish soap with warm water.
- Apply and Scrub Gently: Dip a soft microfiber cloth or sponge into the soapy water and gently scrub the affected area, always following the grain.
- Rinse Thoroughly: Dampen a clean cloth with plain water and wipe away all soap residue.
- Dry and Buff: Dry the area immediately with a clean, dry microfiber cloth, buffing gently with the grain to restore shine.
Adding a Protective Shine
Once the exterior is clean and dry, you can add a final polish for extra gleam and protection.
- Apply a Small Amount of Oil: Put just a tiny drop of olive oil or mineral oil onto a clean, soft microfiber cloth.
- Buff: Gently rub the oil onto the stainless steel surface, following the grain. A little goes a long way! Too much oil will attract dust and create a greasy feeling.
- Wipe Away Excess: Use another clean, dry microfiber cloth to gently buff away any excess oil until the surface looks smooth and has a uniform shine. This step is optional but excellent for maintaining that like-new appearance between deep cleans and helps repel future smudges.
Cleaning the Stainless Steel Interior: A Fresh Start for Your Food
A clean refrigerator interior is crucial for food safety and freshness. This involves deep cleaning shelves, drawers, and walls to remove spills, odors, and potential bacteria.
Step 1: Remove and Wash Shelves and Drawers
Carefully remove all shelves, drawers, and ice bins. Wash these separately in your sink with warm, soapy water. For heavily soiled items, a paste of baking soda and water can be used as a gentle scrub. Rinse thoroughly with clean water and set them aside to air dry completely or dry them with a clean towel. Ensuring they are bone dry before reinserting prevents mildew.
Step 2: Clean the Interior Walls and Ceiling
Prepare a cleaning solution of warm water mixed with a few drops of mild dish soap or a diluted vinegar solution (1 cup water to 1 cup vinegar). Using a damp microfiber cloth or soft sponge, wipe down all interior walls, the ceiling, and the inside of the door. Pay close attention to any food splatters or sticky spots.
Step 3: Tackle Tough Stains and Odors
- Sticky Residue: For stubborn, sticky spots, a cloth dampened with rubbing alcohol can be effective. Wipe gently and then follow up with a damp cloth.
- Lingering Odors: After cleaning with soap and water or vinegar, if odors persist, place an open box of baking soda inside the fridge. It's highly effective at absorbing smells. Other natural odor absorbers include activated charcoal or a bowl of coffee grounds (use sparingly to avoid transferring scent). For persistent odors, a mix of diluted bleach and water (check your fridge manual for manufacturer recommendations on bleach) can be used, but ensure thorough rinsing and airing out.
Step 5: Clean the Door Seals
Don't forget the rubber door seals, which can trap food particles and become grimy. Wipe them down with your chosen cleaning solution and rinse with a damp cloth. Ensure they are completely dry to maintain their integrity.
Step 6: Reassemble and Organize
Once the interior is clean and dry, and all shelves and drawers are dry, carefully reassemble everything. As you return your food items, take the opportunity to discard anything old and organize for optimal airflow and accessibility.

Maintaining Shine and Preventing Issues

Consistency is key to keeping your stainless steel fridge looking its best. Here’s how to maintain that polished finish and prevent common problems.
Daily Wipe-Downs
Make it a habit to give your fridge doors a quick wipe with a dry microfiber cloth after each use, especially around handles, where fingerprints accumulate most. This simple action prevents smudges from setting in and significantly reduces the need for intensive cleaning.
Regular Polishing
Applying a thin layer of stainless steel polish or a food-grade mineral oil once a month can add a protective layer that repels fingerprints and makes future cleaning easier. Always apply sparingly and buff well with a clean cloth to avoid a greasy look.
Addressing Streaks and Spots Promptly
When you notice a streak or a water spot, tackle it immediately with a damp microfiber cloth followed by a dry buff. The longer they sit, the harder they are to remove and the more likely they are to etch the surface.
Common Mistakes to Avoid
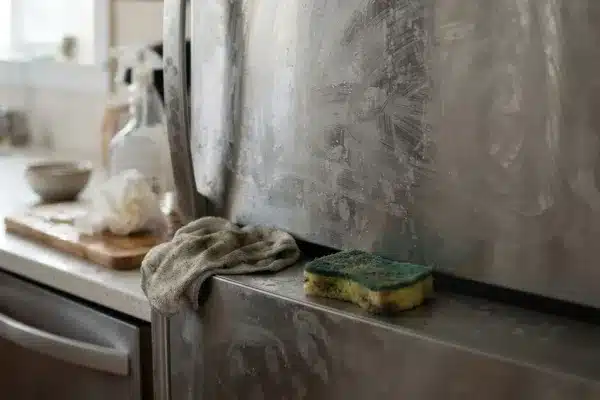
Even with the best intentions, some common pitfalls can leave your stainless steel fridge looking worse for wear. Understanding these can save you a lot of frustration.
Using Abrasive Cleaners or Tools
Harsh scrub pads, steel wool, abrasive powders, or cleaners containing ammonia, bleach, or chlorine can permanently scratch the surface of your stainless steel. Always opt for soft cloths and gentle, pH-neutral cleaners. For tough spots, patience and the right gentle technique are more effective than brute force.
Wiping Against the Grain
Stainless steel has a visible grain, much like wood. Always wipe and polish in the direction of this grain. Wiping against it can make minor scratches more noticeable and lead to an uneven, streaky appearance that’s hard to correct.
Letting Moisture Sit
Whether it's water from cleaning or condensation, standing moisture can lead to unsightly water spots and, over time, potential discoloration. Always ensure the surface is thoroughly dried with a clean, soft cloth immediately after cleaning.
Over-Application of Polish or Oil
While polishing is beneficial, using too much product will attract dust and create a greasy film. A tiny amount applied evenly and buffed well is all that's needed for a protective shine.
Eco-Friendly Cleaning Options

You don't need harsh chemicals to achieve a sparkling fridge. Many environmentally friendly solutions are readily available or easy to make.
Natural Cleaning Solutions
- Vinegar and Water: This classic combination is one of the most effective and eco-friendly ways to tackle fingerprints and general grime.
- Baking Soda Paste: For stubborn food residue, a paste of baking soda and water offers a gentle abrasive action without scratching.
- Lemon Juice: Diluted lemon juice can also help cut through grease and leave a fresh scent, though use with caution as its acidity could potentially affect some finishes if left on too long.
Reducing Waste
Opt for reusable microfiber cloths instead of paper towels. When possible, buy cleaning products in bulk or look for brands that offer refillable options to minimize packaging waste. Consider a regular cleaning schedule to prevent build-up, thus reducing the frequency and intensity of cleaning needed.
Troubleshooting Common Stainless Steel Issues
Even with careful cleaning, you might encounter specific problems. Here’s how to address them.
Dealing with Scratches
Minor surface scratches can often be minimized or made less visible.
- For Very Light Scratches: Use a dedicated stainless steel polishing compound or paste. Apply a small amount to a microfiber cloth and rub gently in the direction of the grain. This can help blend the scratch into the surrounding finish. For extremely minor scuffs, a tiny bit of non-gel toothpaste on a cloth can sometimes work, but always test on an inconspicuous area first.
- For Deeper Scratches: You may need a specialized stainless steel repair kit. These kits typically involve abrasive pads and a polishing compound designed to re-color and re-finish the affected area. Always follow the kit instructions precisely. For significant damage, professional restoration might be the only option.
Handling Discoloration
Discoloration is often caused by food spills, acidic substances, or using the wrong cleaning agents.
- Baking Soda Paste: Apply a paste of baking soda and water to the discolored area. Let it sit for 10-15 minutes, then gently scrub with a soft cloth following the grain. Rinse thoroughly and dry.
- Diluted Vinegar: For more stubborn spots, a diluted vinegar solution can help. Apply to a cloth and wipe the discolored area. Rinse and dry promptly.
- Manufacturer Recommendations: Always consult your refrigerator's user manual. Some manufacturers may have specific recommendations or warnings regarding cleaning certain stains or using particular products.
Frequently Asked Questions

What is the best thing to use to clean a stainless steel refrigerator?
The best all-around solution is a mixture of equal parts white vinegar and warm water applied with a microfiber cloth, followed by drying and buffing with a clean, dry microfiber cloth. Mild dish soap and water is also effective for general cleaning.
How do you get fingerprints off a stainless steel refrigerator?
Use a microfiber cloth slightly dampened with a 50/50 white vinegar and water solution. Wipe in the direction of the grain, then immediately dry and buff with a clean, dry microfiber cloth.
What should I NOT use to clean a stainless steel fridge?
Avoid bleach, ammonia, scouring pads, steel wool, abrasive powders, and chemical cleaners not specifically designed for stainless steel. These can cause permanent scratches and discoloration.
How do you make stainless steel look new again?
Regular cleaning with a mild cleaner, always wiping with the grain, and thoroughly drying are crucial. A final polish with a food-grade mineral oil or stainless steel polish, buffed well, can restore and protect the finish, making it look like new.
Conclusion: A Gleaming Fridge is Achievable
Keeping your stainless steel refrigerator looking its absolute best involves consistent effort and the right approach. By understanding the unique needs of this material – especially the directive to always work with the grain – and by employing gentle, effective cleaning agents, you can easily overcome challenges like fingerprints, smudges, and streaks.
Remember that preparation is key, and having your supplies ready streamlines the entire process. Whether you choose the classic vinegar and water method or a specialized stainless steel cleaner, the goal is always a streak-free, polished finish. Don't forget the interior; a clean fridge is essential for food hygiene and freshness. By incorporating regular light cleaning and occasional deeper cleans into your routine, your stainless steel fridge will remain a beautiful and functional centerpiece of your kitchen for years to come. Enjoy the satisfaction of a truly spotless appliance.
