
You need a straightforward plan for how to replace a rangehood without surprises. If the new hood matches the old duct, mounting, and power, it's often a one‑day DIY swap. If not, the project can require ductwork, ceiling blocking, or electrical upgrades.
Manufacturer specifications indicate common duct collars are 4‑inch or 6‑inch, and many kitchens use 30‑inch or 36‑inch hoods as of 2026. Aggregate installer feedback shows duct problems cause most replacement headaches. Below is a clear decision path and a stepwise workflow to follow.
Quick Answer
how to replace a rangehood begins by checking fit, duct, and power.
If same size and collar, swap it yourself.
If ducting or wiring changes, hire HVAC or electrician.
Permits may be required for new penetrations or circuits.
Problem / Pain Point: Why replacing a rangehood can go sideways
Most swaps go smoothly when the new hood matches the old one. Problems start when duct size, duct path, or power changes. Old flexible duct, crushed runs, or hidden hardwired connections usually stall a DIY.
Common frustrations are weak airflow, noisy motors, and grease in the duct. Installer data shows grease and mismatched collars cause most performance failures. The checklist below tells you what to measure and photograph first.
Key Decision Checklist — measurements, duct type & size, power, mounting, and permits
Take clear measurements and photos before ordering or removing anything. These let you decide whether to proceed or call a pro.
Measurements and photos to capture
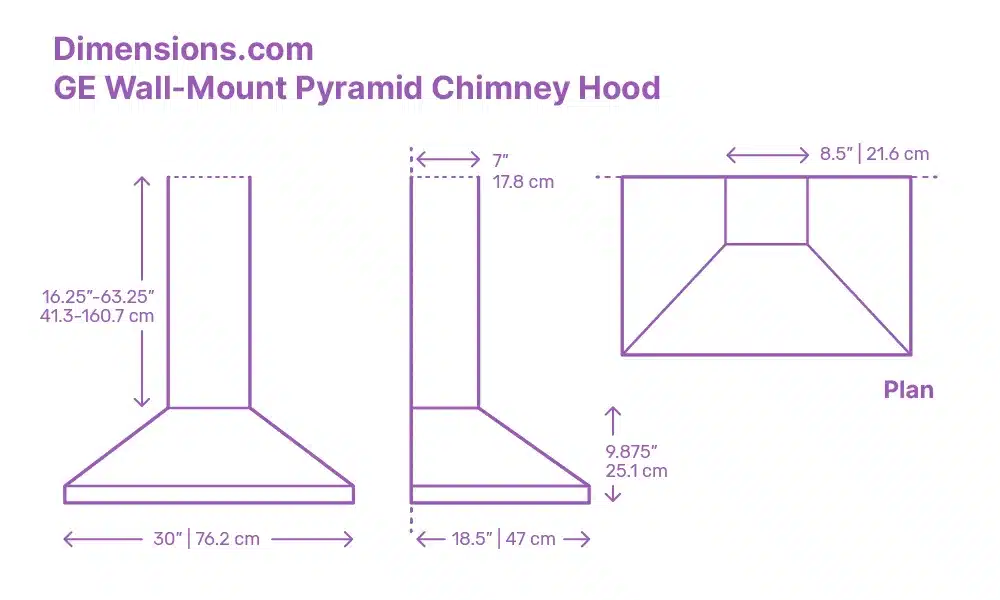
- Hood width, in inches, across the front.
- Clearance from cooktop to hood bottom, in inches. Typical clearances are 24 to 30 inches for electric, 30 to 36 inches for gas.
- Duct collar diameter and shape, note 4‑inch or 6‑inch round, or rectangular dimensions.
- Count bends and estimate total run length to the exterior cap, in feet.
- Photograph the junction box or power cord location and any exterior cap you can access.
If/then decision rules
- If width, collar, and mount match, then a like‑for‑like swap is usually DIY.
- If collar size changes, then plan for a transition fitting and possible larger penetration.
- If the hood is plug‑in but the new one needs hardwiring, then hire a licensed electrician.
- If you must run new duct through a roof or framed wall, then expect a permit and consider a pro.
Permits and authoritative guidance
- Check local building department rules for exterior penetrations and wiring permits. The International Code Council offers adopted codes and guidance at ICC.
- For makeup air triggers and ventilation planning, see energy efficiency guidance on Energy.gov.
Rangehood Types, Blower Locations & Duct Components That dictate your path
Identify hood type and blower location before you buy or remove anything. Those choices define difficulty, cost, and whether you need structural work.
Hood types and replacement difficulty
- Under‑cabinet, easiest when footprints match. Screws are often inside the cabinet.
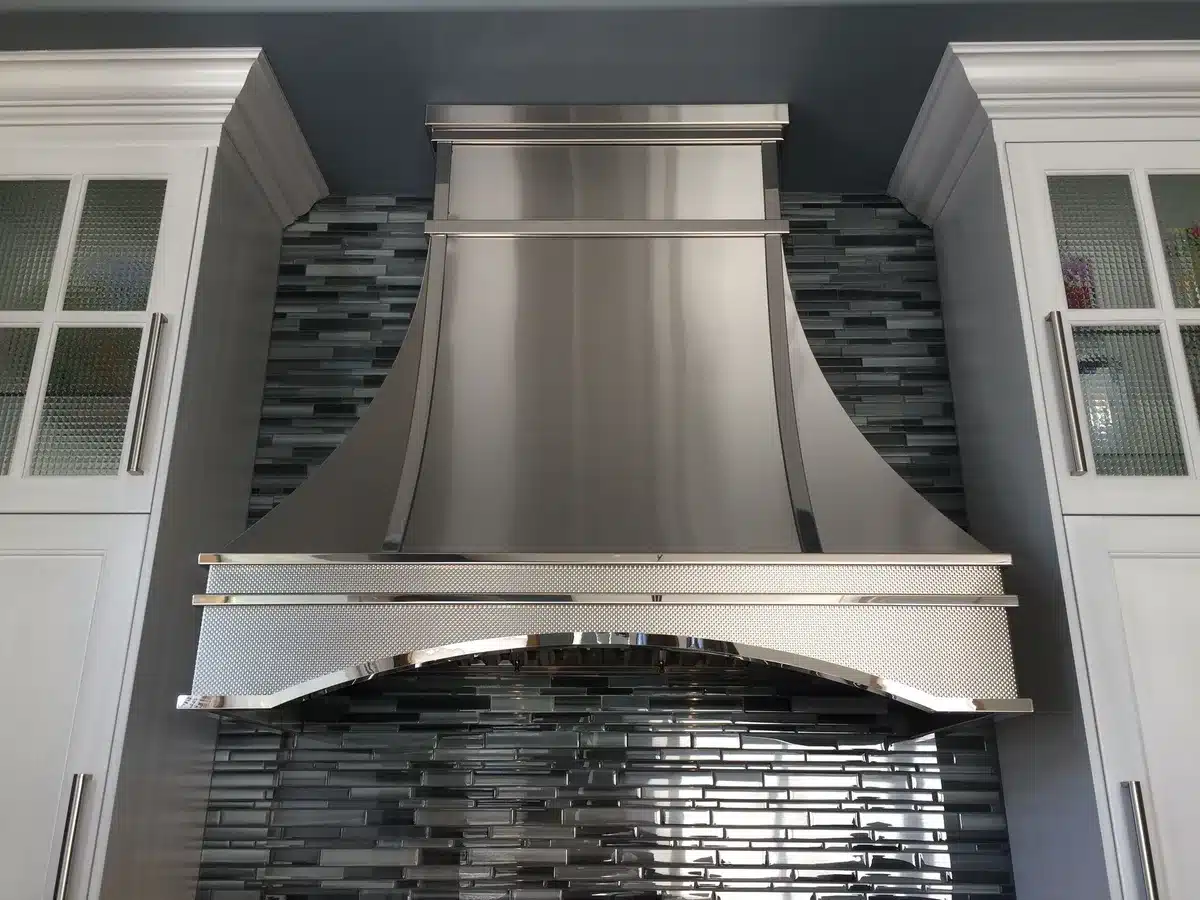
- Wall‑mounted chimney, medium difficulty, needs bracket alignment and external duct alignment.
- Island hood, high difficulty, requires ceiling blocking or an engineered support box.
- Insert/liner, medium difficulty, needs trim and exact fit.
- Downdraft, complex, often tied to the cooktop and not a simple swap.
- Recirculating (ductless), easiest to install but much lower extraction performance.
Blower locations and who they suit
- Internal blower, best for short runs and simple swaps. It places the noise near the cooktop.
- Inline blower, placed in attic or wall cavity, best for medium runs and quieter kitchens.
- Remote or roof‑mounted blower, best for high‑CFM demands and minimal kitchen noise.
Duct components to verify
- Collar size and shape. Match the hood collar to ductwork or plan a transition.
- Backdraft damper. Ensure it opens with airflow and is free of grease.
- Exterior cap type, roof or wall. Note condition and screening.
- Transitions and elbows. Count bends for pressure loss estimates.
Step‑by‑Step Workflow: Like‑for‑like replacement (prep, remove, inspect, mount, duct, wire, test)
Follow this sequence when the new hood matches the old one in width, collar, and power. Stop if any condition changes.
Prep and safety
- Turn off the circuit at the breaker, then verify with a voltage tester.
- Clear counters and set a ladder. Have a helper for lifting and alignment.
- Remove filters and wipe excess grease so it does not drip during removal.
Remove the old hood
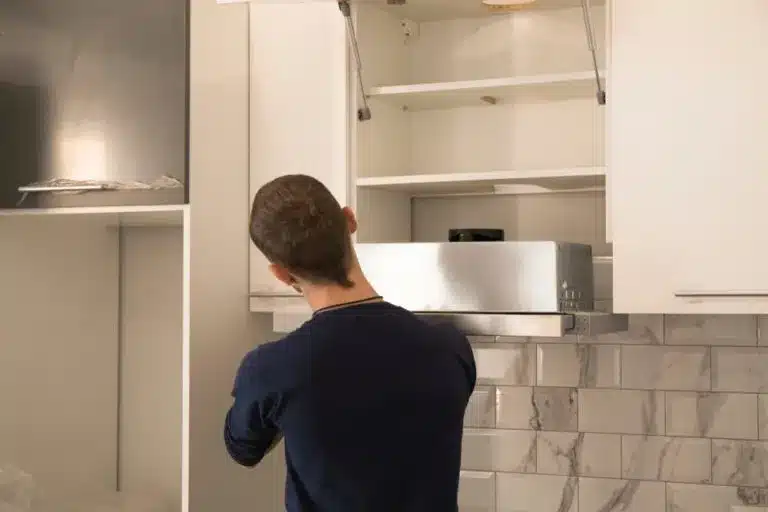
- Locate mounting screws, support the hood, then remove fasteners.
- Unfasten the duct from the collar and slide the hood away.
- Disconnect power, either unplug or open the junction box and cap wires safely.
Inspect the opening
- Check duct for cracks, grease, or crushing and replace if damaged.
- Probe mounting wood for rot or thin particleboard, then add blocking if screws pull out.
- Confirm a proper junction box. If wiring looks old or unsafe, hire an electrician.
Mount, connect duct, and wire
- Use the manufacturer template to mark holes and align the collar. Level the hood and fasten into blocking or studs.
- Fit rigid or semi‑rigid metal duct to the collar, shorten the run, and minimize bends. Seal seams with metal foil tape.
- For plug‑in models, route the cord to a reachable outlet. For hardwired models, match neutral to neutral, hot to hot, and ground to ground then tuck connections into the box.
Test and finish
- Restore power and run each fan speed. Check lights and damper operation.
- Listen for rattles and tighten loose fasteners. Reinstall filters and clean the area.
- Perform a smoke or tissue test at the exterior cap to confirm airflow.
Branch Workflow A: Converting recirculating (ductless) to ducted, routing, adapters, and firestopping
If you decide to vent outside, choose the route first, then decide DIY versus professional help. Wall, soffit, and roof terminations have different tradeoffs.
Routing options and tradeoffs
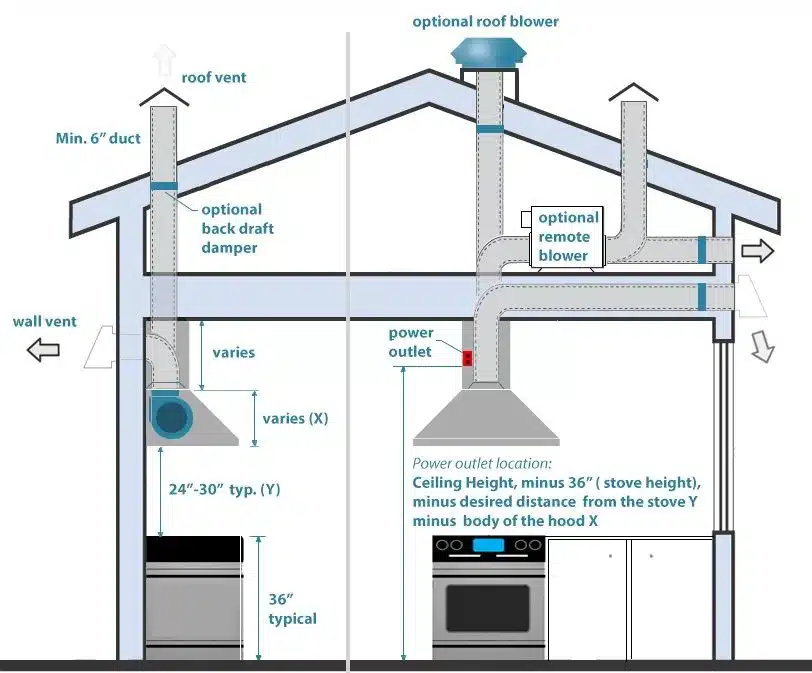
- Wall exit, shortest runs and easiest access when an exterior wall is behind the hood.
- Soffit exit, hides duct under eaves but requires attention to backdraft and screening.
- Roof exit, can be quickest vertical run, but needs flashing and attic access.
If/then routing rules
- If the wall is adjacent and run is short, then wall cap routing is best.
- If the run is long through attic, then choose an inline blower to preserve CFM and reduce kitchen noise.
- If ducts cross fire separations or floors, then hire a pro for firestopping and permits.
Installation details
- Use rigid or semi‑rigid metal duct. Avoid thin foil flex except for short, last‑inch transitions.
- Keep equivalent length low. Use long‑radius elbows and minimize 90 degree bends.
- Install a backdraft damper at the exterior cap unless the hood has an integrated damper.
- Firestop penetrations with listed collars or approved sealants per local code.
Branch Workflow B: Moving the hood or installing an island hood, structural support and ceiling penetrations
Moving location or installing an island hood adds structural and routing complexity. Plan blocking, routing, and finish work in advance.
Load and support basics
- Determine hood weight and locate ceiling joists. Many island hoods need an engineered support box mounted to joists.
- If joists are not above the hood, install cross blocking or an engineered bracket tied to framing.
Electrical and duct routing steps
- Run supply and duct through the ceiling before drywall work. Ensure attic access for routing and servicing.
- Consider an inline or remote blower when the duct run is long, to keep the kitchen quiet.
When to hire pros
- If you need ceiling framing, roof penetrations, or extensive drywall repair, hire a contractor.
- If the installation requires a dedicated circuit or new junction box, hire a licensed electrician.
Tools, Materials & Installation Templates you’ll actually need
Prepare tools and materials in advance, and always follow the manufacturer template for hole locations and clearances.
Essential tools
- Drill or impact driver, set of driver bits, 1/4‑inch and 3/8‑inch sockets, level, tape measure.
- Voltage tester, ladder, gloves, safety glasses, and a putty knife for sealant work.
Core materials
- Rigid or semi‑rigid metal duct, transitions, long‑radius elbows.
- Metal foil tape for seams, high‑temperature silicone for exterior sealing, backdraft damper.
- Mounting screws sized to the manufacturer, blocking or cleats, replacement filters.
Reference and documentation
- Keep the manufacturer installation template and wiring diagram handy. Templates prevent misaligned collars and mounting errors.
- Save photos of the old installation for future service, and store manuals in the cabinet for easy access.
| Item | Purpose | Notes |
|---|---|---|
| Rigid round duct | Main airflow path | Best efficiency and lowest noise |
| Metal foil tape | Seal seams | Use only metal foil tape, not cloth tape |
| Backdraft damper | Prevent return air | Verify correct orientation on install |
| High‑temp silicone | Exterior cap seal | Weatherproofs and resists grease |
Common Mistakes, Troubleshooting & Fixes
Start with the simple checks below before calling a pro. Most problems are straightforward fixes.
Weak airflow checks
- Clean or reinstall filters correctly, then inspect duct for crushing or long flexible runs.
- Reduce bends or replace small diameter duct with a larger, matched collar.
Noise and vibration fixes
- Tighten mounting screws and add rubber vibration pads between hood and cabinet.
- If the motor is loud at the cooktop, consider an inline or remote blower for quieter operation.
Electrical and light issues
- For lights not working, check bulbs and the socket. Then test power at the junction box with a tester.
- For intermittent power, inspect splices and secure connections or hire an electrician if connections look unsafe.
Simple troubleshooting steps
- Observe the symptom, then turn the hood off.
- Check filters, duct, and mounts first. Test the junction box last.
If these checks fail, call a licensed HVAC technician or electrician.
Safety, Code, Permits & Compliance
Follow local codes and safe practices to avoid hazards and failed inspections. Proper documentation protects resale value.
When permits are required
- Expect permits for new exterior penetrations, substantial duct reroutes, or electrical alterations. Confirm with your municipal building department.
- Many jurisdictions adopt the International Mechanical Code and International Residential Code. Use the local authority having jurisdiction for specifics.
Makeup air and high‑CFM hoods
- Makeup air is often required when exhaust exceeds about 400 CFM. This prevents negative pressure and backdraft into gas appliances. Consult local authorities or an HVAC pro for requirements before installing a high‑CFM hood.
Product and wiring certifications
- Choose hoods with UL or ETL listings for electrical and motor safety. Manufacturer specs confirm listing status.
- Ensure proper grounding and correct wire gauge for hardwired installations, and use a licensed electrician when new circuits are needed.
Firestopping and exterior termination
- Use listed firestop collars at floor and ceiling penetrations that cross fire separations.
- Install exterior caps with bird screens and seal with high‑temp silicone to prevent leaks.
Time, Cost & Performance Metrics to budget for
Keep realistic time and cost expectations before you start.
Time estimates
- Like‑for‑like swap, one to three hours for a competent DIYer with a helper.
- Pro install with new ducting, four to sixteen hours depending on attic access and penetrations.
Cost ranges
- Replacement hood units commonly range from $100 to $1,500.
- Pro labor for ducting and electrical typically runs $300 to $1,200 or more depending on scope.
Performance metrics to watch
- Common residential hoods run 200 to 600 CFM. Higher CFM reduces smoke but may trigger makeup air rules.
- Sones ratings indicate noise, with quieter hoods usually listed around 1 to 3 sones on low speed.
Expert Tips, Maintenance & Long‑Term Care
Simple maintenance preserves performance and safety.
Routine tasks
- Clean baffle grease filters monthly for heavy cooks, or run them in the dishwasher if allowed.
- Replace charcoal odor filters every six to twelve months when using recirculating mode.
Annual checks
- Inspect exterior caps, damper operation, and the duct path for grease build up.
- Tighten mounting hardware and check wiring connections inside the junction box.
Practical storage and spares
- Keep spare bulbs and a roll of metal foil tape in the cabinet.
- Schedule duct cleaning if you cook heavily with oils or use a commercial‑style range.
Quick Decision Flow / Final Checklist
Follow this short flow before you buy or remove anything.
Checklist steps
- Measure hood width and collar diameter, then photograph duct and junction box.
- If the new hood matches size, collar, and power type, proceed with a like‑for‑like swap.
- If collar, wiring, or routing changes are required, plan for transitions, permits, or hire pros.
Final pre‑install checklist
- Dimensions verified and photos saved.
- Duct type noted and transition fittings ready.
- Circuit off and voltage tester on site.
- Blocking or support confirmed for mounting.
Frequently Asked Questions
How wide should a replacement hood be?
Match the hood width to the cooktop width, or choose a hood 2 to 6 inches wider, for better capture. Wider hoods increase the capture area and reduce sideways escape of smoke. Measure the cooktop front to back and left to right, and confirm clearance to cabinets before ordering.
Do I need a permit to replace a hood when nothing else changes?
If you only swap a like‑for‑like hood and keep existing duct and wiring, a permit is often not required. If you add new exterior penetrations, reroute ducts, or alter wiring, a permit is commonly needed. Contact your local building department for specific rules and inspection requirements.
Can I replace a recirculating hood with a ducted model myself?
You can convert to ducted venting, but new exterior penetrations and long runs add complexity. If the wall is adjacent and the run is short, an experienced DIYer may manage it. If you need roof penetrations, attic routing, or firestopping, hire an HVAC contractor for a code‑compliant install.
What duct size should I use for better airflow?
Match the hood collar size and avoid down‑sizing between hood and duct. Common collars are 4‑inch and 6‑inch round. Upsizing from 4‑inch to 6‑inch reduces resistance and preserves CFM, especially on longer runs and when the hood is rated over 300 CFM.
When should I call an electrician or HVAC pro?
Call an electrician for hardwired connections, unsafe or old wiring, and when a dedicated circuit is required. Call HVAC pros for new duct routing through attics, roof penetrations, makeup air systems, or if the hood's blower exceeds about 400 CFM and local rules may apply.
Final Recommendation / Decision Guide
If the new hood matches the old hood in size, collar, and power, proceed with a DIY swap following the checklist. If you must change ducting, move location, add ceiling support, or alter wiring, hire licensed professionals and secure permits to ensure a safe, code‑compliant outcome.
