
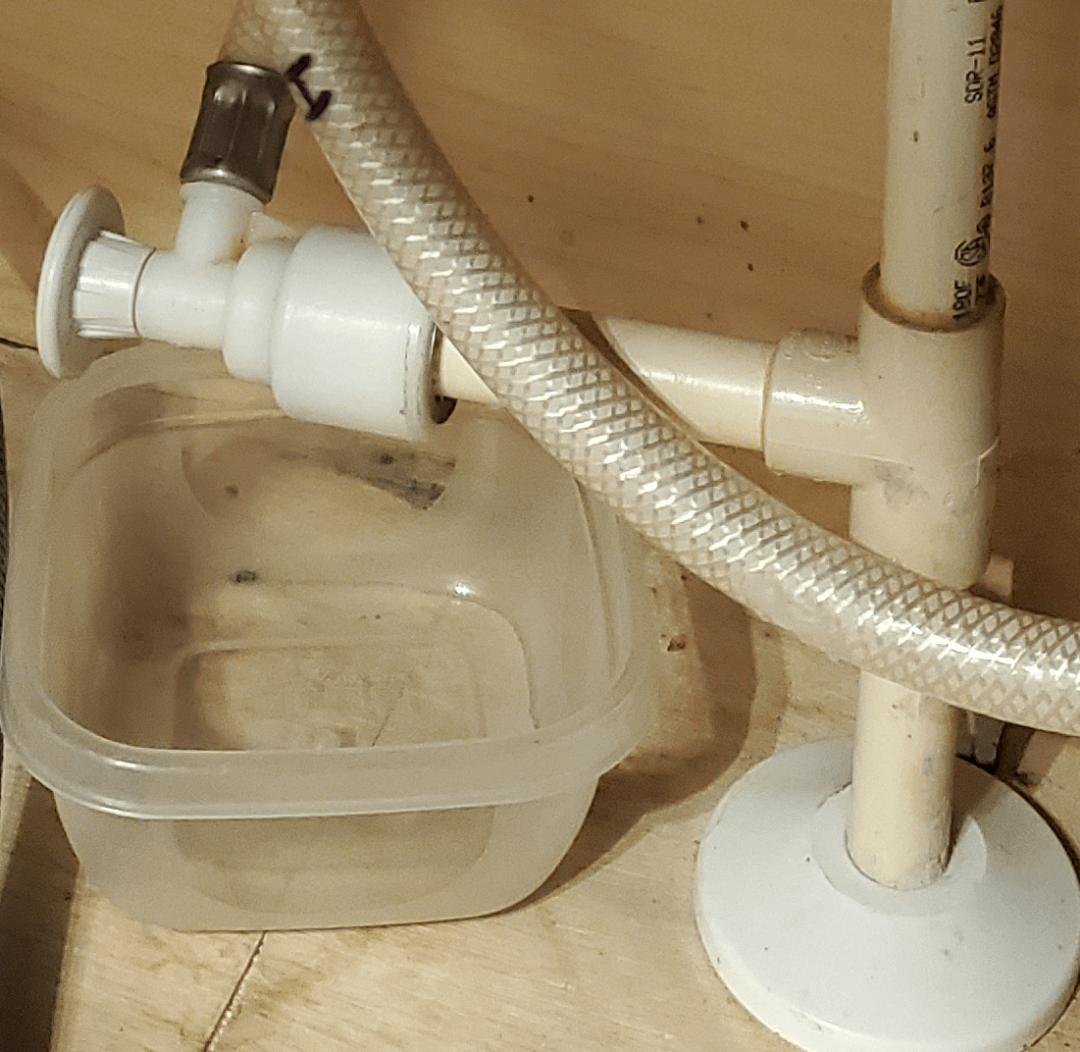
Discovering water pooling beneath your kitchen sink, even after the tap has been switched off, is a perplexing issue. It’s natural to assume that once the water supply is cut, the dripping stops, but a persistent leak in this scenario points to a problem beyond simple usage. These seemingly minor leaks can lead to significant water damage, mold growth, and escalating repair costs if left unaddressed. Understanding the specific reasons why water continues to escape when the main flow is stopped is crucial for a swift and effective resolution.
This guide will demystify why this confusing leak occurs and provide actionable, expert-backed solutions. We’ll delve into the common culprits, guide you through identifying the precise source, and equip you with the knowledge to perform immediate fixes, or know when it's time to call in the professionals.
Pinpointing the Source: Why Water Lingers When the Tap is Off
When water continues to leak from under your kitchen sink after the main tap is shut off, it indicates an issue with the plumbing system's integrity or its components that hold residual water or fail to seal properly. It's not about new water entering the system, but rather about existing water finding an escape route from within the pipes or fixtures themselves.
The Role of Residual Water and Trapped Pressure
Even after turning off the water supply valves, a certain amount of water remains in the pipes between the shut-off valve and the faucet assembly, as well as within the faucet’s internal workings. If seals or washers within the faucet or the connected supply lines are compromised, this trapped water can slowly escape. Think of it like a squeezed sponge – it will continue to drip long after you stop applying pressure.
Faulty Shut-Off Valves: A Common Culprit
While you believe the water is off, the shut-off valve itself might be faulty. If a valve doesn't seal completely, a small trickle of water can still pass through. This is especially true for older or worn-out valves. Over time, internal components can corrode or accumulate debris, preventing a tight seal. This allows a slow leak to persist.
Issues with the Faucet Assembly
The faucet itself contains several internal components, including cartridges, stems, and O-rings, designed to control water flow and prevent leaks. If any of these parts are worn, cracked, or improperly seated, they can allow water to seep out even when the handle is in the off position. A leaky faucet cartridge is a frequent cause of continuous dripping.
Problems with Supply Lines and Connections
The flexible supply lines that connect your shut-off valves to the faucet can also be a source of leaks. Over time, their rubber or braided exterior can degrade. Connections at the faucet shank or the valve can also loosen slightly due to vibrations or thermal expansion/contraction, creating a pathway for residual water to escape.
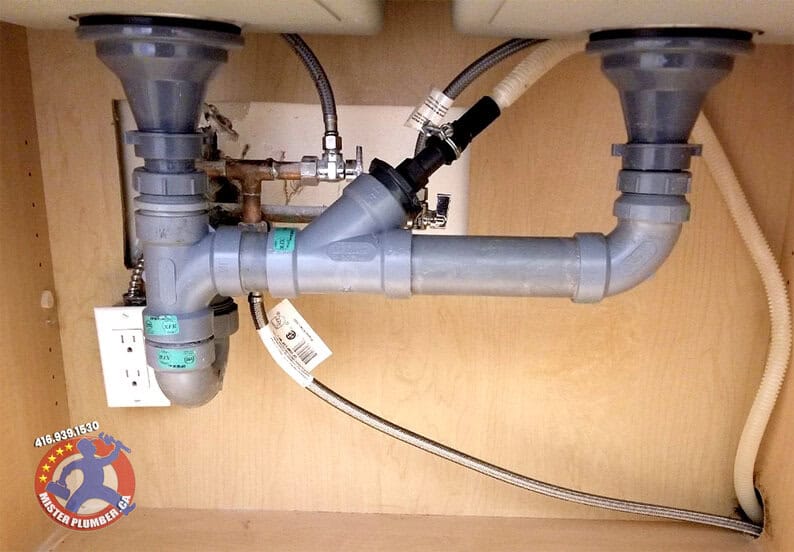 Persistent drips from under the sink reveal an ongoing plumbing issue.
Credit: www.misterplumber.ca
Persistent drips from under the sink reveal an ongoing plumbing issue.
Credit: www.misterplumber.ca
Investigating the Leak Source: Your Step-by-Step Diagnostic Guide
Before attempting any repairs, precise identification of the leak’s origin is paramount. This diagnostic phase is often the most critical, as misidentifying the source can lead to wasted effort and potentially worsen the problem.
Thorough Visual Inspection Under the Sink
Begin by clearing everything out from under your kitchen sink to ensure unobstructed access. Use a bright flashlight to meticulously examine every pipe, fitting, and connection. Look for:
- Wet Spots: Trace any visible moisture to its source. Even small puddles or damp areas on cabinet walls or the floor can indicate a leak.
- Corrosion or Rust: Pitted or discolored pipes and fittings are signs of age and potential weakness, often preceding actual leaks.
- Drip Marks: Look for streaks or water stains running down pipes, which are tell-tale signs of past or present drips.
Pay close attention to the shut-off valves, the hot and cold water supply line connections to the faucet, the drain pipe assembly, and any connections to appliances like dishwashers or garbage disposals.
The Paper Towel Trick for Pinpointing Hidden Drips
This simple, yet effective method can help locate slow leaks that are difficult to see. After drying all visible components thoroughly with a paper towel or clean cloth, wrap dry paper towels around each joint or suspected leak area. Run the water briefly for a few seconds and then immediately shut it off. If a leak is present, the paper towel will reveal the exact spot where moisture is seeping through. This is particularly useful for identifying very slow drips from threaded connections.
Checking Faucet and Water Supply Components
Since the leak occurs when the water is off, focus your inspection on components related to the water supply and the faucet assembly itself:
- Shut-Off Valves: Examine the base of the hot and cold water shut-off valves where they connect to the wall pipes and where the supply lines attach. Any weeping here indicates a valve or connection issue. Learn more about how to install shut off valve under kitchen sink for future reference.
- Supply Lines: Inspect the entire length of the flexible supply lines forcracks, fraying braided metal, or signs of wear.
- Faucet Base and Connections: Check where the supply lines connect to the underside of the faucet body. O-rings or seals in these connections can fail. Also, inspect the escutcheon plate where the faucet mounts to the sink, though leaks here usually manifest when water is on.
The Significance of Drips from the Aerator or Sprayer Hose
Sometimes, persistent drips originate from the faucet itself, even when off. While a leaky aerator (the tip of the spout) is usually apparent when water flows, persistent drips from within the faucet body, or from the sprayer hose connection, indicate an internal issue. A compromised diverter valve, which directs water to the sprayer, or a damaged sprayer hose can retain water and leak slowly.
Essential Tools and Materials for Leak Repair
Having the right tools and materials readily available can turn a potentially frustrating repair into a manageable DIY task. For most common leaks under the kitchen sink, you won't need highly specialized equipment, but a few key items will streamline the process.
Core Plumbing Hand Tools
- Adjustable Wrench or Pipe Wrench: Essential for gripping and turning hexagonal nuts on supply line fittings and pipe connections.
- Basin Wrench: Specifically designed for faucet nuts and difficult-to-reach connections under sinks, this tool is invaluable.
- Channel-Lock Pliers (Slip-Joint Pliers): Useful for gripping larger pipes or odd-shaped fittings, and for providing leverage.
- Screwdriver Set: A Phillips and flathead screwdriver may be needed for disassembling certain faucet components or dealing with appliance connections.
- Bucket or Shallow Pan: Crucial for catching any residualwater when disconnecting pipes or fittings.
- Utility Knife or Pliers: For cutting old plumber's tape or removing stubborn seals.
Sealing and Replacement Materials
- Plumber's Tape (PTFE Tape/Teflon Tape): A critical item for sealing threaded pipe connections. Ensure you have a fresh roll, as it's single-use for effective sealing.
- Pipe Joint Compound (Thread Sealant): An alternative or supplementary sealant for threaded connections, particularly on metal pipes.
- Replacement Washers and O-Rings: Having a small assortment of common plumbing washers and O-rings can save a trip to the hardware store if you discover a worn-out seal. Many leaks when water is off are due to these simple rubber components.
- Replacement Supply Lines: If your existing supply lines are old, cracked, or kinked, it’s best to replace them entirely. Modern braided stainless steel lines are durable and reliable.
Safety and Cleaning Supplies
- Gloves: Protect your hands from grime, potential leaks of old water, and any sharp edges.
- Safety Glasses: Essential to shield your eyes from potential debris or splashes, especially when loosening connections.
- Dry Rags or Paper Towels: For drying components, cleaning up spills, and the paper towel trick.
- Flashlight or Headlamp: Adequate lighting is non-negotiable for working in the confined, often dark, space under the sink.
Quick Fixes for Common Leaks When Water is Off
Once you've identified the source, you can implement these straightforward fixes. Remember to always turn off the water supply at the shut-off valves before starting any repair. If you're unsure about any step, especially with complex plumbing, consulting a professional is always the safest option.
Tightening Loose Connections
Often, the simplest solution is the correct one. Many leaks occur because fittings have vibrated loose over time.
- Locate the Loose Fitting: Identify the nut or connector where you see moisture.
- Gently Tighten: Using an adjustable wrench or basin wrench, carefully tighten the fitting. Turn it clockwise.
- Avoid Overtightening: Apply firm pressure but do not force it. Overtightening can strip threads or crack plastic fittings, creating a worse problem.
- Test: Dry the area thoroughly. Turn the water supply valves back on slowly and observe for immediate leaks.
Replacing Worn Washers and O-Rings
These small rubber or neoprene components are the silent heroes of plumbing, creating watertight seals. When they degrade, crack, or become compressed, they fail to seal, leading to drips. This is a very common cause for leaks when the water is turned off because the residual water will still find its way through failed seals.
- Disassemble the Fitting: Carefully loosen and remove the nut or component that houses the washer or O-ring. You may need to disconnect a supply line or unscrew part of the faucet stem.
- Remove the Old Seal: Gently pry out the old washer or O-ring with a small screwdriver or pick. Note its position and orientation.
- Clean the Seating Area: Ensure the internal surfaces where the seal sits are clean and free of debris or old sealant.
- Install the New Seal: Place the new washer or O-ring into position. Ensure it is seated correctly and flush.
- Reassemble: Tighten the fitting securely, but again, avoid overemphasizing.
Sealing Threaded Connections with Plumber's Tape
When supply lines or pipe nipples connect via threads, plumber's tape is essential for creating a watertight seal. If the tape is damaged, absent, or improperly applied, leaks can occur.
- Disconnect the Fitting: Unscrew the threaded connection you suspect is leaking.
- Clean the Threads: Remove all old plumber's tape, sealant, and debris from both the male and female threads.
- Apply New Plumber's Tape: Wrap the plumber's tape clockwise around the male threads (the part that screws in) 3-4 times, ensuring it is snug and covers the threads without bunching.
- Reassemble: Screw the fitting back together by hand until snug, then use a wrench for a final tightening (about a quarter to a half turn past hand-tight is usually sufficient).
Addressing Leaky Faucet Cartridges or Stems
If you suspect the leak originates from the faucet body itself and not the supply connections, the internal cartridge or stem may be the issue. This repair is slightly more involved and varies greatly by faucet model.
- Identify Your Faucet Model: This is crucial for obtaining the correct replacement parts. Look for a brand name or model number on the faucet itself or check your home's original documentation.
- Turn Off Water Supply: Ensure both hot and cold shut-off valves are fully closed.
- Disassemble Faucet Handle: Remove decorative caps and screws to access the faucet handle.
- Remove Escutcheon and Retaining Nut/Clip: Expose the faucet cartridge or stem.
- Replace Cartridge/Stem: Carefully remove the old cartridge or stem and install the new one, ensuring it's oriented correctly.
- Reassemble Faucet: Reverse the disassembly steps to put the faucet back together.
- Test: Slowly turn the water supply valves back on and check for leaks.
Maintaining Your Undersink Plumbing for Long-Term Dryness
Preventing future leaks under your kitchen sink is as important as fixing current issues. Regular maintenance can save you time, money, and the hassle of emergency repairs. Staying ahead of potential problems is key to protecting your home from water damage.
Scheduled Inspections Are Key
Make it a habit to perform a quick visual inspection under your sink at least once every few months. This doesn't require special tools, just a few minutes and good lighting. Look for any signs of moisture, discoloration, corrosion, or new drips. Also, check the condition of your supply lines for any signs of wear or bulges. A proactive approach can catch]
