
If you're fixing leaking pcv pipe under kitchen sink cabinets, you're almost certainly dealing with a drain leak, not a burst supply line. "PCV" is a common search misspelling. The white plastic under most sinks is PVC (polyvinyl chloride), and it carries wastewater out through a P-trap and trap arm.
Most US kitchen drains use 1-1/2 inch Schedule 40 PVC joined with slip nuts and tapered rubber washers. Water tracks along pipe undersides before it drops, so the puddle on your cabinet floor rarely sits directly under the failed joint. Find the real drip point first, and you'll skip buying parts you don't need.
Quick Answer
Fixing leaking pcv pipe under kitchen sink drains starts at the wettest joint. Most failures are worn slip joint washers or loose nuts. Dry the pipes, run water, and watch where drips begin.
Replace the washer or tighten the nut by hand plus one quarter turn. Call a plumber if the trap body is cracked.
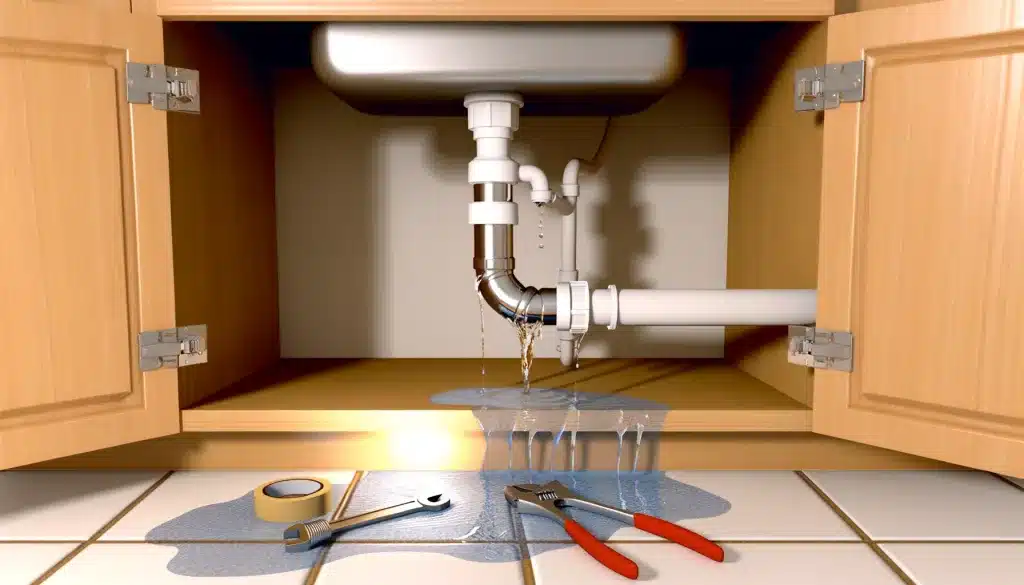
Image source: Web (Bing) / storage.googleapis.com (Web image (fair-use with source credit))
Why Water Under Your Kitchen Sink Isn't Always a "PVC Pipe" Leak
That white pipe under your sink is part of the drain system, not the clean water supply. If you've ever wondered whether all under-sink pipes carry drinking water, the answer is no. Hot and cold supply lines feed the faucet.
Everything below the strainer handles dirty water only.
A leaking PVC drain rarely sprays. It weeps, drips, or runs in a thin stream along the pipe belly. You might see water on the trap arm while the failure sits two joints higher.
Here's what you're usually looking at:
| Component | What it does | Common leak sign |
|---|---|---|
| Basket strainer | Seals sink to tailpiece | Drip from strainer nut when sink is full |
| Tailpiece | Vertical pipe from sink | Steady drip at top slip joint |
| P-trap (J-bend) | Holds water seal against sewer gas | Drip at curved section or slip nut |
| Trap arm | Horizontal run to wall drain | Weeping at wall connection |
| Disposal outlet | Connects disposal to trap | Leak only when disposal runs |
Per International Plumbing Code fixture trap requirements, every kitchen sink needs a P-trap. That U-shaped bend keeps a water seal that blocks sewer gas from entering your home. If you smell rotten eggs after opening the trap, work quickly and reinstall it.
The leak fix and the odor fix often share the same gasket.
Pinpoint the Drip Before You Turn a Nut: The 10-Minute Leak Test
Don't grab channel-lock pliers yet. Aggregate repair reports show most failed DIY attempts start with guessing the wrong joint. A 10-minute test beats a 45-minute reassembly.
Prep the cabinet. Pull everything out. Lay towels down. Set a bucket under the P-trap.
Wear gloves. Drain water is not clean.
Dry every visible pipe surface. Use a paper towel on each joint. Any fresh wetness after drying tells you where to focus.
Run these tests in order:
- Faucet only. Run cold water for 30 seconds. No leak? Move on.
- Plugged sink test. Stop the drain, fill the bowl, then pull the plug. A tailpiece or strainer leak shows up here.
- Disposal test. Run the disposal with water flowing. Leaks at the disposal outlet or dishwasher barb appear now.
- Dishwasher cycle. If connected, run a drain cycle. A loose hose clamp causes drips only during this step.
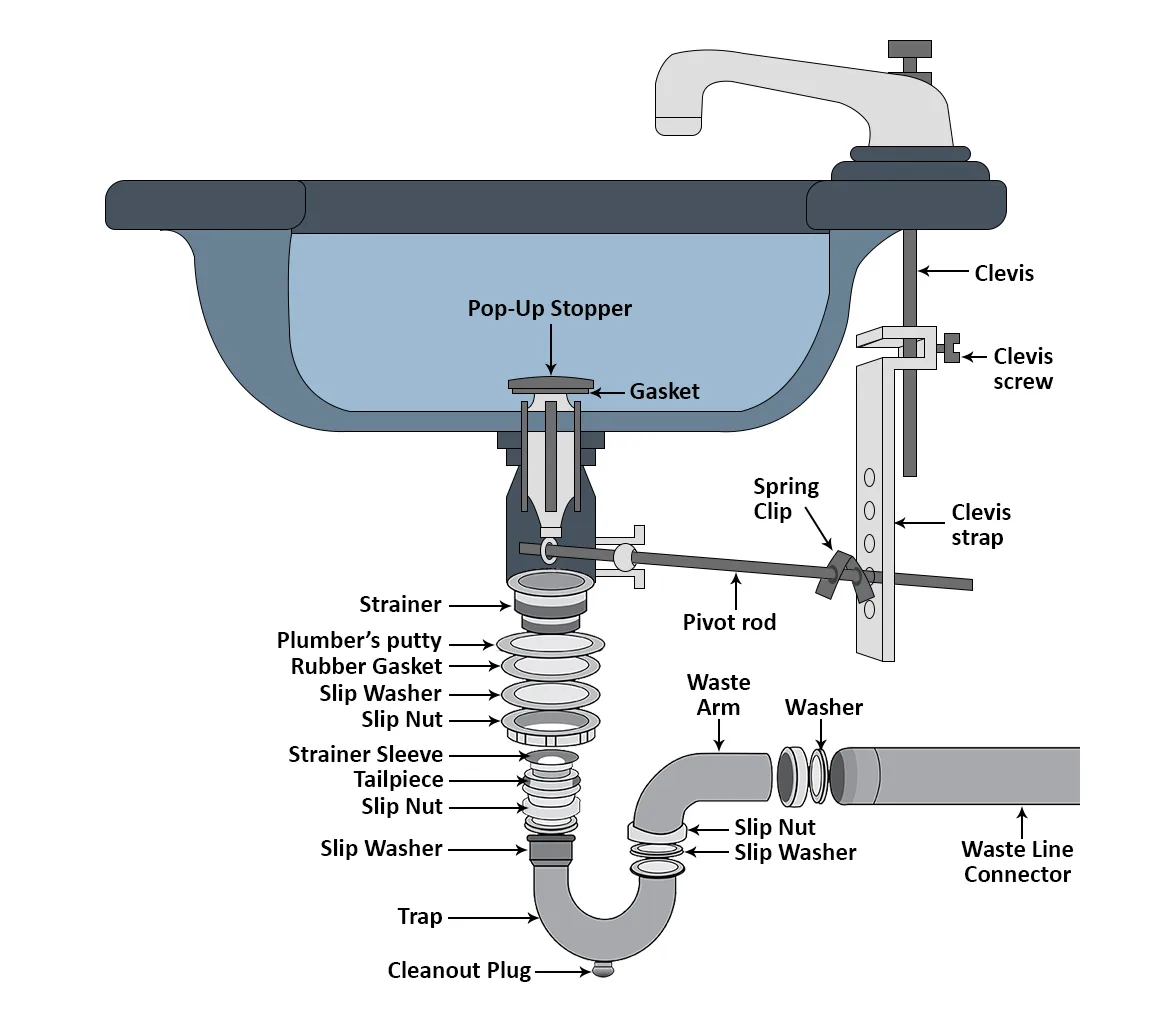
Image source: Web (Bing) / storage.googleapis.com (Web image (fair-use with source credit))
Paper-towel wrap trick. Wrap one joint at a time with a dry paper towel secured by a rubber band. Run your test. The first towel that gets wet marks your leak zone.
If water tracks along the pipe but every joint looks dry, check the basket strainer nut from above. Fill the sink and look underneath with a flashlight. Strainer leaks hide well because water runs down the tailpiece exterior.
Match the Wet Spot to the Fix: Slip Joints, P-Trap, Tailpiece, or Disposal?
Once you know where the drip starts, the repair path gets straightforward. Match your wet spot to the branch below.
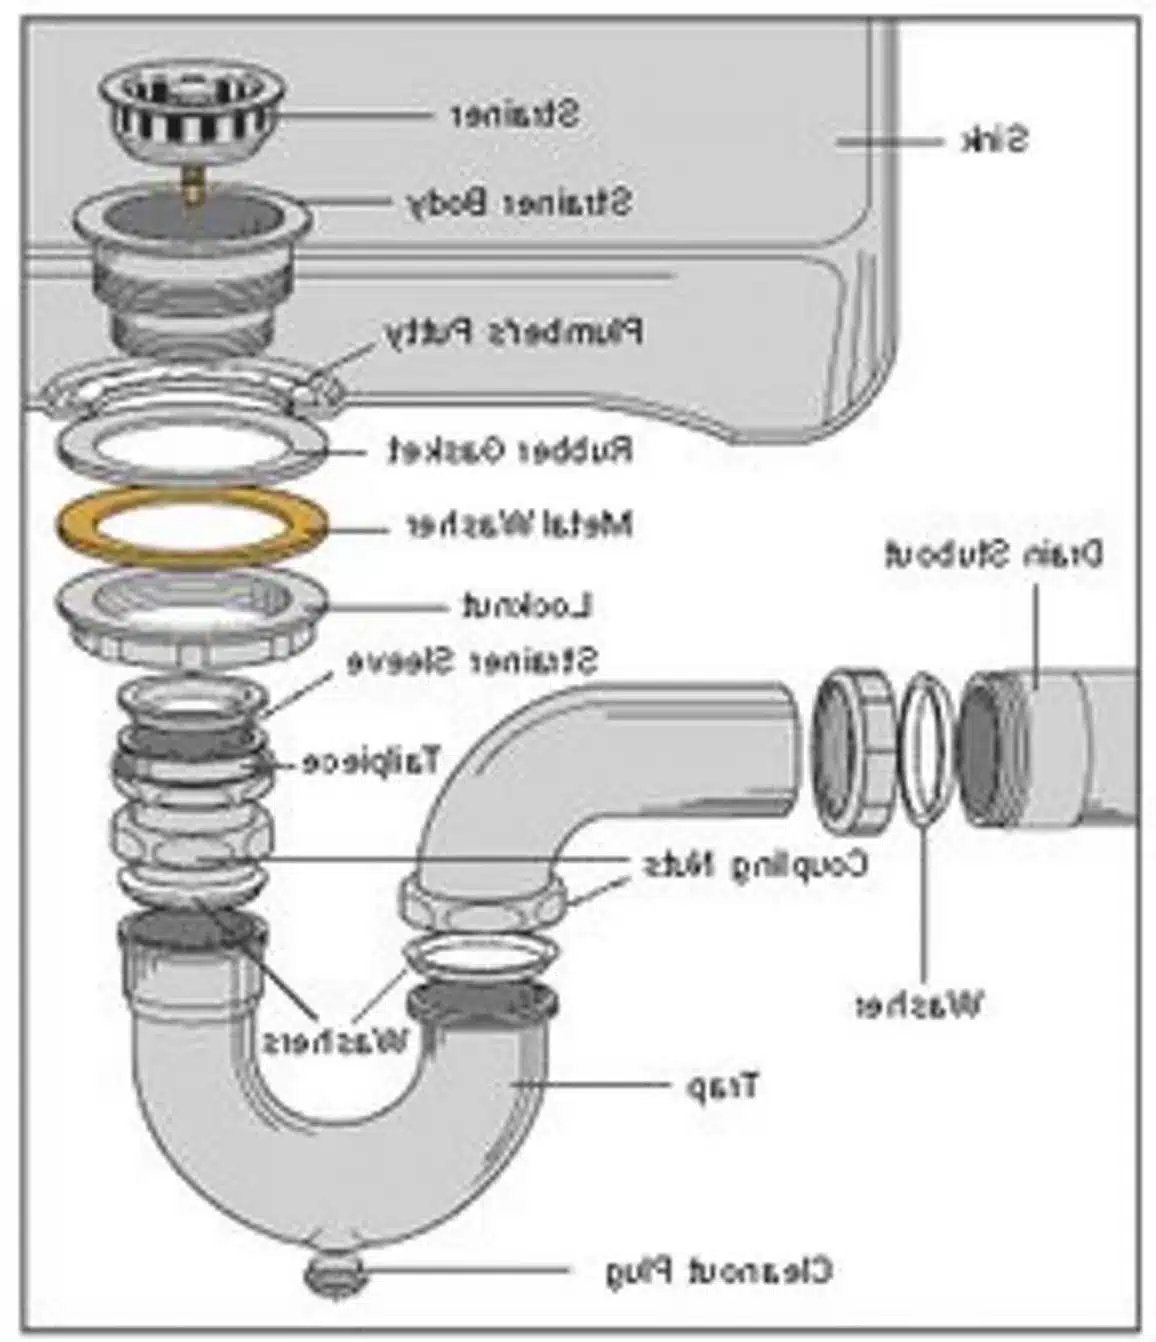
Image source: Bing (Web (fair-use with source credit))
Leak at a slip nut or gasket
If water beads at a chrome or white slip nut, then the tapered rubber washer inside is the prime suspect. These washers flatten and harden over time, especially in hard-water areas as of 2026.
You'll see the drip right at the nut threads or on the pipe directly below the joint. The fix is usually a new washer, not a new trap.
Leak at the tailpiece or basket strainer
If water appears where the tailpiece meets the sink, then check two spots. The slip joint at the trap end, and the large strainer locknut under the sink bowl.
Strainer leaks drip when the sink holds water. Tailpiece slip joint leaks can drip constantly once the joint weeps.
Leak at the P-trap body or trap arm
If the curved trap itself is wet along the belly, then inspect for hairline cracks. Plastic traps crack from overtightening or stress from misalignment.
If only the trap arm-to-wall joint leaks, then try a new washer first. A full trap kit runs roughly $8 to $25 if the body is cracked.
Leak at the garbage disposal or dishwasher connection
If the drip starts only when the disposal runs, then the disposal drain outlet gasket or slip joint needs attention.
If it only wets during a dishwasher drain cycle, then check the hose clamp at the disposal barb or air-gap connection. A backed-up dishwasher line can force water out of a weak joint, so keeping the filter clear reduces strain on that hose.
Leak at a glued (solvent-weld) PVC joint
If the pipe is glued with no slip nut, then you're past a simple washer swap. Glued Schedule 40 joints fail from age, movement stress, or a skipped primer step.
A weeping glued joint usually means cutting out the section and re-cementing. Manufacturer specs from Oatey list roughly 2 hours for handling strength and about 24 hours for full cure on PVC cement.
How to Fix Each Leak Type Without Replacing What Still Works
You don't need to swap the whole drain assembly for every drip. Start with the smallest fix that matches your leak type.
Tools and materials you'll likely need:
| Item | Why you need it |
|---|---|
| Channel-lock pliers | Slip nut tightening (10 to 12 inch works well) |
| Bucket and towels | Catch trap water and protect cabinet |
| Replacement slip joint washers | Most common fix ($1 to $5 per pack) |
| P-trap kit (optional) | Only if the trap body is cracked |
| Flashlight | See joints in a dark cabinet |
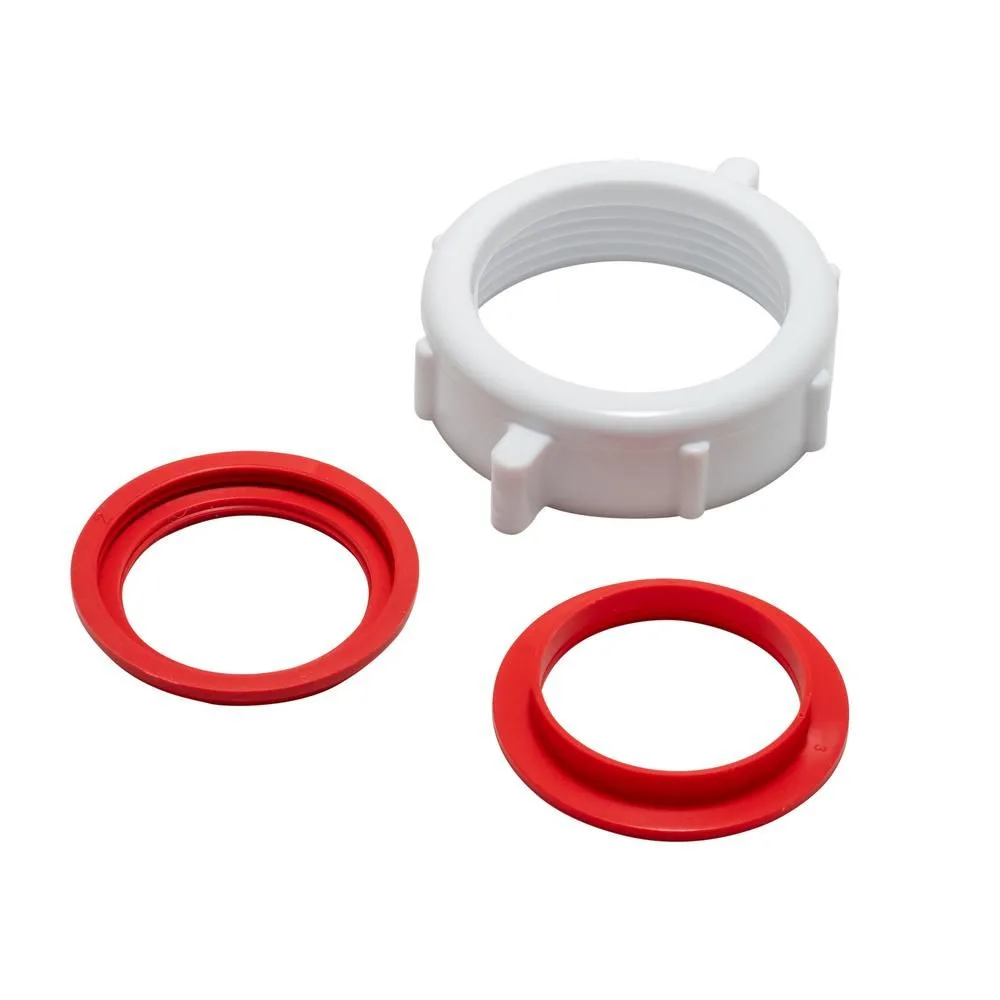
Image source: Web (Bing) / storage.googleapis.com (Web image (fair-use with source credit))
Slip joint washer replacement (most common fix):
- Place the bucket under the trap.
- Loosen the slip nut at the leaking joint. Some water will spill out.
- Slide the nut back. Pull the pipe apart gently.
- Remove the old washer. Note which way the tapered face pointed.
- Seat the new washer with the taper facing the correct direction (toward the pipe end it seals against).
- Rejoin the pipes. Hand-tighten the nut, then add about one quarter turn with pliers.
Strainer leak fix: From above, tighten the strainer locknut with a spud wrench or pliers on the strainer body while holding the nut from below. If the gasket is hardened, replace the strainer assembly.
Disposal outlet fix: Disconnect the trap from the disposal. Replace the rubber gasket at the disposal drain flange. Reconnect and run water through the disposal.
When to replace the whole trap: Swap the P-trap only if you see a visible crack, crushed section, or stripped threads. Otherwise, a fresh washer set costs far less and takes 15 to 20 minutes.
After any repair, run a 24-hour drip check. Leave paper towels under each joint overnight. One dry morning beats discovering swollen cabinet flooring a week later.
If your dishwasher has been draining slowly, a vinegar and baking soda flush can ease pressure on the shared drain line while you confirm the repair holds.
Overtightening, Backward Washers, and Other Expensive DIY Mistakes
The fastest way to turn a $3 washer job into a $20 trap kit is cranking a plastic slip nut until it cracks. Aggregate DIY feedback shows this pattern again and again.
Overtightening plastic slip nuts. Hand-tight plus one quarter turn is the rule for plastic nuts. More torque does not mean a better seal. It means cracked threads or a split trap collar.
Backward washer installation. Tapered slip joint washers have a beveled face. Install it facing the wrong direction and the joint weeps forever. Before you reassemble, compare the old washer's orientation to the new one.
Replacing the wrong part. A drip at the disposal outlet does not mean the P-trap is bad. Match the wet joint to the fix branch above before you buy anything.
Skipping the dry-and-test step. Tightening every nut blindly often creates new leaks at joints that were fine. One targeted fix beats disturbing four good connections.
Working right after drain cleaner. If someone poured chemical drain opener recently, wear eye protection and avoid splashing. Give the trap a thorough flush before disassembly.
Ignoring a chronic drip. A slow leak that leaves your dishwasher smelling off is often the least of it. Cabinet particleboard swells fast. Mold follows within days in a dark, warm space.
Accordion trap patch jobs. Flexible accordion traps hide pinhole leaks at the folds. Wrapping them in tape buys hours, not years. Replace with a rigid PVC trap kit for a lasting seal.
When to call a plumber instead. Call a pro if the leak sits on a glued joint you can't easily cut out, if supply lines are spraying, or if tightening and washer swaps fail twice at the same spot. That usually signals misalignment or a cracked hidden fitting that needs a proper repipe, not another gasket.
Repair Costs, Timelines, and Your DIY-vs-Plumber Decision
Most under-sink drain fixes land on the cheap end of home repair. The real question is whether you're staring at a $3 washer or a cracked glued fitting behind the wall.
Typical part costs:
| Repair type | Parts cost | DIY time |
|---|---|---|
| Slip joint washer swap | $1 to $5 | 15 to 30 min |
| Full P-trap kit | $8 to $25 | 30 to 45 min |
| Strainer gasket/assembly | $10 to $30 | 45 to 60 min |
| Disposal drain gasket | $5 to $15 | 30 to 45 min |
| Glued PVC cut-and-replace | $10 to $20 | 2 to 24 hr cure |
A plumber service call for a simple trap repair typically runs $100 to $250 or more depending on your region and after-hours timing. If the leak is a worn washer at a slip nut, DIY wins on cost every time.
When DIY makes sense: You found the exact wet joint, the pipe isn't cracked, and the connection uses slip nuts. Budget 15 to 45 minutes plus a hardware store run.
When to call a pro: The trap body is cracked, the same joint leaks twice after fresh washers, or the failure sits on a glued joint you can't reach without cutting cabinet or wall access. Supply line spraying is a different problem entirely. That's pressurized clean water, not drain repair.
Timeline reality check: Slip joint repairs hold immediately once reassembled. Glued PVC needs about 2 hours before you can run water through it, per manufacturer cement specs. Full cure takes roughly 24 hours.
Plan an overnight towel test either way.
Renters should check lease terms before tearing into plumbing. Some landlords cover drain repairs. Others expect you to report leaks promptly to avoid cabinet damage claims.
A photo of the wet joint before and after repair protects both sides.
While you're under there, glance at your Bosch or other dishwasher filter setup. A slow drain upstream can push water out of weak joints during heavy discharge cycles.
FAQs: Leaking PVC Drain Pipe Under the Kitchen Sink
Is a leaking PVC pipe under the sink an emergency?
Not usually, but don't ignore it. A slow drip won't flood your kitchen overnight. It will swell cabinet flooring and invite mold within days.
Place a bucket, run your leak test, and fix it within 24 to 48 hours.
Can I just tighten the slip nut to stop the leak?
Sometimes, if the nut loosened from vibration. Hand-tighten, then add about one quarter turn. If it still weeps, the washer inside is likely worn.
Overtightening a plastic nut often cracks the trap.
Why does my sink leak only when the garbage disposal runs?
That points to the disposal drain outlet or the dishwasher hose barb. Water pressure shifts when the disposal pumps. Check the gasket at the disposal flange and the hose clamp on the dishwasher connection.
Do I need PVC primer and cement for every under-sink leak?
No. Most kitchen drain leaks happen at slip joints sealed with rubber washers. Primer and cement are only for glued Schedule 40 joints with no slip nut.
Those repairs take longer because the cement needs hours to cure.
How do I know if the P-trap or the tailpiece is leaking?
Run the plugged-sink test. Fill the bowl, then pull the plug. Tailpiece and strainer leaks show up under heavy flow.
A constant drip at the trap curve with the faucet running only points to the P-trap or its slip joints.
Should I replace the whole drain assembly or just the washer?
Replace only what's failed. A weeping slip nut almost always needs a new washer, not a full assembly swap. Replace the P-trap body only if you see a crack, crush, or stripped threads.
That's the cheapest path that actually lasts.
