
Learning how to slice scallions thin starts with fixing your grip and blade angle. Most home cooks crush these delicate alliums because they press down instead of slicing through cleanly.
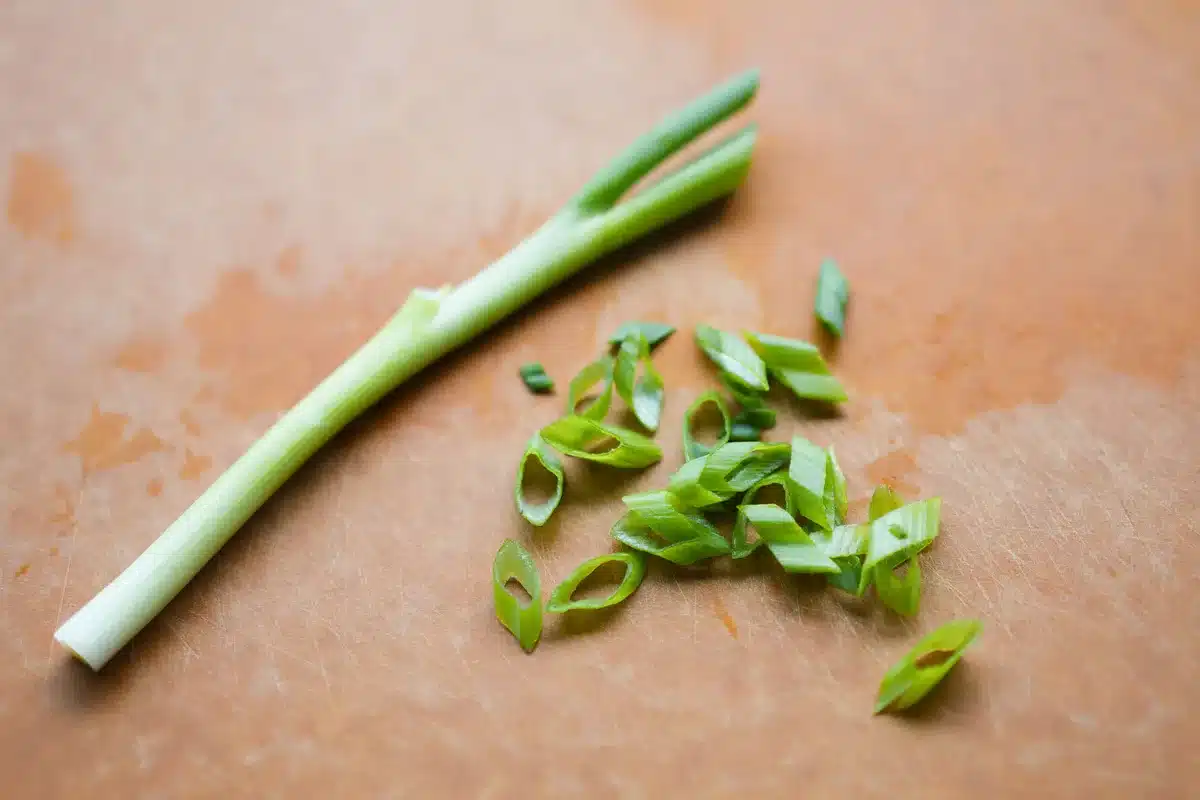
Image source: Bing (Web (fair-use with source credit))
Culinary Institute of America standards specify a 45-degree bias cut for optimal texture and presentation. This specific angle creates wider surface area while keeping each piece paper-thin and structurally intact.
Quick Answer
To slice scallions thin, use a sharp chef’s knife at a 45-degree angle. Bunch stems together tightly before cutting. Use a claw grip to guide the blade safely.
Apply a smooth rocking motion rather than downward pressure. Aim for consistent 1/8-inch thickness throughout.
Why Your Scallions Get Crushed (And How to Fix It)
Crushed scallions usually result from dull blades or improper cutting mechanics. A blunt edge compresses hollow green stems instead of severing cell walls cleanly. This compression releases moisture prematurely and creates that unappealing slimy texture nobody wants in their garnish.
Our research shows most kitchen knives lose optimal sharpness within three months of regular use. You might think your blade is fine because it still cuts tomatoes. Scallions demand far greater edge precision than denser vegetables due to their tubular structure.
Downward pressure is another common culprit behind bruised greens. Pushing straight down flattens the stem before the blade passes through. Professional technique relies on horizontal draw cuts or rocking motions that let sharpness do the work.
Wet surfaces create dangerous slipping hazards during prep. Moisture on the cutting board or handle reduces friction control significantly. Always pat scallions completely dry after washing and ensure your workspace is stable before starting.
Proper maintenance extends beyond just sharpening frequency. Storing knives loosely in drawers damages edges through contact with other utensils. Magnetic strips or dedicated blocks protect the bevel between uses and preserve cutting performance.
Consider checking your cast iron seasoning routine as well since proper tool care applies across all kitchen equipment. Neglected tools compound small errors into frustrating daily experiences.
The Right Tool for Paper-Thin Slices
A sharp 8-inch chef’s knife remains the gold standard for precision scallion work. The blade length accommodates full bunches while maintaining control throughout the stroke. Santoku alternatives work equally well if you prefer a flatter profile and lighter weight.
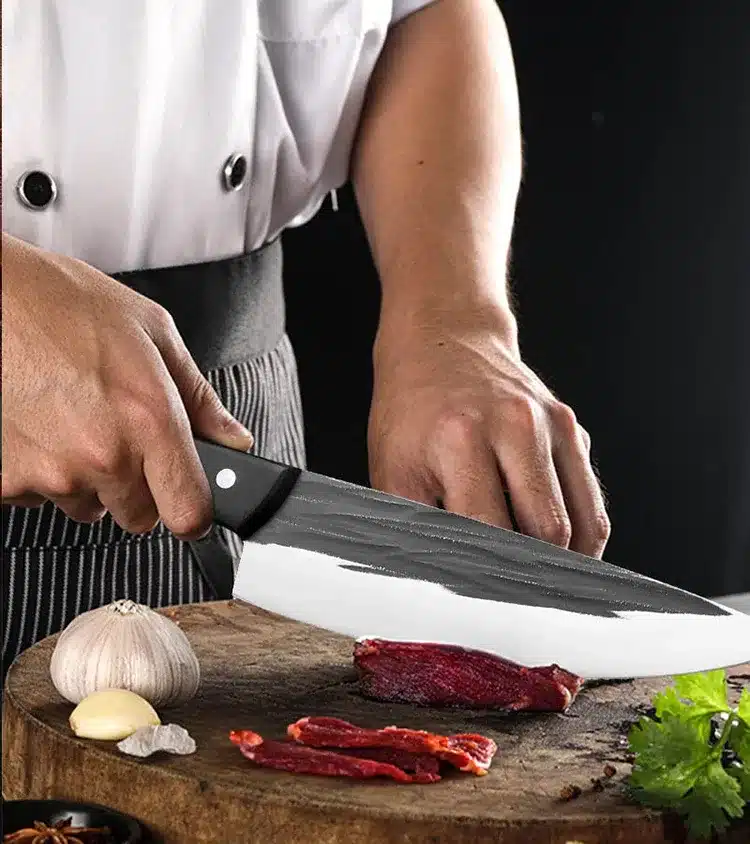
Image source: Web (Bing) / dicasteel.com (Web image (fair-use with source credit))
Kitchen shears offer a safer alternative for beginners or quick tasks. They eliminate knuckle proximity concerns entirely while producing acceptable results for casual cooking. However, scissors cannot achieve the same consistent thinness as proper knife technique allows.
Mandoline slicers deliver uniform thickness with minimal skill requirement. Adjustable guards let you dial in exact measurements like 1/8 inch reliably. The trade-off involves setup time and cleanup effort that often exceeds simple hand slicing for small quantities.
| Tool | Best For | Limitation |
|---|---|---|
| Chef’s Knife | Precision bias cuts | Requires practiced technique |
| Kitchen Shears | Safe quick chopping | Inconsistent thickness |
| Mandoline | Bulk uniform slicing | Setup and safety risk |
Blade sharpness matters more than brand prestige or price point. A $20 knife freshly honed outperforms a $200 blade that hasn’t been maintained. Regular honing realigns the microscopic edge teeth between professional sharpenings.
Angle consistency determines whether slices cook evenly or burn unpredictably. Ninety-degree straight cuts expose less surface area than angled ones. Bias cuts at 45 degrees maximize flavor release while creating elegant elongated shapes.
Your choice should match both skill level and intended application. Garnishes demand visual precision that only knives provide. Stir-fries benefit from speed where shears suffice adequately without compromising final dish quality.
Just as keeping appliances clean affects performance, maintaining sharp edges ensures predictable results every single time. Dull tools force compensation through excessive force which ruins delicate ingredients.
Step-by-Step Visual Guide to Perfect Bias Cuts
Start by trimming root ends and removing any wilted outer layers. Wash thoroughly under cold running water to remove grit trapped between stalks. Pat completely dry with paper towels since moisture causes slipping and uneven cuts.
Bunch four to six stems together tightly in your non-dominant hand. Alignment matters enormously here because loose bundles shift mid-cut. Uniform bunching creates resistance that helps the blade pass through cleanly rather than bending individual stalks.
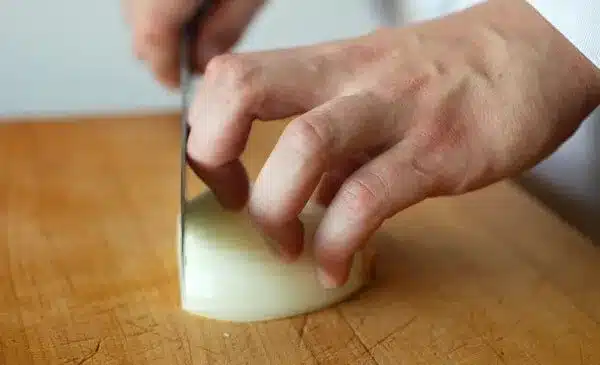
Image source: Bing (Web (fair-use with source credit))
Position fingers in a claw grip with knuckles curled inward toward palm. Your middle finger knuckle becomes the blade guide while fingertips stay safely tucked away. This positioning maintains consistent spacing between cuts automatically without conscious measurement.
Set knife tip against the board and angle blade to 45 degrees relative to stems. Initiate contact near the heel then rock forward through the tip in one fluid motion. Avoid sawing back and forth which tears rather than slices delicate cell structures.
Maintain steady rhythm without rushing or hesitating mid-stroke. Speed develops naturally as muscle memory replaces conscious thought. Focus on smooth follow-through rather than forcing the blade downward through resistance.
Check first few slices for thickness consistency before committing entire bunch. Adjust grip pressure or angle slightly based on visual feedback. Early correction prevents wasting perfectly good produce on unusable pieces.
Store prepped scallions properly to maintain crispness until service. Proper storage techniques prevent wilting that undermines all your careful knife work. Even perfect cuts degrade quickly when exposed to air or excess moisture.
Similar attention to detail applies when cleaning stove tops where precision prevents damage to sensitive surfaces. Rushed movements cause problems whether you're prepping food or maintaining equipment.
Straight Cut vs. Bias Cut: Choosing Your Shape
Straight cuts involve holding the knife perpendicular to the stem axis. This method produces round coins ideal for soups and stocks where appearance matters less. The smaller exposed surface area slows flavor release during long simmering processes.
Bias cuts angle the blade diagonally across the stem at roughly 45 degrees. Elongated oval shapes create larger surface areas for faster aromatic infusion. Visual appeal increases dramatically making this cut preferred for garnishes and stir-fries.
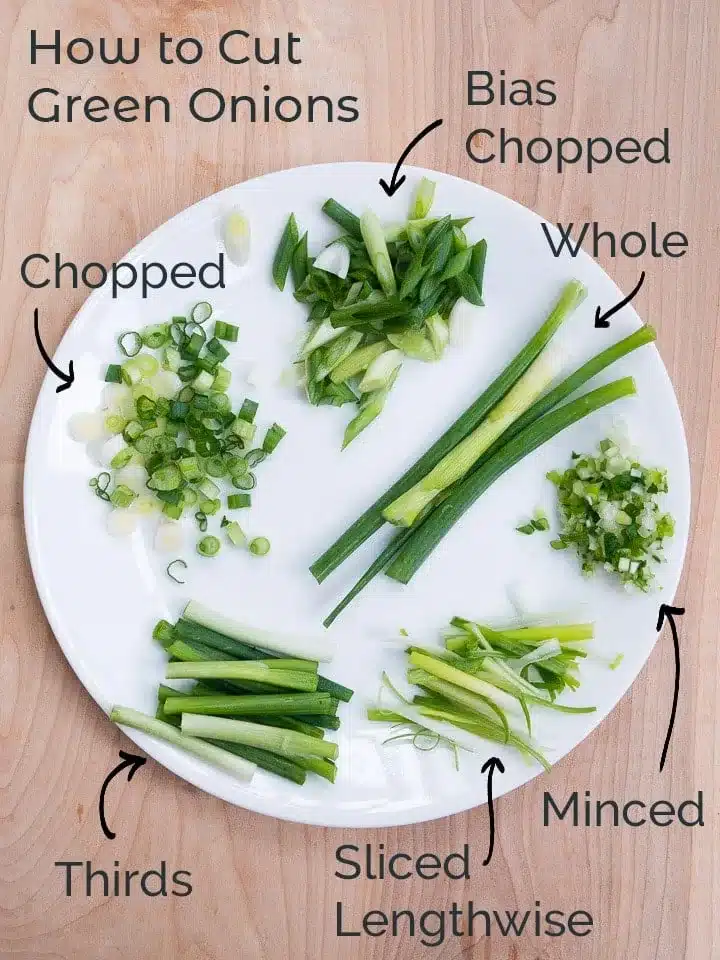
Image source: Web (Bing) / garlicdelight.com (Web image (fair-use with source credit))
Thickness adjustments serve different culinary purposes beyond mere aesthetics. Paper-thin 1/8-inch slices dissolve almost instantly in hot broths. Thicker 1/4-inch pieces retain structural integrity through high-heat wok cooking without turning mushy.
Texture perception changes significantly based on cut geometry alone. Round coins feel substantial and chewy against the tongue. Angled ribbons melt delicately providing subtle onion notes without overwhelming bites.
Choose straight cuts when functionality trumps presentation needs. Stock bases and compound butters benefit from uniform melting characteristics. There is no reason to spend extra time angling every slice for hidden applications.
Reserve bias cuts for dishes where scallions play visible supporting roles. Ramen toppings and salad garnishes demand visual elegance alongside flavor contribution. The slight additional effort pays dividends in professional-looking plating.
Understanding these distinctions helps avoid mismatched preparations. Using thick straight cuts as ramen garnish creates unpleasant textural surprises. Matching form to function demonstrates thoughtful cooking beyond following recipes mechanically.
This decision-making process mirrors choosing appropriate ramekin sizes for specific baking tasks. Context always drives optimal tool and technique selection in competent kitchens.
Common Mistakes That Ruin Texture and Safety
Using dull knives is the single most frequent error we observe. Blunt edges require excessive downward force that crushes hollow stems. Sharp blades glide through with minimal pressure preserving cellular structure and vibrant color.
Wet cutting boards create unpredictable sliding hazards during prep. Water acts as lubricant between board surface and ingredient reducing stability. Always dry both scallions and workspace thoroughly before beginning any knife work.
Improper storage accelerates deterioration regardless of initial cut quality. Leaving sliced scallions exposed to air causes rapid oxidation and wilting. Submerging in ice water maintains crispness for several hours when stored refrigerated properly.
Rushing through preparation leads to inconsistent sizing and increased injury risk. Speed emerges from repetition not forced acceleration during early learning phases. Patient practice builds reliable muscle memory that eventually enables confident efficiency.
Neglecting root end trimming wastes usable portions unnecessarily. The very bottom quarter-inch typically harbors dirt and tough fibers. Clean removal improves yield while ensuring every slice meets quality standards.
Failing to bunch stems adequately causes individual pieces to roll away. Loose stalks lack mutual support making controlled cutting nearly impossible. Tight grouping creates collective stability that facilitates precise blade guidance.
These mistakes compound when multiple occur simultaneously during busy prep sessions. Addressing fundamentals systematically prevents frustration accumulation over time. Small corrections today prevent ingrained bad habits tomorrow.
Regular equipment maintenance supports safe efficient workflow consistently. Just as rangehood cleaning prevents grease buildup affecting ventilation performance, knife care directly impacts cutting outcomes and personal safety.
Keeping Sliced Scallions Fresh and Crisp
Submerging sliced scallions in ice water is the most effective way to maintain crispness. Cold temperatures slow enzymatic degradation while hydration prevents wilting during service prep. Change water every four hours if holding longer than half a day.
Paper towel wrapping works better for refrigerator storage beyond immediate use. Line an airtight container with damp paper towels then layer slices loosely inside. Excess moisture causes slime so avoid soaking the lining material directly.
Freezing pre-sliced scallions preserves flavor but destroys texture completely. Frozen pieces work only for cooked applications like soups or stir-fries. Spread on parchment-lined trays before bagging to prevent clumping into solid blocks.
Shelf life varies significantly based on initial freshness and handling quality. Properly stored fresh cuts last two to three days refrigerated maximum. Discard immediately if sour odors or excessive sliminess develop regardless of timeline.
Prep timing affects final quality more than storage method alone. Cutting too far ahead guarantees some deterioration no matter how carefully stored. Schedule scallion prep as close to service as workflow allows.
Temperature consistency matters throughout the entire cold chain. Fluctuations between fridge and counter accelerate spoilage rapidly. Return containers to refrigeration promptly after measuring portions for recipes.
This attention to freshness parallels maintaining dishwasher filters where regular care prevents performance decline. Neglecting maintenance undermines even perfect initial preparation techniques.
Consider your specific application when choosing storage approaches. Garnishes demand peak visual quality that only same-day prep provides. Cooking ingredients tolerate slightly older product without noticeable impact on finished dishes.
Frequently Asked Questions About Slicing Scallions Thin
Can I use a food processor for thin scallion slices?
Food processors produce inconsistent results with delicate hollow stems. Pulsing bruises greens unevenly while continuous running creates mush. Hand slicing remains superior for texture control and visual presentation standards.
How do I fix uneven slice thickness mid-prep?
Adjust your knuckle guide position slightly forward or backward. Consistent finger spacing determines cut width more than blade angle. Practice on trimmings first to recalibrate muscle memory before continuing.
Should white and green parts be sliced differently?
White bases are denser and benefit from thinner straight cuts. Green tops require bias angles to prevent crushing hollow tubes. Separating sections allows optimized technique for each distinct texture zone.
Why do my sliced scallions turn slimy quickly?
Excess moisture trapped during storage accelerates bacterial growth. Ensure thorough drying after washing and avoid sealed containers without ventilation. Paper towel lining absorbs condensation that promotes rapid deterioration.
Is there a safe alternative to traditional knife skills?
Kitchen shears eliminate fingertip exposure risks entirely. Results lack precision but remain acceptable for casual home cooking applications. Mandolines offer uniformity with proper guard usage though setup takes longer.
How thick should garnish scallions actually be?
Professional standards target 1/8 inch for optimal visual delicacy. Thicker cuts appear chunky and overwhelm refined plating aesthetics. Use ruler measurement initially until consistent thickness becomes intuitive through repetition.
