
A Maytag dishwasher is too loud when the noise stems from a mechanical fault or poor setup, not just the cycle itself. If the unit is vibrating, grinding, or hissing, it is signaling a specific problem.
Manufacturer specs list standard operation around 55 to 60 decibels. Noisy operation often indicates a worn pump seal, blocked drain, or foreign object in the sump. We can pinpoint the cause by listening to each phase of the cycle.
Let’s identify what’s wrong before you spend money on parts.
Quick Answer
A Maytag dishwasher is too loud due to specific mechanical issues. If you hear grinding, check for stuck objects. Humming usually points to the water valve.
Rattling stems from poor rack loading or loose cabinet mounting.
Identify the sound type first. Then isolate the cycle phase. This process usually resolves the noise without a repair call.
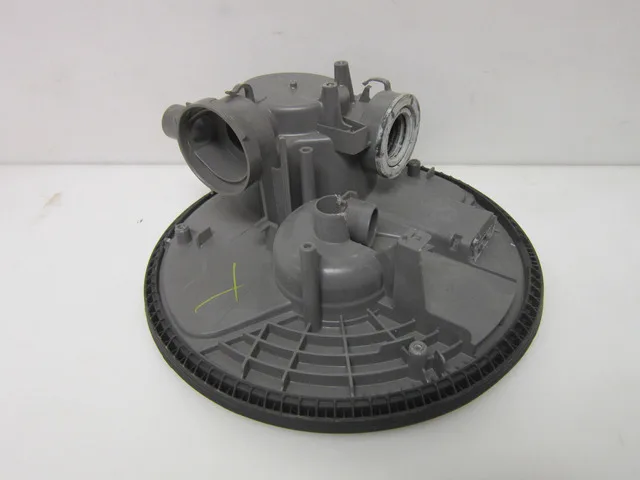
Image source: Bing (Web (fair-use with source credit))
The Noise Diagnostics: Identifying Your Specific Maytag Problem
You need to map the specific sound to its likely source. Different noises indicate different mechanical failures. This is the first step in any home appliance troubleshooting routine.
- Grinding or Scraping: A fork handle, ring, or bone is stuck in the impeller. The motor tries to push against hard objects. This is the most common "too loud" complaint.
- Humming or Vibrating: The unit is not level. Or the water inlet valve is resonating. Loose cabinet mounting screws also cause this buzz.
- Rattling or Clanging: Stemware is touching the spray arms. Or the racks are too full. Glass hitting glass creates a chaotic clatter.
- Hissing or Roaring: Water pressure is too high. Or the sump seal is failing. You might hear a low roar that gets louder during the rinse cycle.
- Clicking: The timer or relay is closing. This is normal. If it happens mid-cycle, the thermal fuse might be tripping.
If you cannot tell the sound apart, move to the next section. Run the isolation test to pinpoint the issue.
The Diagnostic Workflow: Running the "Noise Isolation" Test
We use a three-step process to find the root cause. This method works for any Maytag model.
Step 1: The Visual Sump Inspection
Unplug the unit and shut off the water supply. You need dry access to the bottom of the tub.
- Pull out the bottom rack.
- Twist and lift the filter assembly.
- Look under the impeller. You are checking for glass shards, coffee grounds, or silverware.
- Use a flashlight. You might see a screw or a small ring.
If you find debris, remove it. Then run a short cycle. If the grinding stops, you fixed it.
If not, proceed to the next test.
Step 2: The Spray Arm & Rack Stress Test
Run an empty cycle. Do not add soap. Do not add dishes.
- Listen closely: Is the noise constant? Or does it start and stop?
- Observe the spray arms: They should spin freely. If they hit the dishes, they will slow down.
- Check the rack tines: Bent tines let dishes shift. This causes clattering.
If the noise is intermittent, it is likely a loading issue. If it is constant, suspect the motor or pump.
Step 3: The Cabinet & Leveling Check
Pull the dishwasher forward two to three inches. You need to access the rear feet.
- Use a bubble level on the top of the unit.
- Adjust the front and rear feet. The unit must be level.
- Check the cabinet mounting screws. They should be snug. Not tight enough to warp the frame.
A properly installed appliance reduces vibration significantly. If the floor is uneven, the unit will rock. That rock turns into a rattle.
Maytag-Specific Mechanical Culprits & Fixes
Some parts wear out faster in Maytag units. We’ve seen these fail repeatedly in the field.
The Water Inlet Valve Issue
Symptom: Loud hum during the fill phase only.
- Cause: The solenoid is failing. Or sediment is blocking the strainer.
- Fix: Remove the shut-off valve. Clean the small mesh screen inside. If the hum persists, replace the valve. It is a $30 part. You do not need a pro for this.
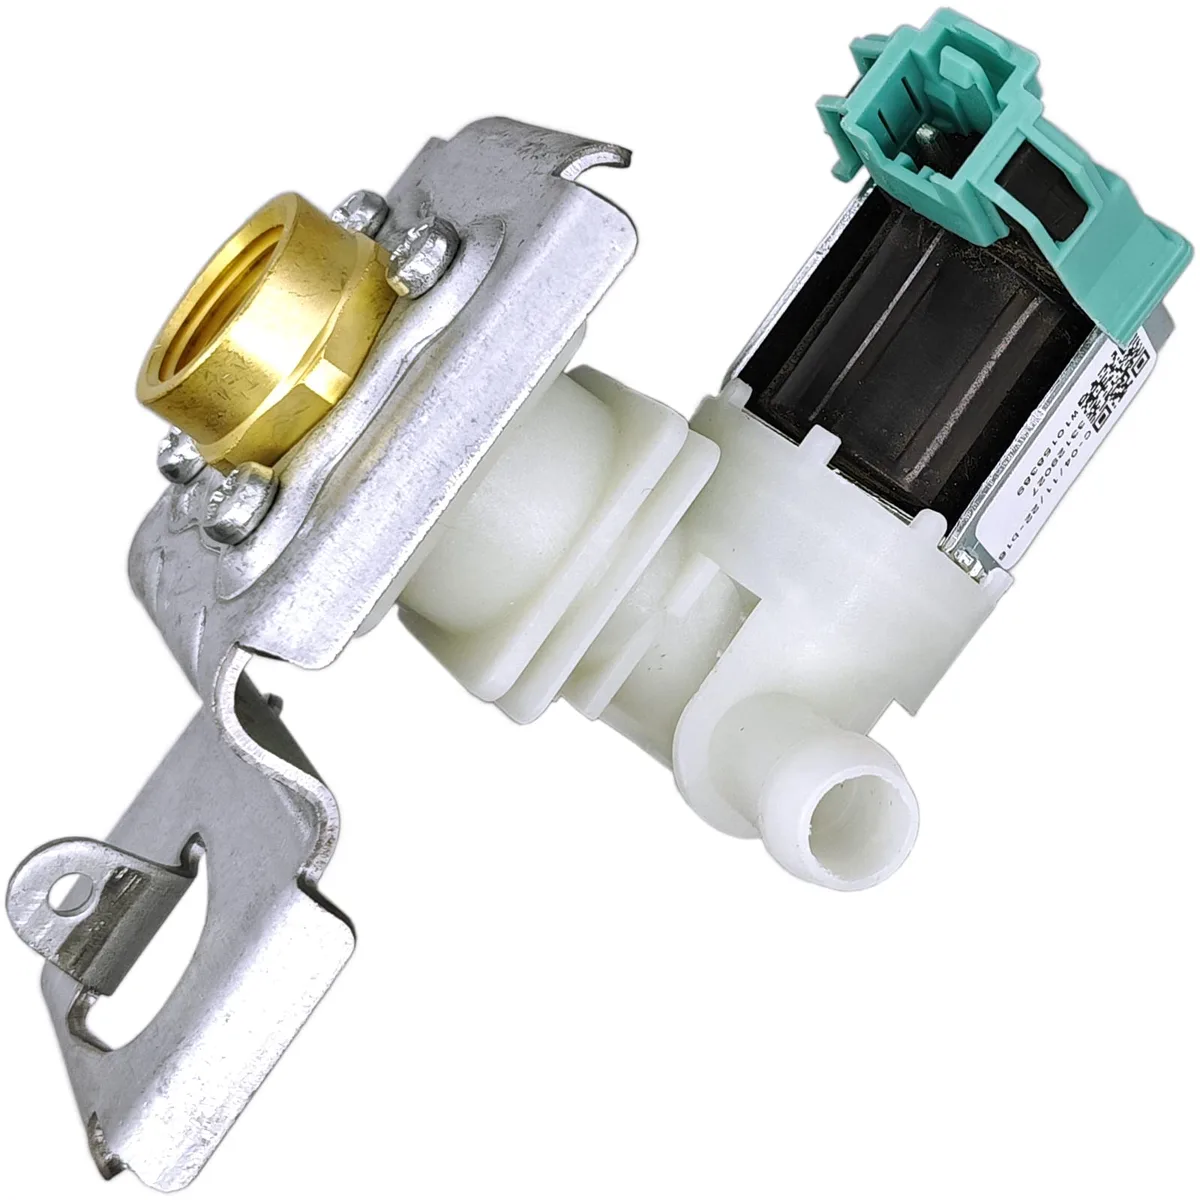
Image source: Web (Bing) / amazon.ca (Web image (fair-use with source credit))
The Sump & Impeller Seal
Symptom: Gurgling or sloshing noise. It gets worse during the rinse cycle.
- Cause: The seal is cracked. Water bypasses the impeller. Air mixes with the water.
- Fix: Inspect the sump base. Look for hairline cracks. If you see them, replace the sump assembly. This is a job for a technician. The part is hard to access.
The Dry Fan & Heater Cycle
Symptom: Buzzing in the last 30 minutes.
- Cause: The fan bearing is worn. Or debris is stuck in the vent.
- Fix: Clean the vent slats at the bottom of the door. If the buzz is mechanical, the motor is dead. Replacement costs about $45.
Loading & Usage Mistakes That Create Noise
How you load the machine matters more than you think. A full rack is not always a good rack.
The "Tall Item" Trap
Wine glasses and tall mugs can hit the upper spray arm. This causes high-frequency rattling.
- Solution: Angle the stems inward.
- Solution: Use the "High Rack" feature if your model has it.
- Solution: Leave a gap in the upper rack for the arm to clear.
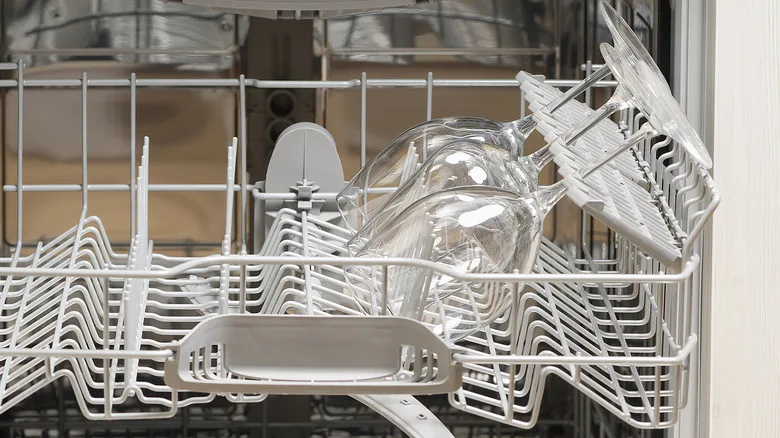
Image source: Web (Bing) / mashed.com (Web image (fair-use with source credit))
Soap & Rinse Aid Mismanagement
Using regular dish soap creates foam. This foam traps water in the spray arm holes. The motor works harder.
The noise gets louder.
- Rule: Only use dishwasher-safe detergent.
- Rule: Fill the rinse aid cup to max. It helps break surface tension.
A clogged dispenser can also cause strange clicks. If the dispenser is stuck, the water cannot release. The machine compensates by running longer.
Regular cleaning of the dispenser prevents this blockage.
Repair vs. Replace: The Cost-Benefit Decision Guide
Sometimes fixing it is not worth it. Here is how to decide.
When to Call a Pro
- Electrical faults: Blown fuses or shorting wires.
- Major leaks: Water inside the cabinet frame.
- Pump failure: The drain pump is completely dead.
Service calls range from $150 to $300. Add parts costs. That is a lot of money.
When to DIY
- Foreign object removal: Cost is $0.
- Leveling the unit: Cost is $0.
- Cleaning inlet valve screens: Cost is $0.
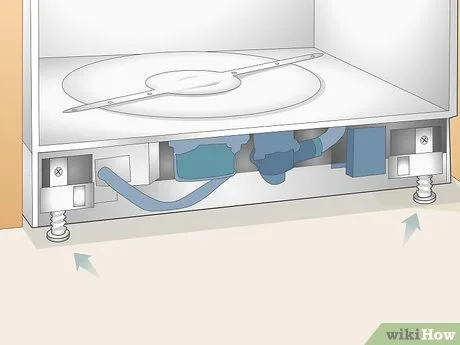
Image source: Web (Bing) / wikihow.com (Web image (fair-use with source credit))
When to Replace
If the unit is over eight years old, replace it. The seal issues in older Maytag units are common. As of 2026, new models have better insulation.
They run quieter. If the repair costs 50% of a new machine, buy new.
Consider removing old pipes if you are changing the sink layout. But for a simple swap, just disconnect and reconnect. The new unit will likely be quieter.
Frequently Asked Questions
Is it normal for a Maytag to make a clicking sound at the end of a cycle?
Yes, this is standard operation. The electronic relay or timer clicks when the cycle concludes. If you hear clicking during the wash phase, check for a stuck thermal fuse.
That indicates an electrical fault.
Can a full dishwasher cause noise?
Overloading is a primary cause of loud motors. When racks are packed too tight, spray arms cannot rotate freely. The motor strains against the resistance.
You will hear a grinding or humming strain. Leave space between items to allow free rotation.
How tight should the water supply connection be?
Hand-tight plus a quarter turn is the rule. Never use a wrench on the plastic hose fittings. Metal tools can crack the plastic seal.
A loose connection causes hissing noise during fill.
What should I do if the noise is a high-pitched scream?
Stop the machine immediately. Unplug the unit before touching anything. A high-pitched scream usually means a broken impeller blade is scraping the sump wall.
Continuing to run it will destroy the pump motor. Call a technician for this specific failure.
Why does my Maytag hum only when I start it?
The hum comes from the water inlet valve opening. The solenoid draws current to allow water flow. This is normal electrical noise.
If the hum persists after the fill phase ends, the valve is stuck open. Replace the valve assembly to fix it.
How often should I clean the filter to prevent noise?
Check the filter weekly. Food debris builds up quickly in the sump area. A clogged filter forces the pump to work harder.
This creates a strained, noisy operation. Follow the guidance in our dishwasher filter cleaning guide for a deep clean.
