
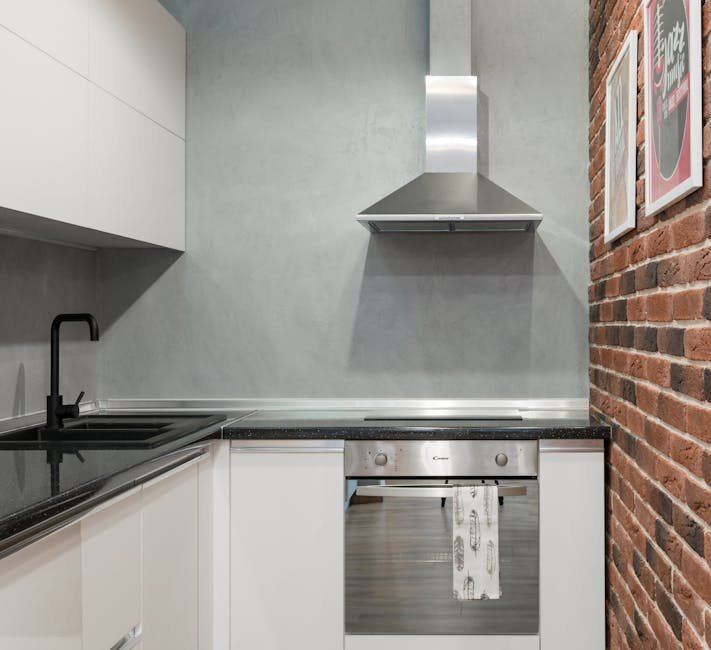
A stainless steel range hood works hard every time you cook, trapping grease, smoke, and airborne particles before they settle on your cabinets and walls. But that hard work comes at a cost: within weeks, the surface can look dull, streaked, or dotted with stubborn grease splatters. Many homeowners avoid cleaning their hood because they worry about scratching the finish or leaving impossible streaks.
The reality is simpler than most expect. With the right technique and a handful of everyday supplies, you can restore your range hood to a mirror-like finish in under 30 minutes. This guide covers exactly how to clean a stainless steel range hood — from the grease-laden filters inside to the fingerprint-prone exterior — using methods that protect the metal and extend the life of the appliance.
Why Cleaning Your Range Hood Matters More Than You Think
A greasy range hood isn't just an eyesore. When grease accumulates on the filters and fan blades, the motor has to work harder to pull air through, reducing efficiency and increasing energy consumption. Over time, heavy buildup can unbalance the fan, causing noise or premature motor failure.
There's also a genuine safety concern. The National Fire Protection Association (NFPA) identifies cooking equipment as the leading cause of home kitchen fires. Grease-laden filters and ductwork can fuel a flame if a stovetop flare-up reaches the hood's interior. Regular cleaning removes that fuel source.
Beyond safety, a clean hood simply performs better. Unobstructed filters capture more grease before it circulates through your kitchen, meaning your cabinets, walls, and even your lungs see less airborne oil.
Gather the Right Supplies (And Avoid Costly Mistakes)
Using the wrong cleaning tool is the fastest way to scratch stainless steel permanently. Before you start, assemble the items that work — and set aside the ones that don't.
What You Need
- Microfiber cloths (at least 3–4): These are non-abrasive and lint-free. Avoid paper towels or terry cloth towels, which can leave fine scratches.
- Mild dish soap: Dawn, Seventh Generation, or any gentle grease-cutting formula works well.
- Warm water
- White vinegar: A natural degreaser and polish in one.
- Baking soda: For tough, baked-on grease that soap alone won't budge.
- Non-abrasive sponge or soft nylon brush: Never use green scouring pads or steel wool.
- Optional: A dedicated stainless steel cleaner and polish, such as Weiman or Bar Keepers Friend Stainless Steel Cleaner & Polish.
What to Avoid
- Chlorine bleach or ammonia: These can pit or discolor stainless steel over time.
- Abrasive powders: Comet, Ajax, and similar products leave micro-scratches that trap dirt.
- Steel wool or metal scrubbers: Even "fine" grade steel wool will scratch the grain.
- Glass cleaners with ammonia: They often contain additives that leave a dull, sticky film.
Step 1: Safety First — Unplug and Ventilate
Before any cleaning touches the hood, disconnect power. Unplug the unit from the wall outlet, or flip the breaker if it's hardwired. This prevents accidental activation of the fan or lights while you're working near the motor housing.
Open a window or turn on a separate exhaust fan. While the cleaners recommended here are mild, good airflow never hurts — especially if you're sensitive to vinegar fumes.
If you still have the manufacturer's manual, check for model-specific cleaning instructions. Some high-end hoods have specialized coatings or electronic components that require extra care. For general guidance on installation and maintenance, the tips in this range hood duct installation guide apply equally to cleaning access.
Step 2: Remove and Deep-Clean the Filters
The filters are the front line of defense against grease, and they're usually the dirtiest component. Most range hood filters are aluminum mesh or baffle-style, and they're designed to be removed and washed repeatedly.
How to Remove Filters
Filters typically slide out of a track or release with a spring-loaded clip or latch. Look underneath the hood — the mechanism is usually visible. Pull the filter downward or toward you, depending on the model.
How to Clean Them
- Fill your sink or a large basin with the hottest tap water available. Add a generous squirt of dish soap and submerge the filters.
- Let them soak for 15–20 minutes. For heavily saturated filters from frequent frying or wok cooking, extend the soak to 30 minutes or add ½ cup of white vinegar to the water.
- After soaking, scrub each filter gently with a soft brush or non-abrasive sponge. Pay attention to the mesh intersections where grease cakes hardest.
- Rinse thoroughly under running warm water. Hold the filter up to the light — if you see clogged holes, repeat the soak.
- Shake off excess water and let the filters air-dry completely on a clean towel before reinstalling. Moisture trapped in the filter housing can lead to musty odors or mold growth.
If your home has hard water, mineral deposits can accumulate on the filters over time. For guidance on dealing with related kitchen drain issues, this article on why the pipe under your kitchen sink leaks covers common buildup problems.
Step 3: Clean the Fan Blades and Interior Housing
With the filters removed and power disconnected, you now have access to the hood's interior — including the fan blades, motor housing, and interior walls. Grease accumulates here just as heavily, and it directly affects airflow.
Wiping the Fan Blades
Use a microfiber cloth slightly dampened with warm, soapy water. Reach around each blade carefully — some blades are sharp. For stubborn, crusted grease, make a paste from baking soda and a few drops of water. Apply the paste to the blade, let it sit for 3–5 minutes to soften the grease, then wipe away with a damp cloth.
Avoid spraying any liquid directly into the motor housing. The motor itself should never be submerged or soaked. A barely-damp cloth is all you need for the surrounding areas.
Drying the Interior
After cleaning, use a dry microfiber cloth to wipe down every interior surface you touched. Any leftover moisture can attract dust or cause corrosion over time. Let the hood sit open for 10–15 minutes before reinstalling the filters to ensure full evaporation.
Step 4: Clean the Exterior Surface — With the Grain
The exterior is what everyone sees, and it's where most cleaning mistakes happen. Stainless steel has a directional grain — fine parallel lines running in one direction. Wiping against that grain creates micro-abrasions that catch light and look like scratches.
The Correct Wiping Technique
- First, dust the surface with a dry microfiber cloth to remove loose particles. If you wipe a gritty surface, you'll drag those particles across the metal and scratch it.
- Next, dampen a clean cloth with warm, soapy water. Wipe the hood using straight, overlapping strokes that follow the grain. From left to right if the grain runs horizontally, or top to bottom if it runs vertically. Don't use circular motions.
- Rinse the surface by wiping with a second cloth dampened with plain water. This removes any soap residue that could cause streaking.
- Immediately dry with a fresh, dry microfiber cloth — again, following the grain. This step is non-negotiable. Water left to air-dry will leave mineral spots.
For Fingerprints and Light Grease
A 50/50 mix of white vinegar and water in a spray bottle works exceptionally well. Mist the solution onto your cloth (never directly onto the hood, where it could drip into seams), then wipe with the grain. The vinegar cuts grease and evaporates quickly, leaving minimal streaks.
For Tough, Baked-On Grease on the Exterior
If the exterior has spots that soap and vinegar won't touch, make a baking soda paste (3 parts baking soda to 1 part water). Apply it with a soft cloth, let it sit for 5 minutes, then gently rub in the direction of the grain. Rinse and dry immediately.
Step 5: Polish for a Protective Shine
Polishing isn't just cosmetic — it adds a microscopic protective layer that repels fingerprints and makes future cleaning easier.
Option A: Commercial Stainless Steel Polish
Products like Weiman Stainless Steel Cleaner & Polish or Sprayway Stainless Steel Cleaner are formulated specifically for appliances. Apply a small amount to a dry microfiber cloth and buff with the grain. These products often contain oils that fill in micro-scratches and create a hydrophobic barrier.
Option B: Natural Polish with Vinegar or Oil
If you prefer to avoid commercial products, white vinegar on a dry cloth produces a streak-free shine on its own. For an even deeper gloss and fingerprint resistance, apply a tiny drop of mineral oil or even olive oil to a clean cloth and buff the surface. Use sparingly — too much oil leaves a visible, sticky residue that attracts dust.
How Often Should You Clean Your Range Hood?
The right cleaning schedule depends on how much you cook and what you cook.
| Cooking Frequency | Exterior Wipe-Down | Filter Deep Clean | Interior/Fan Cleaning |
|---|---|---|---|
| Daily cooking (multiple meals) | After each cooking session | Every 2–4 weeks | Every 3 months |
| Moderate (3–5 meals per week) | Weekly | Every 4–6 weeks | Every 6 months |
| Light (1–2 meals per week) | Weekly | Every 2–3 months | Annually |
If you deep-fry frequently or cook with high-heat methods like wok stir-frying, accelerate every timeline by roughly half. For tips on keeping other kitchen appliances in top shape, this guide on cleaning the inside of your stainless steel dishwasher follows similar best practices for maintaining metal surfaces.
Common Mistakes That Damage Stainless Steel
Even well-intentioned cleaning can cause permanent damage. Here are the errors most people make at least once.
Using Too Much Water
Excess water seeps into seams, behind the control panel, and into the motor housing. Water trapped inside can cause electrical shorts, rust on internal components, or a musty smell. Always use a damp — not wet — cloth.
Cleaning a Hot Surface
If you've just finished cooking, the hood surface may be warm. Wiping a warm stainless steel surface with a cold, damp cloth can create thermal shocking that warps the metal or leaves water spots that are nearly impossible to remove. Let the hood cool completely first.
Using Abrasive Cream Cleansers
Products like Soft Scrub or Comet contain fine abrasive particles that scratch stainless steel. Even if you can't see the scratches with the naked eye, they'll show up under kitchen lighting as a dull, hazy appearance.
Skipping the Grain Direction
This is the single most common mistake. If you're unsure which direction the grain runs, look closely at the surface under bright light. The grain lines are subtle but visible. Always wipe parallel to them, never perpendicular.
FAQ
Can I use Dawn dish soap on my stainless steel range hood?
Yes. Dawn is an excellent choice because it cuts grease effectively without harsh chemicals. Dilute a few drops in warm water, use a microfiber cloth, and always rinse and dry afterward. Dawn is safe for both the exterior and the removable filters.
What's the best homemade cleaner for stainless steel range hoods?
A 50/50 mix of white vinegar and water works for regular cleaning and degreasing. For tougher spots, a paste of baking soda and water provides gentle abrasion without scratching. Both solutions are safe, inexpensive, and environmentally friendly.
How do I remove heat discoloration from stainless steel?
Heat discoloration — bluish or golden stains from prolonged high heat — is difficult to remove with ordinary cleaners. A stainless steel cleaner with a mild acidic component, such as Bar Keepers Friend Soft Cleanser, can help. Apply with a soft cloth, rub gently with the grain, rinse, and dry. Severe discoloration may be permanent, so preventing it by wiping the hood after high-heat cooking is best.
Should I clean the inside of the ductwork too?
Only if you have accessible ductwork and feel comfortable doing so. In most residential kitchens, the duct is concealed inside walls or cabinets. If you notice reduced airflow or smell lingering grease odors even after cleaning the filters and fan, it may be time to have the duct professionally cleaned. Understanding how your ductless range hood works can help you decide whether duct cleaning applies to your setup.
My filters are still greasy after soaking. What now?
For extremely saturated filters, add ½ cup of baking soda or ½ cup of white vinegar to the hot soapy soak water. Let the filters sit for 30–40 minutes, then scrub with a soft brush. If they still feel greasy, run them through the top rack of your dishwasher on a heavy cycle with a degreasing detergent. Note that dishwasher cleaning can dull the finish on some aluminum filters over time, so it's best reserved for occasional deep cleaning.
Conclusion
A spotless stainless steel range hood doesn't require expensive products or professional help. With warm water, mild soap, white vinegar, and a few microfiber cloths, you can remove grease, eliminate fingerprints, and restore the original luster in under half an hour. The key is consistency — a quick wipe after cooking prevents the heavy buildup that turns cleaning into a chore.
Always work with the grain, avoid abrasive tools, and never skip the drying step. Your range hood is one of the hardest-working appliances in your kitchen. Treating it with the right cleaning routine keeps it running efficiently, looking great, and serving you reliably for years.
For more kitchen maintenance tips and appliance care guidance, visit our blog where we cover everything from routine upkeep to troubleshooting common household issues.
