If you’ve ever wondered what’s really happening under your kitchen sink, you’re not alone. Understanding the plumbing setup beneath your sink can save you time, money, and a lot of frustration.
Whether you’re facing a leak, planning a DIY fix, or just curious about how it all works, a clear plumbing under kitchen sink diagram can be a game-changer. You’ll discover exactly how the pipes connect, where common problems occur, and how to spot them before they become serious.
Keep reading to take control of your kitchen plumbing with confidence.
Kitchen Sink Plumbing Basics
Understanding the basics of kitchen sink plumbing helps in identifying problems and making simple repairs. The plumbing system under your kitchen sink connects water supply lines and drainage pipes. These parts work together to bring clean water and remove wastewater efficiently. Knowing the main components, materials, and water flow process can save time and money.
Main Components
- Water supply lines deliver hot and cold water to the faucet.
- The faucet controls the water flow and temperature.
- The drain pipe carries wastewater away from the sink.
- The P-trap prevents sewer gases from entering the kitchen.
- Shut-off valves allow you to stop water flow for repairs.
Common Materials Used
- Plastic (PVC or ABS) pipes are lightweight and easy to install.
- Metal pipes like copper offer durability and resistance to corrosion.
- Brass fittings provide strong connections and resist rust.
- Rubber washers and seals prevent leaks at joints.
How Water Flows
Cold and hot water enter the supply lines through shut-off valves. Opening the faucet mixes water to the desired temperature. Water flows out through the spout into the sink basin. Wastewater moves down the drain and through the P-trap. The P-trap holds water to block sewer gases. Then, wastewater continues to the home’s main drain system.
Types Of Plumbing Diagrams
Understanding the types of plumbing diagrams helps in fixing kitchen sink plumbing. Diagrams show the pipe layout and connections clearly. They guide both beginners and experts through plumbing tasks. Diagrams vary in complexity and detail. Choosing the right type depends on your needs and skills.
Simple Layouts
Simple layouts show the basic pipe paths under the sink. They use straightforward lines to represent pipes. These diagrams highlight main parts like drains, traps, and water supply lines. They are easy to read and follow. Perfect for quick repairs and small projects.
Detailed Schematics
Detailed schematics provide a complete view of the plumbing system. They include pipe sizes, fittings, and valve locations. These diagrams help with complex installations and troubleshooting. They often show measurements and material types. Ideal for professionals or advanced DIYers.
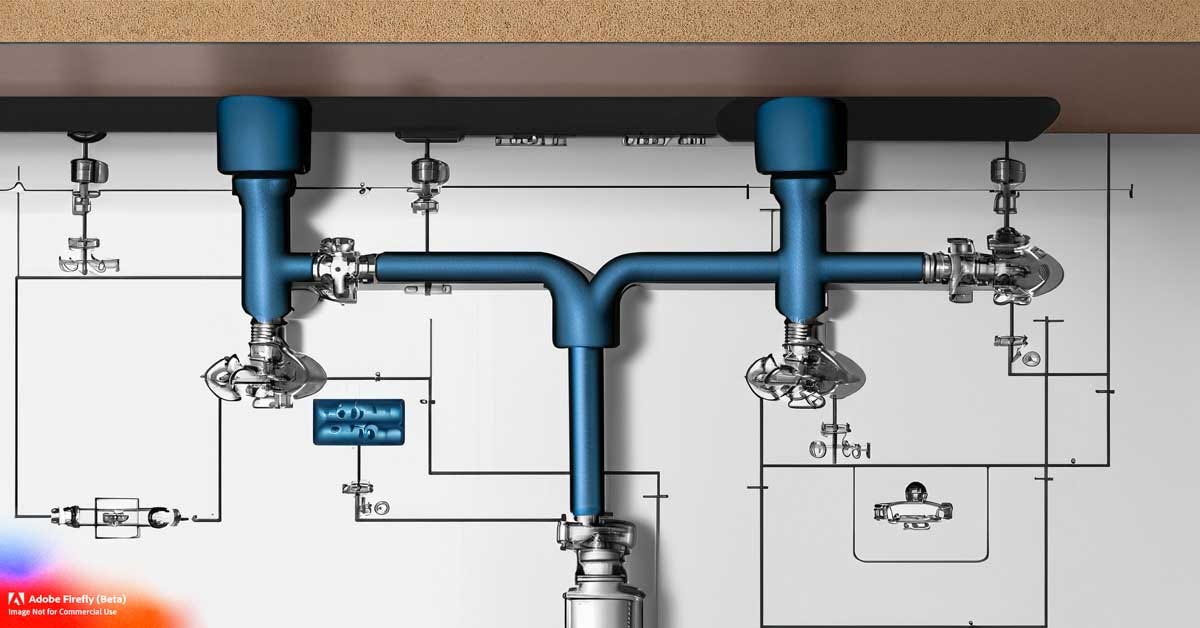
Color-coded Diagrams
Color-coded diagrams use colors to separate different pipes and functions. For example, blue for cold water and red for hot water. This makes identifying pipes faster and easier. Colors reduce mistakes during repairs or installation. Helpful for visual learners and those new to plumbing.
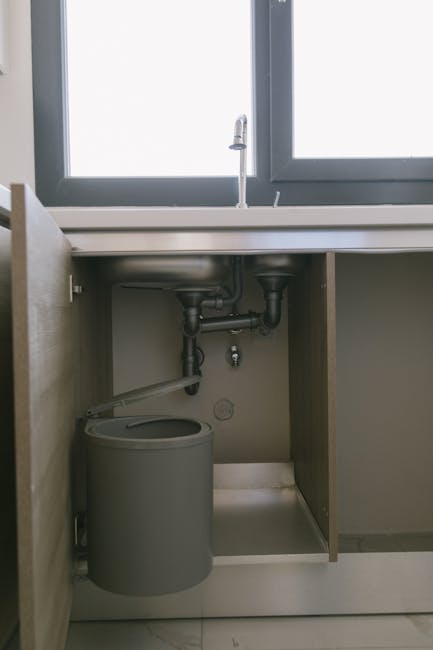
Identifying Key Parts Under The Sink
Understanding the key parts under your kitchen sink can save you time and money. It helps you quickly identify issues and decide if a simple fix is possible. Let’s break down the main components you’ll find beneath the sink and why each one matters.
P-trap And Its Role
The P-trap is the curved pipe that you often see just below the drain. Its main job is to trap water in the bend to prevent sewer gases from coming up into your kitchen. If you notice a bad smell or slow drainage, the P-trap might be clogged or leaking.
In my experience, cleaning the P-trap is one of the easiest fixes you can do yourself. Just place a bucket underneath, unscrew the connectors, and clear out any blockages. Have you checked your P-trap recently?
Drain Pipes
Drain pipes carry wastewater away from your sink and into your home’s plumbing system. They usually connect directly to the P-trap and extend into the wall or floor. Knowing their layout helps you spot leaks or clogs before they cause bigger problems.
Look for cracks or loose fittings along the drain pipes. Even a small drip can waste water and damage cabinets over time. Are your drain pipes secure and dry right now?
Shut-off Valves
Shut-off valves control the water flow to your sink’s faucet. They come in two types: one for hot water and one for cold. Knowing where these valves are and how to turn them off can prevent flooding during repairs.
Don’t wait for an emergency to find your shut-off valves. Practice turning them off and on to make sure they work smoothly. When was the last time you tested yours?
Garbage Disposal Connections
If your kitchen has a garbage disposal, you’ll find its connections under the sink too. These include the power supply and the drainpipe attached to the disposal unit. Understanding these connections makes troubleshooting easier if the disposal jams or leaks.
Always disconnect power before inspecting the disposal connections to avoid accidents. Tighten any loose pipes or reset the unit if it stops working. Have you ever dealt with a stuck garbage disposal?
Common Plumbing Issues
Understanding common plumbing issues under your kitchen sink can save you time, money, and stress. These problems often start small but can quickly disrupt your daily routine. Knowing what to look for helps you catch issues early and decide whether you can fix them yourself or need a professional.
Leaks And Drips
Leaks under the kitchen sink are one of the most frequent plumbing problems. They often come from worn-out washers, cracked pipes, or loose fittings. Even a slow drip can waste gallons of water over time and cause damage to your cabinets.
Have you ever noticed a puddle forming under your sink without knowing the source? Checking for wet spots or a musty smell can alert you to hidden leaks before they get worse. Tightening connections or replacing seals usually stops drips quickly.
Clogs And Blockages
Clogs happen when food scraps, grease, or soap build up inside the drain pipes. This slows water flow and can cause backups. A plunger or a drain snake often clears minor blockages, but severe clogs might need professional attention.
Ask yourself: How often do you pour grease down the drain? Changing this habit can prevent many blockages. Regularly flushing your drain with hot water helps keep it clear and reduces unpleasant odors.
Loose Connections
Loose connections occur when pipe joints or fittings are not tightened properly or loosen over time. This can lead to leaks and water damage under your sink. You can usually spot this issue by checking for movement in the pipes or visible gaps.
If you feel a connection is loose, turn off the water supply before tightening it with a wrench. Avoid overtightening, which can crack fittings and create new problems. Have you checked your pipes for snugness recently?
Slow Drainage
Slow drainage signals partial blockages or venting problems in your plumbing system. When water takes longer to go down, it’s a sign your pipes might be clogged with buildup or debris. Slow drains also increase the risk of bad smells and backups.
Using a mixture of baking soda and vinegar can break down light clogs and refresh your drain naturally. If the problem persists, consider inspecting the P-trap for obstructions or calling a plumber. How long do you wait before addressing a slow drain in your kitchen?
Tools Needed For Repairs
Fixing plumbing under your kitchen sink can feel daunting without the right tools. Having the correct equipment not only makes the job easier but also helps avoid accidental damage. You might be surprised how a few essential tools can save hours of frustration and costly repairs.
Wrenches And Pliers
Wrenches and pliers are your go-to tools for loosening and tightening nuts and bolts. An adjustable wrench fits different sizes of fasteners, which is perfect for various pipe connections. Slip-joint pliers offer a strong grip on pipes and fittings, making it easier to turn stubborn parts without slipping.
Consider adding a basin wrench to your toolkit—it’s specially designed for hard-to-reach nuts under the sink. Have you ever tried tightening a pipe connection blindfolded? A basin wrench could be your new best friend in that situation.
Pipe Sealants
Pipe sealants, including plumber’s tape and joint compound, ensure leak-free connections. Teflon tape wraps around threaded pipe ends to create a tight seal and prevent leaks. A good quality pipe joint compound can be applied to threaded areas for extra protection.
Not all sealants are the same; some work better with metal pipes, while others suit plastic. Choosing the right one can mean the difference between a dripping faucet and a dry, worry-free kitchen.
Drain Snakes
Drain snakes are essential for clearing clogs without dismantling your plumbing. These flexible tools can reach deep into pipes to remove hair, grease, or debris blocking water flow. Using a drain snake saves you from calling a plumber for minor blockages.
Have you ever felt the frustration of a slow-draining sink? A simple drain snake might be the quickest fix you need, putting control back in your hands.
Replacement Parts
Keeping common replacement parts on hand can speed up repairs dramatically. Items like washers, gaskets, and O-rings wear out over time and cause leaks. Having these parts ready means you won’t have to wait for a trip to the hardware store when a leak appears.
Before starting a repair, inspect your pipes and fittings for worn components. Replacing a small part early can prevent bigger, costlier problems down the road.
Step-by-step Fixes With Diagrams
Understanding plumbing under the kitchen sink helps solve common problems fast. Clear diagrams guide you through each fix. This section breaks down the most frequent repairs with easy steps and images. Follow along to keep your sink running smoothly.
Fixing A Leak
Start by turning off the water supply below the sink. Check all pipe connections for wet spots or drips. Tighten loose nuts with a wrench. Replace worn-out washers or seals to stop leaks. Use plumber’s tape on threaded joints for a better seal. Dry the area and watch for new leaks once water is back on.
Clearing A Clog
Remove the drain stopper and use a plunger over the sink drain. Push and pull to create suction that loosens the clog. If that fails, disconnect the P-trap under the sink. Place a bucket below to catch water. Clear out debris from the trap and pipes. Reassemble the pipes tightly. Run water to check if the clog is gone.
Replacing The P-trap
Turn off the water supply. Place a bucket under the P-trap to catch water. Use a wrench to loosen slip nuts on both ends. Remove the old P-trap carefully. Clean pipe ends before installing the new trap. Attach the new P-trap and tighten the nuts by hand, then with a wrench. Test for leaks by running water through the sink.
Installing A New Faucet
Shut off water valves under the sink. Disconnect old water supply lines and remove the old faucet. Clean the sink surface around the faucet holes. Position the new faucet and secure it with mounting nuts. Connect the water supply lines to the faucet. Turn the water back on and check for leaks. Run the faucet to ensure proper flow.
Safety Tips And Precautions
Working under your kitchen sink can feel straightforward, but safety should always be your top priority. Small mistakes can lead to water damage or even personal injury. Understanding and applying key safety tips helps you stay protected while handling plumbing tasks.
Turning Off Water Supply
Before you touch any pipes or fittings, make sure to turn off the water supply. Locate the shut-off valves under the sink and close them completely. This simple step prevents unexpected flooding and keeps the workspace dry.
Have you ever started a repair only to be surprised by water gushing out? Avoid that frustration by double-checking the valves. If you can’t find local shut-offs, turn off the main water supply to your home.
Using Protective Gear
Always wear gloves to protect your hands from sharp edges and dirty water. Safety goggles are a smart choice too, especially if you’re loosening old pipes that might release debris. Wearing the right gear keeps you safe and comfortable during the job.
Think about the last time you worked without gloves—did you notice any cuts or irritation? Taking a few extra seconds to gear up can save you from pain and infections later.
Handling Chemicals Safely
Plumbing often involves chemical drain cleaners or sealants. Never mix chemicals, as this can cause dangerous reactions. Read all labels carefully and use these products in well-ventilated areas.
Keep chemicals out of reach of children and pets. If you spill any, clean it up immediately while wearing gloves. Have you checked the expiration dates on your cleaners recently? Using outdated chemicals can reduce effectiveness and increase risks.
Maintenance Tips For Longevity
Maintaining the plumbing under your kitchen sink is key to avoiding costly repairs and ensuring everything runs smoothly for years. Simple, regular care can extend the life of pipes, traps, and valves. Let’s dive into some practical tips that can help you keep your kitchen sink plumbing in top shape.
Regular Inspections
Check under your sink at least once a month. Look for leaks, corrosion, or loose fittings. Catching issues early can save you from water damage and expensive fixes.
Pay attention to unusual smells or damp spots, which often signal hidden leaks. Don’t forget to inspect the water supply lines and shut-off valves to ensure they operate smoothly when needed.
Preventing Clogs
Clogs are a common plumbing headache but preventing them is easier than you think. Avoid pouring grease, coffee grounds, or food scraps down the drain.
Use a drain strainer to catch debris and clean it regularly. If water starts to drain slowly, try flushing the drain with hot water or a mixture of baking soda and vinegar before using harsh chemicals.
Keeping Components Clean
Keeping the pipes and fittings clean helps maintain good water flow and prevents buildup. Wipe down the P-trap and visible pipes with a mild detergent every few months.
If you notice mineral deposits, soak affected parts in vinegar to dissolve the buildup. Regular cleaning also helps you spot small problems before they escalate.
When To Call A Professional
Knowing when to call a professional plumber can save time and prevent damage under your kitchen sink. Some plumbing tasks require special tools and skills. Trying to fix complex problems without experience might worsen the issue.
Understanding the signs that need expert help ensures your kitchen plumbing stays in good shape. It also keeps your home safe from leaks and water damage.
Complex Repairs
Complex repairs involve parts that are hard to reach or replace. Issues like broken pipes, damaged traps, or faulty valves need expert attention. Professionals have the tools and knowledge to fix these safely.
Attempting complex repairs alone can lead to leaks or bigger problems. It is best to trust a plumber for tasks beyond simple fixes.
Persistent Issues
Persistent problems like constant clogs or slow drainage show an underlying issue. These problems often need specialized equipment to diagnose and repair. A professional can find hidden blockages or pipe damage quickly.
Ignoring persistent issues can cause water damage or bad odors. Calling a plumber stops these problems before they get worse.
Upgrading Plumbing Systems
Upgrading your plumbing system improves kitchen function and water efficiency. Professionals ensure that new parts fit well and work properly. They also follow local codes and safety standards.
Trying to upgrade plumbing without experience can cause leaks or system failure. Hiring a plumber guarantees a safe and lasting upgrade.
Credit: medium.com
Frequently Asked Questions
What Parts Are Included In A Kitchen Sink Plumbing Diagram?
A kitchen sink plumbing diagram shows the drain pipe, trap, water supply lines, shut-off valves, and faucet connections. It helps understand how water flows in and out of the sink.
How Does The P-trap Function Under The Sink?
The P-trap holds a small water amount to block sewer gases from entering your home. It also traps debris to prevent clogs further down the drain.
Why Is The Shut-off Valve Important Under The Sink?
The shut-off valve lets you quickly stop water flow during repairs or emergencies. It prevents water damage and makes plumbing maintenance easier.
How Do Supply Lines Connect In The Kitchen Sink Plumbing?
Supply lines connect the hot and cold water valves to the faucet. They ensure controlled water flow and proper temperature mixing.
Conclusion
Understanding the plumbing under your kitchen sink is crucial. It helps in fixing minor issues. The diagram guides you through the basic setup. You can identify pipes, traps, and valves easily. This knowledge makes future repairs less daunting. Regular checks can prevent major problems.
Keep the area clean and organized. It ensures a smooth water flow. A simple diagram can save you time and money. Use this guide to maintain your kitchen plumbing. Stay proactive to avoid costly repairs. Your kitchen sink will function smoothly with these insights.
