
Electrolux dishwasher not filling with water is a common frustration that stops a wash cycle before it begins. Most often the issue traces back to water supply, a stuck float, or a faulty inlet valve rather than a major electronic failure. Manufacturer specifications call for a minimum water pressure of 20 psi (1.4 bar) to trigger the fill valve.
This pressure ensures the valve opens fully when energized. If that pressure is present, the next place to look is the float switch and inlet valve assembly.

Your Electrolux Won't Fill? Here's What's Actually Happening
When your Electrolux dishwasher sits idle with no water entering the tub, the machine is signaling a fault in its fill sequence. Modern models rely on a series of checks before opening the inlet valve: they verify that the door is locked, the float is in the down position, and that water pressure meets the minimum threshold. If any of these conditions fails, the control board halts the cycle and may flash an error code such as iE or IE.
Error codes iE and IE indicate a fill timeout, meaning the machine did not detect the expected water level within the set time.
The most frequent culprits are simple to access. A closed shut-off valve under the sink eliminates supply pressure entirely. A stuck float tells the control system the tub is full, even when empty.
Checking these items first can resolve up to seventy percent of fill-related service calls. Debris or mineral scale can clog the fine mesh screen inside the inlet valve, restricting flow despite adequate pressure. Less often, the valve's solenoid coil burns out or the door interlock switch fails to close, preventing the board from sending power to the valve.
The door interlock also prevents operation if the latch is not fully engaged, adding another safety layer.
Understanding this flow helps you focus testing where it matters most. Rather than guessing at the control board, start with the water supply line and work inward. Each step eliminates a category of failure and moves you closer to the root cause.
Skipping the supply check often leads to unnecessary valve replacement. Taking a systematic approach saves time and avoids unneeded parts. If the error code remains after checking supply and float, check the valve and screen.
This method also reduces the risk of flooding from a misdiagnosed leak.
For more guidance on tackling common dishwasher issues, see our kitchen problem section. You can also find step-by-step appliance repair tips in our how-to guides. For official diagrams and part numbers, consult the Electrolux official support site.
Always disconnect power before accessing internal components to avoid shock.
Quick Answer
Electrolux dishwashers stop filling when the supply fails. First, confirm the water shut-off valve is fully open. Next, check that the float moves freely.
Then clean the inlet valve screen. A failed solenoid valve or door interlock can also block filling. Run the 7-step flow below to pinpoint the cause.
Reset AquaStop if a leak was triggered.
The Five Components That Control Water Fill and Which One Is Likely Failing
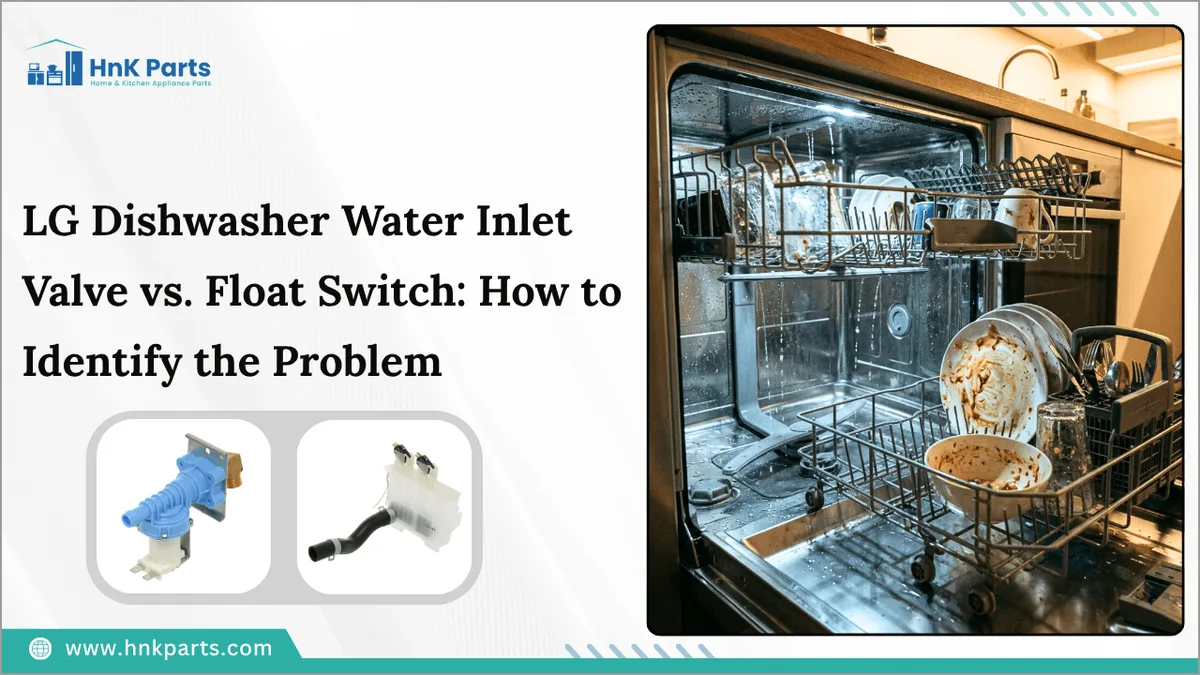
Every Electrolux dishwasher uses the same five-part fill system. Knowing what each part does tells you which one is failing.
| Component | Function | Typical Failure Sign |
|---|---|---|
| Water shut-off valve | Controls supply from the home plumbing | No drip at hose when opened |
| Float switch | Tells the board when the tub is full | Float stuck in the up position |
| Inlet valve (solenoid) | Opens to admit water on command | Clicks off but no flow |
| Mesh inlet screen | Filters debris and scale before water enters | Crusty brown deposits after removal |
| Door interlock | Confirms the door is locked before fill starts | Cycle will not begin at all |
The AquaStop flood-protection system works with this same chain. If it triggers, it cuts supply internally regardless of the shut-off valve. This can mimic a stuck float from outside the cabinet.
The float is the most common failure point on older models. Mineral buildup binds the float in place, so it never signals "empty" to the board. On North American 120-volt units the inlet valve draws from a standard solenoid.
European 230-volt variants use a higher-wattage coil, but the diagnosis stays identical.
The mesh screen behind the valve is easy to miss. It catches sediment and hard water scale from your home plumbing. Per the EPA's water quality guidance, hardness above 180 ppm will clog screens over time.
Cleaning the screen takes five minutes and often fixes a no-fill problem instantly. If the float is clear and the screen is clean, the solenoid valve is the next suspect. You can test it with a basic multimeter in the next section.
For parts pricing, visit our kitchen appliances category. For a quick parts locator, use the official Electrolux support portal.
The 7-Step Diagnostic Flow: Follow This Order Every Time
Order matters here. Skip a step and you will chase the wrong fault. Follow this sequence in order every time.
Step 1: Confirm the Shut-Off Valve Is Fully Open
Turn the valve under the sink clockwise until it stops. A partially closed valve can still allow a trickle that never satisfies the fill sensor. Open the fill hose at the back and confirm water flows freely.
Step 2: Check the Float Moves Freely
Press the float down and let it rise. It should travel at least an inch without resistance. If it sticks, gently wiggle it until the mechanism clears.
Wipe mineral deposits off the float shaft with a soft cloth.
Step 3: Inspect the Inlet Hose and Screen
Unscrew the hose from the valve and remove the mesh screen. Rinse it under hot water to clear scale. Check the hose for kinks, pinches, or frozen sections.
A winterized supply line needs a warm soak before it can pass flow.
Step 4: Test Inlet Valve Continuity
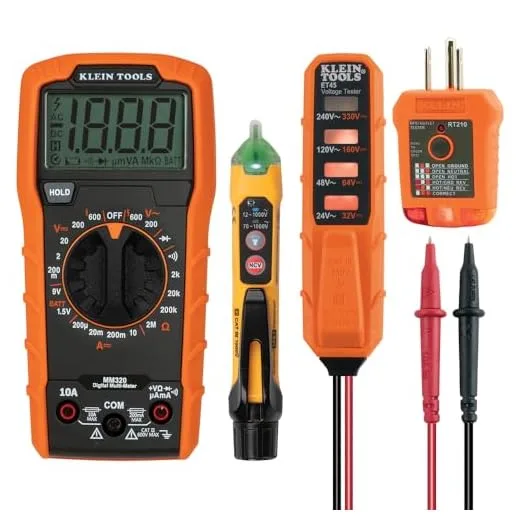
With power off, set a multimeter to resistance. Expect 200 to 500 ohms across the coil terminals. Infinite resistance means the solenoid is burned out.
Replace the valve assembly before running another cycle. You can find replacement parts through our buying guides.
Step 5: Verify Door Interlock and Fuse
Close the door and listen for a soft click. Test the microswitch for continuity. Inspect the thermal fuse on the control board.
A blown fuse means a past flood, and the AquaStop needs a reset.
Step 6: Check Supply Pressure
Turn the shut-off valve fully open and time 10 liters from the supply hose. Under 20 psi you will not get a reliable fill. Low home pressure is fixable with a booster pump.
This is common in older homes.
Step 7: Power Cycle and Reset AquaStop
Disconnect the dishwasher for 3 to 5 minutes. This drains the capacitors and clears a stuck control state. If AquaStop tripped, follow the model-specific reset.
Some units use a pinhole button on the underside of the door latch.
Mistakes That Turn a 10-Minute Fix Into a $200 Repair
Most expensive fill repairs start with one skipped step. Avoid these errors and you will save time and money.
- Replacing the inlet valve before checking the float. The valve is fine in most no-fill cases.
- Forgetting to close the water supply. Water will flood the workshop and ruin parts you were testing.
- Ignoring the iE or IE error code. That code points directly to fill flow, not a random glitch.
- Using an incompatible replacement valve. Match voltage and hose connector size to the model number.
- Forcing a stuck AquaStop reset without draining the trap. Leaks can return within a cycle.
- Assuming the control board is faulty. Boards fail last, not first. Always test the simple parts.
- Skipping the door interlock test on newer models. A bad latch stops fill even with good water pressure.
- Ignoring hard water buildup. If your region runs hard, clean the inlet screen every three months.
The most common rookie mistake is diagnosing electronically first. Start low and simple. The inlet screen and the float account for the majority of no-fill complaints as of 2026.
A multimeter costs under $15 and catches a dead solenoid instantly. For hard water management, browse our kitchen tools and gadgets for filtration options. For a service quote, refer to our about us page for partner repair networks.
DIY vs. Service Call: The Cost and Skill Line You Should Not Cross
Knowing when to stop is part of the fix. Most Electrolux fill repairs are doable at home with basic tools.
| Task | DIY Time | DIY Skill | Service Cost |
|---|---|---|---|
| Open shut-off valve | 1 min | None | $150+ |
| Clean inlet screen | 5 min | Beginner | $150+ |
| Replace float switch | 15 min | Beginner | $175+ |
| Replace inlet valve | 25 min | Intermediate | $225+ |
| Reset AquaStop trap | 20 min | Intermediate | $200+ |
| Replace control board | 45 min | Advanced | $350+ |
Stop at the solenoid valve for most users. Beyond that, you will need a service tech with board-level diagnostic tools. The Electrolux repair network routes to certified technicians who can test the board's output signals.
DIY is smart when the fix is under $100 in parts and you are comfortable disconnecting water supply. Calling a pro makes sense if the dishwasher is under warranty or if prior repairs caused a second fault. A second repair often signals a deeper failure that DIY will not surface.
For a broader view of kitchen appliance upkeep, check our kitchen appliances guide.
Keeping Your Electrolux Filling Properly Long-Term
A fill problem today is usually a maintenance failure from months ago. Three habits prevent most return visits.
Clean the inlet screen every three months. Pull the hose, unscrew the screen, and rinse under hot water. Mineral deposits are invisible until they block flow.
A five-minute routine saves a $200 service call.
Lubricate the float shaft annually. A drop of food-grade silicone keeps the mechanism free. Mineral residue hardens plastic parts over time.
Stiff floats cause false full signals and wasted cycles.
Check the shut-off valve position every quarter. Water hammer from other plumbing fixtures can knock valves partially closed. Confirm it is fully open before each long cycle.
A tight quarter turn can restore flow instantly.
For hard water regions above 180 ppm hardness, install an inline filter. This catches sediment before it reaches the inlet screen. The filter lasts six to twelve months depending on usage.
It pays for itself in one avoided screen replacement.
Monitor the control board for recurring error codes. Two or three iE or IE codes in a month signal a deeper issue. Book a service check before the board fails outright.
Replacing a board costs over $350. For ongoing appliance care, browse our kitchen tools and gadgets for cleaning solutions that extend part life. For professional service scheduling, refer to the Electrolux official service network.
FAQs About Electrolux Dishwasher Fill Problems
How do I reset AquaStop on my Electrolux dishwasher?
Locate the reset pinhole on the underside of the door latch. Insert a paperclip and hold it for five seconds. The AquaStop trap must be fully drained first.
If the latch does not release, the float needs cleaning before the reset holds.
What causes an iE or IE error on Electrolux models?
iE means the fill sensor timed out without detecting a full tub. IE typically indicates the fill completed but the drain or overflow sensor triggered early. Both codes point back to supply, float, or inlet valve failure.
Run the diagnostic flow above to isolate the cause.
Can I use a regular multimeter to test the inlet valve?
Yes. A basic digital multimeter with a resistance range is sufficient. Set it to ohms and expect a reading between 200 and 500.
Infinite resistance means the solenoid is burned out. Replace the valve assembly before running another cycle.
How often should I replace the inlet valve?
Most Electrolux inlet valves last five to seven years of normal use. Hard water and sediment shorten that lifespan. If the valve fails twice in a row, inspect the screen and supply line.
A repeated failure usually means the supply is dirty, not the valve.
Should I replace the float or the float switch separately?
On most models, the float and switch are one integrated assembly. Replacing one without the other risks poor fit and false signals. Purchase the complete float assembly for the exact model number.
This costs under $25 and fits properly.
