
You load the dishwasher, add detergent, press start — then open it an hour later to find food still stuck to your plates, water spots dulling your wine glasses, and a faint musty smell hanging in the air. It’s frustrating, and you’ve probably tried everything from adjusting the load to switching detergent.
The real culprit is often hiding in plain sight: the spray arms. These rotating components shoot pressurised water at every dish, but when their nozzles get clogged with food debris or mineral scale, that high-pressure stream becomes a weak trickle. The good news? Cleaning them takes about 15 minutes and requires nothing fancier than a toothpick and some vinegar.
This guide walks you through the entire process — from diagnosing a blocked arm to reassembling it and keeping it clean for good. No special tools, no expensive products, just straightforward steps that work.
 Inspect the spray arm for visible debris lodged in the nozzle holes.
Why Your Dishwasher Spray Arms Need Cleaning
Even with thorough scraping, small bits of food — rice, spinach, eggshell fragments — slip through the filter and make their way into the spray arm assembly. Hard water minerals also deposit inside the hollow arm, narrowing the channels. When enough buildup collects, the water pressure drops and certain dishes get left out.
Look for these telltale signs of a clogged spray arm:
- Dishes come out dirty. Food residue remains on plates and bowls, especially on the lower rack.
- Water spots on glassware. Hard-water minerals aren’t being rinsed away completely.
- Unusual noises. A rumbling or knocking sound during the cycle means the arm is off-balance from debris.
- Detergent left in the cup. Poor water circulation fails to flush the soap out.
- Visible blockages. White crust (calcium) or black specks lodged in the spray arm holes.
If any of these sound familiar, it’s time to pull the spray arms out and give them a proper clean.
Tools and Materials You’ll Need
Most of these items are already in your kitchen. Gather everything before you start so the job goes quickly.
| Tool / Material | Purpose |
|---|---|
| Screwdriver (flathead or Phillips) | Some spray arms are secured with a screw or clip |
| Soft brush (old toothbrush works great) | Scrubbing the arm’s surface and nozzle holes |
| White vinegar | Dissolves mineral deposits and mild grease |
| Warm water | Rinsing away loosened debris and vinegar |
| Toothpick or paperclip | Poking through stubborn blockages in each nozzle |
| Microfiber cloth | Drying the arm before reinstallation |
For heavy buildup, you might also want a small bucket or bowl to soak the spray arms in vinegar.
Safety First
Cleaning spray arms is a low-risk job, but a few precautions keep it safe:
- Unplug the dishwasher or turn off the circuit breaker. Water and electricity don’t mix.
- Wear gloves to protect against sharp edges on the spray arm or any hidden metal burrs.
- Read your manual for model-specific removal instructions — some brands use a push-button release instead of a screw.
- Keep children and pets away while you work with small parts and cleaning vinegar.
Step-by-Step Cleaning Guide
Removing the Spray Arms
Open the dishwasher and slide out the bottom rack so you can reach the lower spray arm. The arm sits on a central hub. To remove it:
- Grip the arm at the base and twist it counterclockwise. Many arms simply unscrew by hand.
- If it doesn’t budge, look for a locking nut, clip, or screw underneath. Use the appropriate screwdriver to loosen it.
- Lift the arm straight up and set it aside.
Repeat the process for the upper spray arm (located under the top rack) and, if your dishwasher has one, the top-most arm inside the ceiling. Some models have only one arm; others have three.
Common mistake: Forcing the arm off without checking for a hidden clip — this can crack the plastic. If it’s stuck, re-read the manual.
Inspecting and Clearing Blockages
Hold each spray arm under a bright light. Look through the nozzle holes — you’ll often see food bits or white scale blocking them. Turn the arm over and check the main inlet port where it connects to the water supply.
Using a toothpick or straightened paperclip, gently push through each nozzle hole. Work from both the outside and the inside of the arm. Don’t use anything metal that’s too thick — a bent paperclip is fine, but a stiff wire may scratch the plastic.
 Poke each nozzle carefully to dislodge food particles and mineral scale.
Deep Cleaning Methods
After clearing visible blockages, give the arms a deeper clean.
Vinegar soak: Fill a bowl or bucket with enough white vinegar to fully submerge the spray arm. Let it soak for 30–60 minutes. Vinegar breaks down calcium and hard-water scale effectively without harsh chemicals.
Baking soda paste (for grease): Mix a tablespoon of baking soda with enough water to form a thick paste. Apply it to the arm’s surface and scrub with a toothbrush. Rinse thoroughly.
Homemade degreaser: If the arm feels greasy (common in households that cook a lot of oily food), a homemade degreaser can cut through the residue without damaging plastic.
Brushing: After soaking, use a soft brush to scrub every surface — especially the crevices around the nozzles and the central hub area where debris tends to hide.
Rinsing and Drying
Hold each spray arm under running warm water. Let the water flow through the nozzles to flush out anything you loosened. Shake the arm and check that all holes now release water freely.
Dry the arm with a microfiber cloth. Moisture left inside can encourage mold growth or cause the arm to stick during reassembly.
Reassembling the Spray Arm
Before you snap the arm back in place, inspect it for cracks, wear, or warping. A damaged spray arm will leak pressure; replace it if necessary.
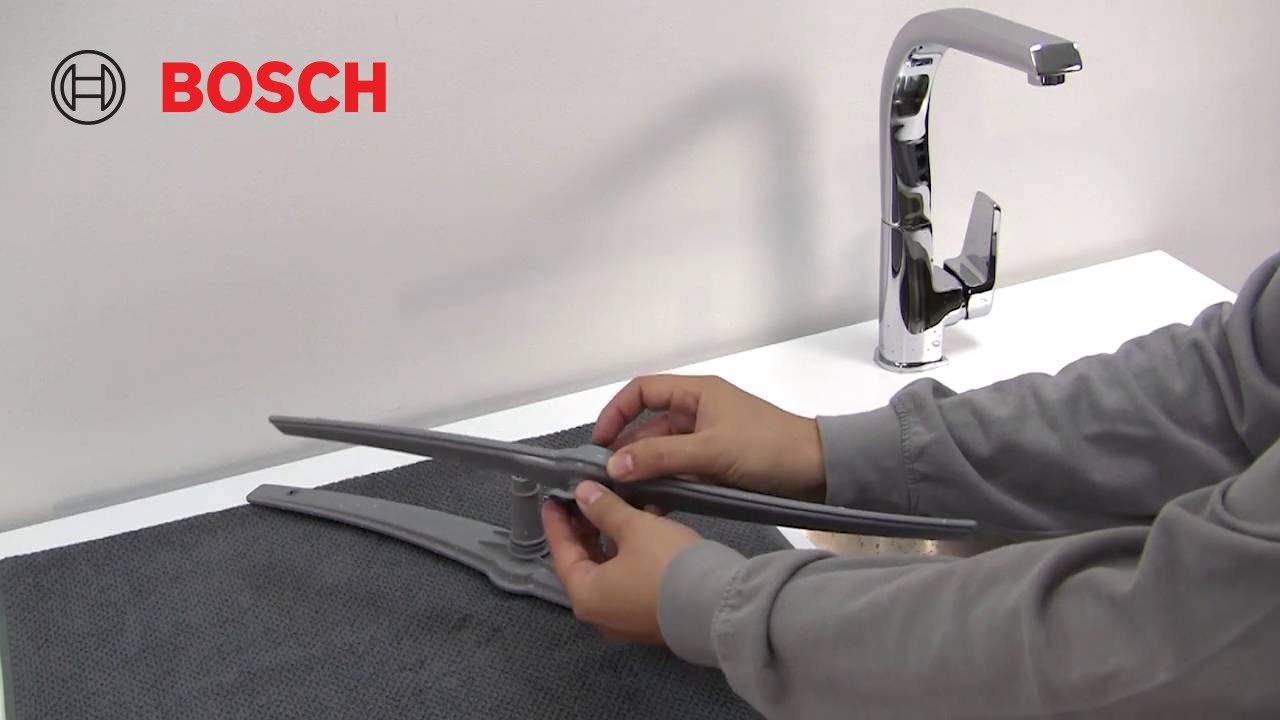
Align the arm with the central hub and press down until it clicks or locks. Twist it gently to confirm it spins freely without resistance. If it catches, you may have misaligned the hub — lift and rotate until it sits properly.
Replace any screws or clips you removed, and run a short rinse cycle (empty) to test water flow and listen for normal operation.
How Often Should You Clean Spray Arms?
Frequency depends on your water hardness and how well you pre-rinse dishes.
| Water type | Recommended cleaning interval |
|---|---|
| Soft water | Every 3–4 months |
| Hard water | Every 1–2 months |
| Very hard water + heavy food debris | Monthly |
Mark a recurring reminder on your phone. Combine spray arm cleaning with washing the dishwasher filter for the best results — the two maintenance tasks address opposite ends of the water path.
If you use a baking-soda-based cleaning cycle monthly, you can often stretch the intervals. The process described in our dishwasher baking soda cleaning guide works well as a supporting routine.
Troubleshooting Common Spray Arm Issues
The arm won’t spin after cleaning.
Check that you reinstalled it correctly — some arms have a specific orientation arrow. Also make sure it isn’t hitting a utensil or a large dish. If the water pressure still seems low, examine the water supply valves under the sink. A partially closed valve will starve the dishwasher of flow. Water valves under kitchen sink explains how to locate and adjust them.
Dishes still come out dirty despite clean arms.
The problem might lie in your dishwasher’s plumbing or the way you load the racks. A clear plumbing diagram with dishwasher can help you inspect for kinked hoses or a blocked drain line.
White crust returns within weeks.
That points to very hard water. Consider installing a water softener or using a dedicated dishwasher rinse aid with anti-scale properties. The Energy Star program recommends a rinse aid to improve drying and reduce deposits (Energy Star – Dishwashers).
Spray arm wobbles after reinstallation.
The mounting clip may be loose or broken. Order a replacement part from your dishwasher manufacturer — it’s usually inexpensive and simple to swap.
Frequently Asked Questions
Can you run vinegar through a dishwasher to clean spray arms?
Yes — pour one cup of white vinegar into the bottom of an empty dishwasher and run a hot cycle. This helps dissolve scale inside the spray arm channels. However, for heavily clogged arms, removal and manual cleaning is far more effective.
Will a dishwasher tablet clean the spray arms?
Not really. Tablets target detergent residue and some light grease, but they can’t force debris out of blocked nozzles. Manual cleaning is needed for tough blockages.
How do you clean a spray arm if it won’t come off?
Most modern dishwashers allow removal without tools. If yours is stuck, check for a hidden screw underneath the cap or a retaining clip on the hub’s center. A few older models have a push-lock mechanism — press the hub and twist simultaneously.
Can I soak the spray arm in bleach?
Avoid bleach; it can damage plastic and rubber seals. White vinegar is safer and equally effective on mineral deposits.
Conclusion
Clean spray arms are the single biggest factor in how well your dishwasher performs. Fifteen minutes of simple maintenance — removing, poking out clogs, soaking in vinegar, and reinstalling — will restore strong water pressure and leave your dishes spotless. Pair this with regular filter cleaning and the occasional baking soda cycle, and your dishwasher will run efficiently for years.
Try it this weekend. Give your spray arms a quick clean and run an empty cycle — you’ll notice the difference the first time you open the door.
