

Fingerprints, smudges, and dull streaks are the nemesis of every stainless steel fridge owner. You wipe it down, and an hour later it looks like a toddler with greasy hands paid a visit. The good news? Getting that showroom shine isn't complicated — it just requires the right technique and a few simple supplies. In this guide you will learn exactly how to polish a stainless steel fridge so it gleams like new, with methods that take only minutes and cost pennies. Whether you’re prepping for guests or finally tackling that daily frustration, these steps will transform your fridge from drab to dazzling.
Understanding Your Fridge’s Finish
Before you touch the surface, you need to know what you’re working with. Stainless steel refrigerator panels are almost always manufactured with a grain — fine, parallel lines that run in one direction (usually vertically, sometimes horizontally). This grain is deliberately brushed into the metal during production. It hides minor scratches and gives the surface its characteristic satin sheen.
Polishing against the grain is the number one mistake people make. It traps cleaner residue in the tiny grooves, creates visible streaks, and over time can dull the finish. Always work with the grain — that is, wipe and buff in the same direction the lines run. The Specialty Steel Industry of North America emphasizes that cleaning along the grain preserves the protective oxide layer and prevents micro-scratches. If you aren’t sure which way your fridge’s grain goes, look closely under a bright light or simply wipe a damp cloth from top to bottom; if you see the light catch the lines, you’ve found the direction.
What You’ll Need
Gather these items before you start. Having everything ready makes the job faster and prevents mid-task frustration.
| Supply | Purpose |
|---|---|
| Two soft microfiber cloths | One for cleaning, one for buffing. Avoid terry cloth or paper towels — they can scratch. |
| Mild dish soap or white vinegar | Gentle cleaners that cut grease without damaging the finish. |
| Water in a spray bottle | For diluting cleaner or applying vinegar solution. |
| Olive oil or mineral oil | Optional — adds a protective shine and helps repel fingerprints. |
| Commercial stainless steel polish | Optional — use a non-abrasive formula (check the label). |
| Baking soda | For stubborn marks; mix with water to make a paste. |
Do not use bleach, ammonia, abrasive powders, scouring pads, or any cleaner that lists “chloride” high on the ingredient list. These can eat away the protective chromium oxide layer and lead to pitting or rust.
Step-by-Step Polishing Process
Step 1: Clear and Prepare
Remove all magnets, papers, and decorations from the fridge door. Clear the surrounding area so you have room to move. If you can, pull the fridge a few inches away from the wall to access the sides. Place a dry towel on the floor in case of drips.
Step 2: Clean the Surface
Spray the fridge with a 50/50 mix of white vinegar and water, or a few drops of mild dish soap in warm water. Wipe with a damp microfiber cloth following the grain. Rinse the cloth frequently to avoid spreading dirt. Dry immediately with a second clean cloth to prevent water spots. This step removes dust, grease, and everyday grime — without a clean base, polish won’t adhere evenly.

Applying a vinegar-water solution to remove grease and grime before polishing.
Step 3: Apply Polish or Oil
Once the surface is clean and dry, you have two good options:
- DIY mineral oil or olive oil: Put a few drops on a clean microfiber cloth. Rub a small section at a time, moving with the grain. Less is more — too much oil leaves a sticky film.
- Commercial stainless steel polish: Spray a light mist onto the cloth (never directly onto the fridge, which can over-saturate). Follow the product’s instructions, but generally you’ll apply it in a thin, even layer.
Step 4: Buff to a Shine
Swap to a fresh, dry microfiber cloth. Buff the entire surface with light pressure, again moving in the direction of the grain. Work in sections — top, bottom, sides, door. The cloth should glide smoothly. If you feel drag, you may have left too much product; wipe off the excess and re-buff. A properly buffed fridge will feel almost silky and reflect light with a clear, streak-free finish.
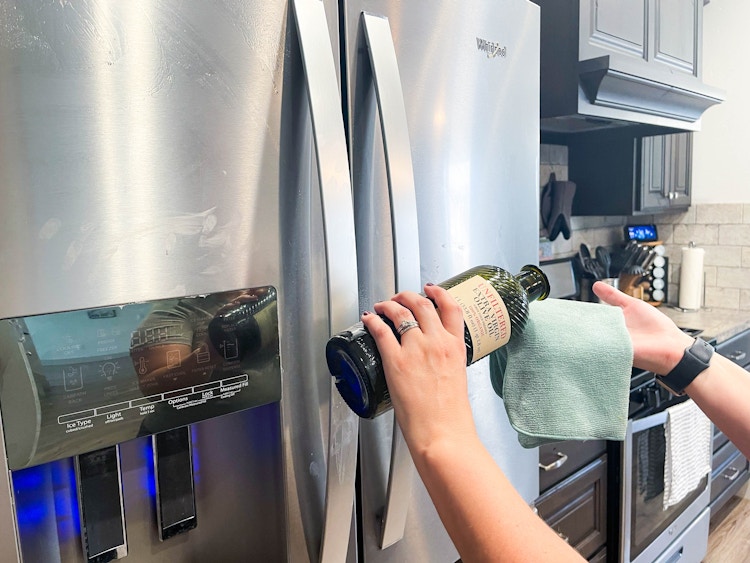
A simple DIY polish using olive oil and vinegar provides a streak-free shine.
Choosing the Right Polish
Commercial vs. DIY Solutions
Commercial stainless steel polishes often contain silicone or other polymers that create a temporary hydrophobic barrier. These can repel fingerprints and water spots for a week or two. However, many contain solvents that may dull the surface over time if overused. DIY options — a light coating of mineral oil or even baby oil — are safer for daily use and cost almost nothing. The trade-off is that oil-based shines need reapplication more often (roughly every one to two weeks, depending on how much the fridge is touched).
What to Avoid
Stay away from any product labeled “abrasive,” “cleanser,” or “scratch resistant.” Powders like Comet or Bar Keepers Friend (original formula) are too harsh. Also avoid bleach-based sprays — they can cause discoloration. The EPA’s Safer Choice program lists many cleaning products that are free of harsh chemicals and safe for stainless steel. Look for the Safer Choice label if you prefer a store-bought cleaner.
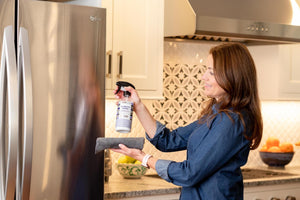
Choose a non-abrasive stainless steel polish for best results — a microfiber cloth is essential.
Maintaining the Shine Long-Term
A polished fridge stays polished if you adopt a few simple habits:
- Daily quick wipe: Use a dry microfiber cloth to buff away fingerprints. This takes 30 seconds and keeps oil or polish looking fresh.
- Weekly deep clean: Spray with vinegar-water, wipe, dry, then reapply a thin layer of oil or polish if needed.
- Address spills immediately: Acidic foods (tomato sauce, citrus, vinegar) can stain if left overnight. Rinse and dry promptly.
- Avoid abrasive magnets: Decorative magnets with rough backings can scratch the grain. Use silicone-backed or vinyl magnets instead.
Regular maintenance also helps you spot other issues early. For example, dealing with musty odors from under the sink or a leaking pipe under the kitchen sink can prevent moisture damage that might affect the fridge’s surroundings. Keeping your dishwasher clean — such as learning how to clean a dishwasher filter Kenmore — also improves overall kitchen hygiene and reduces airborne grease that settles on your fridge.
Common Mistakes and How to Fix Them
Streaks and Smudges
Streaks almost always come from wiping against the grain or using too much product. Fix: Re-wet a clean cloth with plain water, wipe the area following the grain, then dry and re-buff with a tiny amount of fresh oil.
Discoloration
Yellowish or brownish patches usually result from heat exposure (like setting a hot pan near the fridge) or harsh chemical cleaners. Fix: Make a paste of baking soda and water. Gently rub with a soft cloth in the direction of the grain. Rinse thoroughly, dry, and apply a very light coat of mineral oil. If the discoloration is deep, it may be permanent — a local appliance paint touch-up kit can help mask it.
Scratches
Light scratches can be blended by rubbing a stainless steel scratch remover (a fine abrasive polish) along the grain. But be honest: deep gouges cannot be fully erased. The best approach is prevention. Use only soft cloths, never steel wool, and always lift heavy items instead of dragging them across the surface. For stubborn burn marks on other kitchen surfaces, check out how to clean burn marks off glass stove top — similar principles of gentle abrasion apply.
Frequently Asked Questions
How do I make a stainless steel fridge shiny again?
Clean the surface thoroughly with a vinegar-water solution, dry completely, then rub a small amount of mineral oil or stainless steel polish onto a microfiber cloth and buff with the grain. A final dry buff removes excess and restores the mirror-like look.
Can I buff a stainless steel fridge?
Yes, but only with the right method. Use a soft cloth and a non-abrasive polish. Buff in the direction of the grain using light pressure. Do not use a power buffer — it generates heat that can damage the finish.
Can I use Pledge on my stainless steel refrigerator?
Pledge and similar furniture polishes often contain silicone and waxes that leave a greasy film and attract dust over time. They are not formulated for stainless steel. Stick to products designed for metal surfaces or simple mineral oil.
How do you make stainless steel look new again?
Start with a deep clean to remove built-up grease. Then apply a dedicated stainless steel polish or a thin coat of food-grade mineral oil. Buff thoroughly. Regular weekly maintenance (wipe with a damp microfiber cloth, dry, buff) will keep it looking fresh. For everyday upkeep, cleaning inside of stainless steel dishwasher may also help you keep a consistent cleaning routine across all appliances.
Conclusion
Polishing a stainless steel fridge doesn’t require expensive products or endless elbow grease. The secret lies in understanding the grain, using the right cloths, and applying a light oil or polish that protects without leaving a mess. Once you master these steps, a gleaming fridge becomes a five-minute routine rather than a weekly chore. Your kitchen’s centerpiece will reflect light — and your effort — every time you walk by. Start with a simple vinegar-water spray and a microfiber cloth — your fridge will thank you.
