

Lingering cooking smells, a persistent greasy film, or clouds of smoke that refuse to dissipate after a particularly enthusiastic stir-fry – these are common kitchen frustrations that a properly functioning range hood can solve. While many range hoods simply recirculate air by filtering it, venting your range hood directly outside is the most effective way to remove grease, smoke, moisture, and odors, significantly improving your kitchen's air quality and overall comfort. This comprehensive guide will walk you through the entire process, from understanding your options to the final checks, ensuring your kitchen environment is as fresh and pleasant as it is functional.
Understanding Range Hood Venting: Why Go Outside?
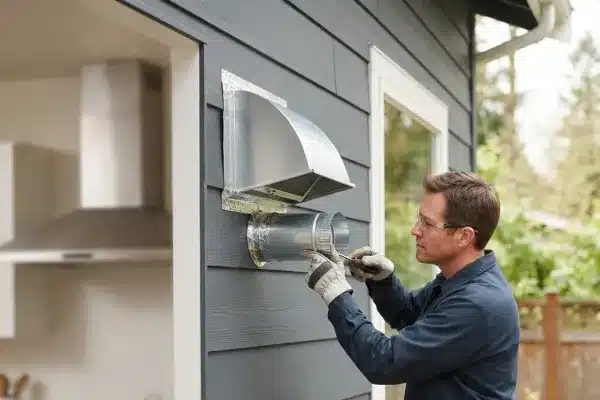
Venting a range hood externally is the gold standard for kitchen air purification. Unlike recirculating hoods, which merely filter and return air to your kitchen, an external vent expels airborne contaminants directly outside your home. This has several key benefits:
- Superior Odor Removal: Effectively eliminates cooking smells before they permeate your living spaces.
- Grease and Smoke Extraction: Removes microscopic grease particles and smoke, preventing their accumulation on surfaces and protecting your cabinets and appliances.
- Moisture Control: Extracts steam and humidity generated during cooking, reducing the risk of mold and mildew growth.
- Improved Air Quality: Contributes to a healthier indoor environment by reducing airborne pollutants.
- Quieter Operation: External vents often allow for quieter operation as the fan motor can be placed further away from the cooking area.
While internal recirculation is a viable option when external venting is impossible, it is generally less effective, especially in homes with high-heat cooking or open-plan designs.
Choosing the Right Range Hood for External Venting
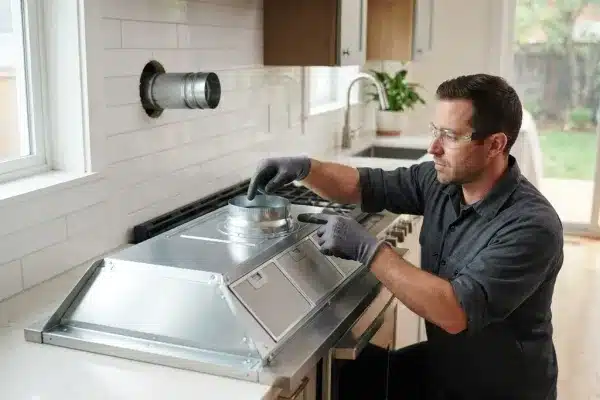
Before you begin the installation, ensuring you have the right type of range hood designed for external venting is paramount. Nearly all professional-grade and many residential range hoods are designed for ducted installation.
Types of Range Hoods for External Venting
- Under-Cabinet Range Hoods: These are mounted directly beneath your kitchen cabinets, offering a streamlined look and utilizing existing cabinetry space. They are a popular choice for their balance of performance and aesthetics.
- Wall-Mounted Range Hoods: Designed to be installed on your kitchen's backsplash against an exterior or interior wall. They offer a range of aesthetic styles, from sleek modern designs to classic chimney styles.
- Island Range Hoods: These are suspended from the ceiling and are ideal for kitchens with an island cooktop. They provide excellent ventilation for open-plan layouts but require careful planning for duct routing.
- Downdraft Range Hoods: Integrated into the stovetop or countertop, these hoods rise when needed. While innovative, their ducting can be more complex, often requiring venting through the floor or an adjacent cabinet.
Sizing and CFM Requirements
Proper sizing and adequate airflow (measured in Cubic Feet per Minute, or CFM) are critical for effective ventilation.
- Width: A good rule of thumb is that the range hood should be at least as wide as your cooktop. For optimal capture, it should extend 3 inches beyond the cooktop on each side. For example, a 30-inch cooktop will benefit from a 36-inch range hood.
- CFM: This dictates how much air the hood can move. For standard electric or gas ranges, aim for a minimum of 100 CFM per linear foot of cooktop width. For high-output gas ranges or commercial-style cooktops, you may need 150-200 CFM or more. It's always better to have slightly more CFM than you think you need, as you can always run the hood on a lower setting. Many modern range hoods offer variable speed settings. Consider using a tool like the Home Ventilating Institute's (HVI) calculator for precise recommendations. For a general idea, most residential ducted range hoods fall between 200-600 CFM.
Essential Tools and Safety Precautions
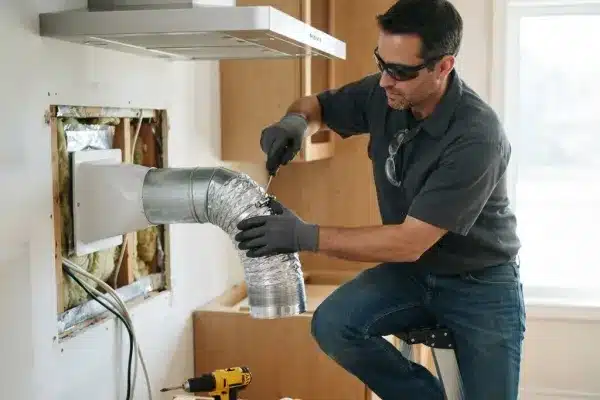
Gathering the correct tools and prioritizing safety are non-negotiable steps before you start cutting into walls or ceilings.
Tools You'll Need
- Drill and Drill Bits: Including a spade bit or auger bit for wood and, if necessary, a masonry bit for brick or concrete.
- Hole Saw (Optional but Recommended): For a cleaner cut when creating the exhaust hole through walls or the roof.
- Screwdriver Set: Both Phillips and flathead.
- Utility Knife or Box Cutter: For opening packaging and cutting sealant.
- Measuring Tape: For accurate placement and measurements.
- Level: To ensure the hood and ductwork are installed straight.
- Stud Finder: To locate wall studs for secure mounting.
- Reciprocating Saw or Jigsaw: For cutting through drywall or wood.
- Sheet Metal Shears: For cutting and shaping ductwork.
- Caulking Gun: For applying sealant.
- Ladder: A stable, sturdy ladder for accessing ceiling or high wall areas.
- Safety Gear: Safety glasses/goggles, work gloves, and a dust mask.
Prioritizing Safety
- Turn Off Power: Always disconnect power to the area where you'll be working, especially if you are near existing electrical wiring. If you are unsure, switch off the main breaker for your kitchen.
- Wear Protective Gear: Safety glasses are crucial to protect your eyes from debris. Gloves will prevent cuts and splinters. A dust mask is recommended, especially when cutting into walls.
- Stable Work Surfaces: Ensure your ladder is secure and on a level surface. Avoid overreaching.
- Know Your Structure: Be aware of potential plumbing pipes or electrical wires within walls or ceilings. Use a stud finder with electrical detection or consult building plans if available.
- Proper Ventilation: Work in a well-ventilated area, especially when drilling or cutting.
Planning Your Venting Pathway
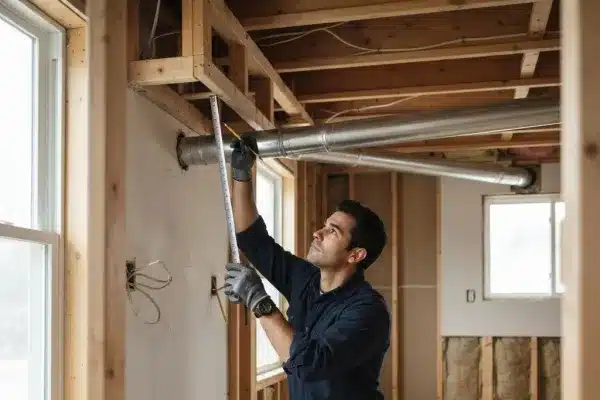
The route your ductwork takes is critical for efficient airflow and minimizing installation complexity. The goal is usually the most direct path possible from the range hood to an exterior wall or roof.
Assessing Your Kitchen Layout
Begin by evaluating your kitchen's current configuration:
- Range Hood Location: Where is your cooktop situated? Is it against an exterior wall, an interior wall, or in a kitchen island?
- Exterior Wall Access: If your cooktop is against an exterior wall, this is often the simplest venting option. You'll need to determine the optimal location for the exterior vent cap, ensuring it's not too close to windows, doors, or other vents to avoid re-entry of exhaust.
- Roof Access: For island hood installations or kitchens without convenient exterior wall access, venting through the roof is a common solution. This typically involves routing ductwork up through the ceiling and attic space.
- Obstructions: Identify any joists, beams, plumbing, electrical wiring, or HVAC ducts that lie in your potential path. These will dictate the routing and may require modifications or alternate paths.
Choosing the Best Route
- Directness is Key: The shortest, most direct path with the fewest bends will provide the best airflow and efficiency. Each bend (elbow) in the ductwork reduces airflow by an equivalent of 5-10 feet of straight duct.
- Wall vs. Roof Venting:
- Wall Venting: Generally easier to install and less costly. However, placement is crucial to avoid issues like backdrafts or interference with windows. Ensure the exterior cap slopes slightly downwards to prevent water ingress.
- Roof Venting: Often provides superior airflow due to a straighter path and can be less obtrusive aesthetically. It requires attic access and potentially more complex installation. A proper roof flashing kit is essential to prevent leaks.
- Building Codes: Always check your local building codes. There may be specific requirements regarding vent termination locations (e.g., minimum distance from windows, doors, property lines) and the type of materials allowed. Consult the International Residential Code (IRC) or your local building department for guidance.
Installing the Exterior Vent Cap and Ductwork

This is where your planning translates into action.
Creating the Exterior Wall Opening
- Mark the Location: Using a stud finder, determine if you are drilling into a stud. It's ideal to center your vent hole between studs if possible. If you must go through a stud, you may need to reinforce the opening later.
- Drill a Pilot Hole: From inside your kitchen, drill a small pilot hole through the exterior wall at your chosen vent location. This allows you to confirm the path and position from the outside.
- Cut the Main Hole: From the exterior, using your pilot hole as a guide, drill the main hole for the vent cap. The size of this hole will depend on the diameter of your ductwork (typically 4", 6", 8", or 10"). A hole saw is highly recommended for a clean, circular cut. If drilling through brick or concrete, use a masonry bit and a hammer drill.
- Install the Vent Cap: Slide the exterior vent cap (often a hooded or louvered fitting) through the hole from the outside. Ensure it's positioned correctly and flush against the siding. Secure it firmly with screws. Use exterior-grade caulk to seal any gaps between the vent cap flange and the wall to prevent water and air leaks.
Routing the Ductwork
- Measure and Cut: Measure the distance from the range hood's exhaust outlet to the exterior vent opening, accounting for any turns. Cut your chosen duct material (rigid metal ducting is generally preferred for efficiency and durability) to size.
- Connect to the Hood: Attach the first section of ductwork to the range hood's exhaust collar. Use foil tape (specifically designed for HVAC) or metal clamps to create a secure, airtight seal. Many hoods require an adapter to transition from the hood's specific outlet size to standard duct diameter.
- Connect to the Exterior Vent: Carefully route the ductwork towards the exterior vent, minimizing bends as much as possible. Use elbows (45° or 90°) for turns but try to limit them. Secure each section with foil tape and/or clamps. If routing through attic spaces, ensure ducts are properly supported to prevent sagging.
- Sealing All Connections: This is paramount for efficiency. Use high-quality HVAC foil tape or mastic sealant on every joint and connection. Air leaks in the ductwork will significantly reduce the system's effectiveness and waste energy.
Rigidity vs. Flexibility
- Rigid Metal Ducting: Typically made of galvanized steel or aluminum, rigid ducting offers the smoothest interior surface for airflow, leading to less friction, better CFM, and reduced noise. It's the preferred choice for efficiency and longevity.
- Flexible Ducting: While easier to maneuver around tight spaces, flexible ducting has an interior corrugation that impedes airflow and can trap grease. If used, it should be for very short runs and kept as taut as possible. It's generally not recommended for the primary duct run.
Sealing and Insulating for Optimal Performance
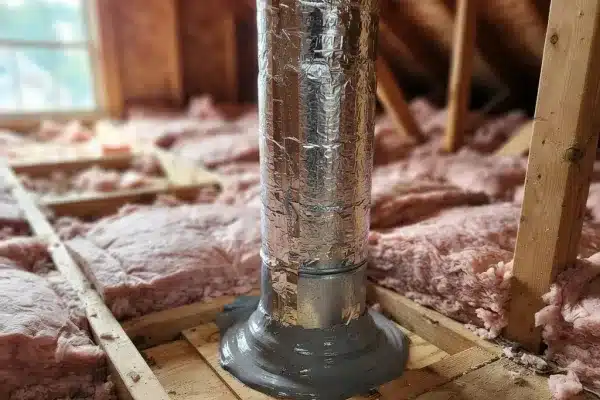
Proper sealing and, where applicable, insulation are key to a high-performing, energy-efficient venting system.
Sealing All Joints and Penetrations
- Duct Connections: As mentioned, use HVAC-grade foil tape or mastic sealant on every seam, elbow, and connection point within the duct system. Ensure the tape is applied smoothly without wrinkles.
- Wall/Ceiling Penetrations: Seal around the exterior vent cap where it meets the house siding. If the ductwork passes through ceilings or walls, seal the gap between the duct and the opening in the building material.
Insulating Ducts (Especially in Unconditioned Spaces)
If your ductwork passes through unconditioned spaces like an attic, crawl space, or unheated garage, insulation is crucial to prevent condensation and heat loss.
- Condensation: In colder climates, warm, moist air from your kitchen can condense inside cold ducts, leading to water damage and mold.
- Heat Loss: In colder weather, insulating the ductwork prevents the air from cooling down before it exits, and in warmer weather, it can help prevent heat gain.
- How to Insulate: Wrap the ductwork with fiberglass pipe insulation or a similar material with a high R-value. Secure it with tape or ties. Ensure a continuous layer of insulation with no gaps.
Testing and Final Checks

Once everything is installed and sealed, it's time to test your new venting system.
The Paper Test
- Turn on the Fan: Set your range hood to its highest fan speed.
- Hold a Piece of Paper: Carefully hold a standard piece of printer paper a few inches in front of the intake grille(s).
- Observe the Pull: The paper should be noticeably pulled towards the hood. If it sticks firmly, you have good airflow. If it barely moves or falls away, there's likely an issue with suction.
Checking for Airflow at the Exterior Vent
- Go outside and check the exterior vent cap. You should feel a steady stream of air being expelled. If it’s windy, it might be harder to feel, but you should ideally see something (like leaves being pushed) or hear the air moving. Ensure the exterior vent flap (if present) is opening freely.
Listening for Issues
- Listen for any unusual rattling, knocking, or excessive vibration. These could indicate loose ductwork, an unbalanced fan, or debris within the system.
Identifying and Fixing Common Problems
- Weak Airflow:
- Check for kinks or sharp bends in the ductwork.
- Ensure filters are clean and properly installed.
- Verify that the fan motor is running at the correct speed.
- Make sure the exterior vent cap is not blocked by debris or has a malfunctioning damper.
- Confirm that you have adequate CFM for your cooktop.
- Noise:
- Loose duct tape or clamps can cause rattling.
- Ensure the hood is securely mounted.
- A fan motor issue might cause humming or grinding noises.
- Leaks:
- Visible air escaping from duct connections or penetrations. Re-seal all points of leakage.
Ongoing Maintenance for Longevity
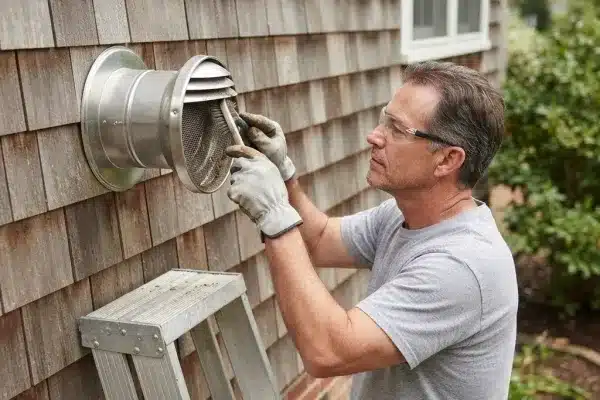
A well-maintained range hood vent system will provide years of reliable service.
Regular Cleaning
- Hood Filters: Clean or replace your range hood's mesh or baffle filters monthly, or more often if you're a heavy user. Grease buildup in filters drastically reduces airflow and increases fire risk. Most metal filters are dishwasher safe – check your manufacturer's instructions.
- Hood Surfaces: Wipe down the exterior and interior surfaces of the hood regularly with a degreaser and a soft cloth.
Duct Inspection
- Annual Check: Annually, inspect the accessible portions of your ductwork for grease buildup, disconnected sections, or damage. If significant grease buildup is observed, professional cleaning might be necessary.
Vent Cap Check
- Periodically check the exterior vent cap for obstructions like bird nests, leaves, or insect nests. Ensure the damper or flap moves freely.
Frequently Asked Questions
How does a range hood vent outside?
A range hood uses a fan to draw air through its filters and then push it through a system of ducts that terminate outside your home. This expels smoke, grease particles, steam, and odors.
Is it better to vent a range hood through a wall or roof?
Both have benefits. Wall venting is often simpler and less expensive. Roof venting can offer straighter duct runs for better airflow and is often preferred for island hoods. The best choice depends on your kitchen layout, home structure, and local building codes.
How do you vent a stove that is not on an outside wall?
If external wall venting isn't feasible, you have a few options. You can route ductwork through the ceiling and attic to vent through the roof. Alternatively, if external venting is impossible, a ductless range hood with charcoal filters can recirculate and filter the air, though this is less effective at odor and moisture removal than external venting.
Can you have a range hood that doesn't vent outside?
Yes, you can use a ductless range hood. These hoods feature charcoal or carbon filters that capture odors and grease, recirculating the filtered air back into the kitchen. They are a good solution when external venting isn't an option, but their air purification capabilities are less potent than ducted systems. Regular filter replacement is crucial for ductless hoods.
Conclusion
Venting your range hood directly outside is a significant upgrade that dramatically improves your kitchen's air quality, reduces odor and grease buildup, and creates a more enjoyable cooking environment. While it requires careful planning and execution, following these step-by-step instructions can make the process manageable. By choosing the right hood, planning a direct duct path, ensuring airtight seals, and performing regular maintenance, you'll enjoy a fresher, cleaner, and healthier kitchen for years to come. Don't let cooking odors or smoky kitchens dampen your culinary spirit – take control of your kitchen's air.
