
Your kitchen hood light flickers then dies right when you need it most. Learning how to change my proline vent hood light blulb saves you a service call and keeps your cooktop visible. The job looks simple until you stare at a stuck cover or a bulb base that will not budge.
Most homeowners finish in fifteen minutes once they know the correct steps.
Proline hoods typically use a standard E26 screw base or a GU10 bi‑pin socket rated for 120 volts. Manufacturer specifications indicate a maximum of 50 watts for halogen or 10 watts for LED equivalents. Let us walk through the process from safety shutdown to final test.
Quick Answer
Turn off power at the breaker. Let the hood cool for ten minutes. Remove the light cover by releasing clips or screws.
Unscrew the old bulb counter‑clockwise. Insert the matching replacement bulb. Reattach the cover.
Restore power and test the light.
Why This Task Is Trickier Than It Looks
The bulb sits behind a lens that collects grease and heat. That grime acts like glue on the clips. Many owners force the cover and snap a plastic tab.
Others buy the wrong bulb because the base looks similar but the voltage differs. A stuck halogen bulb can shatter if you apply uneven pressure. The tight workspace above a stove adds awkward angles.
Knowing the common failure points prevents damage to your hood.
What You're Working With: The Hood Light Assembly
The light assembly consists of three main parts. The socket mounts to the hood liner. The bulb threads or plugs into that socket.
A removable cover, glass, polycarbonate, or metal mesh, protects the bulb from splatter. Clips or small machine screws hold the cover in place. Some models use a twist‑lock ring instead of clips.
Identifying your cover style before you start saves time.
| Component | Common Types | Removal Method |
|---|---|---|
| Cover | Glass lens, plastic shield, metal mesh | Clips, screws, twist ring |
| Socket | E26 screw, GU10 bi‑pin | Fixed to liner |
| Bulb | Halogen PAR20, LED A19, LED GU10 | Twist or pull |
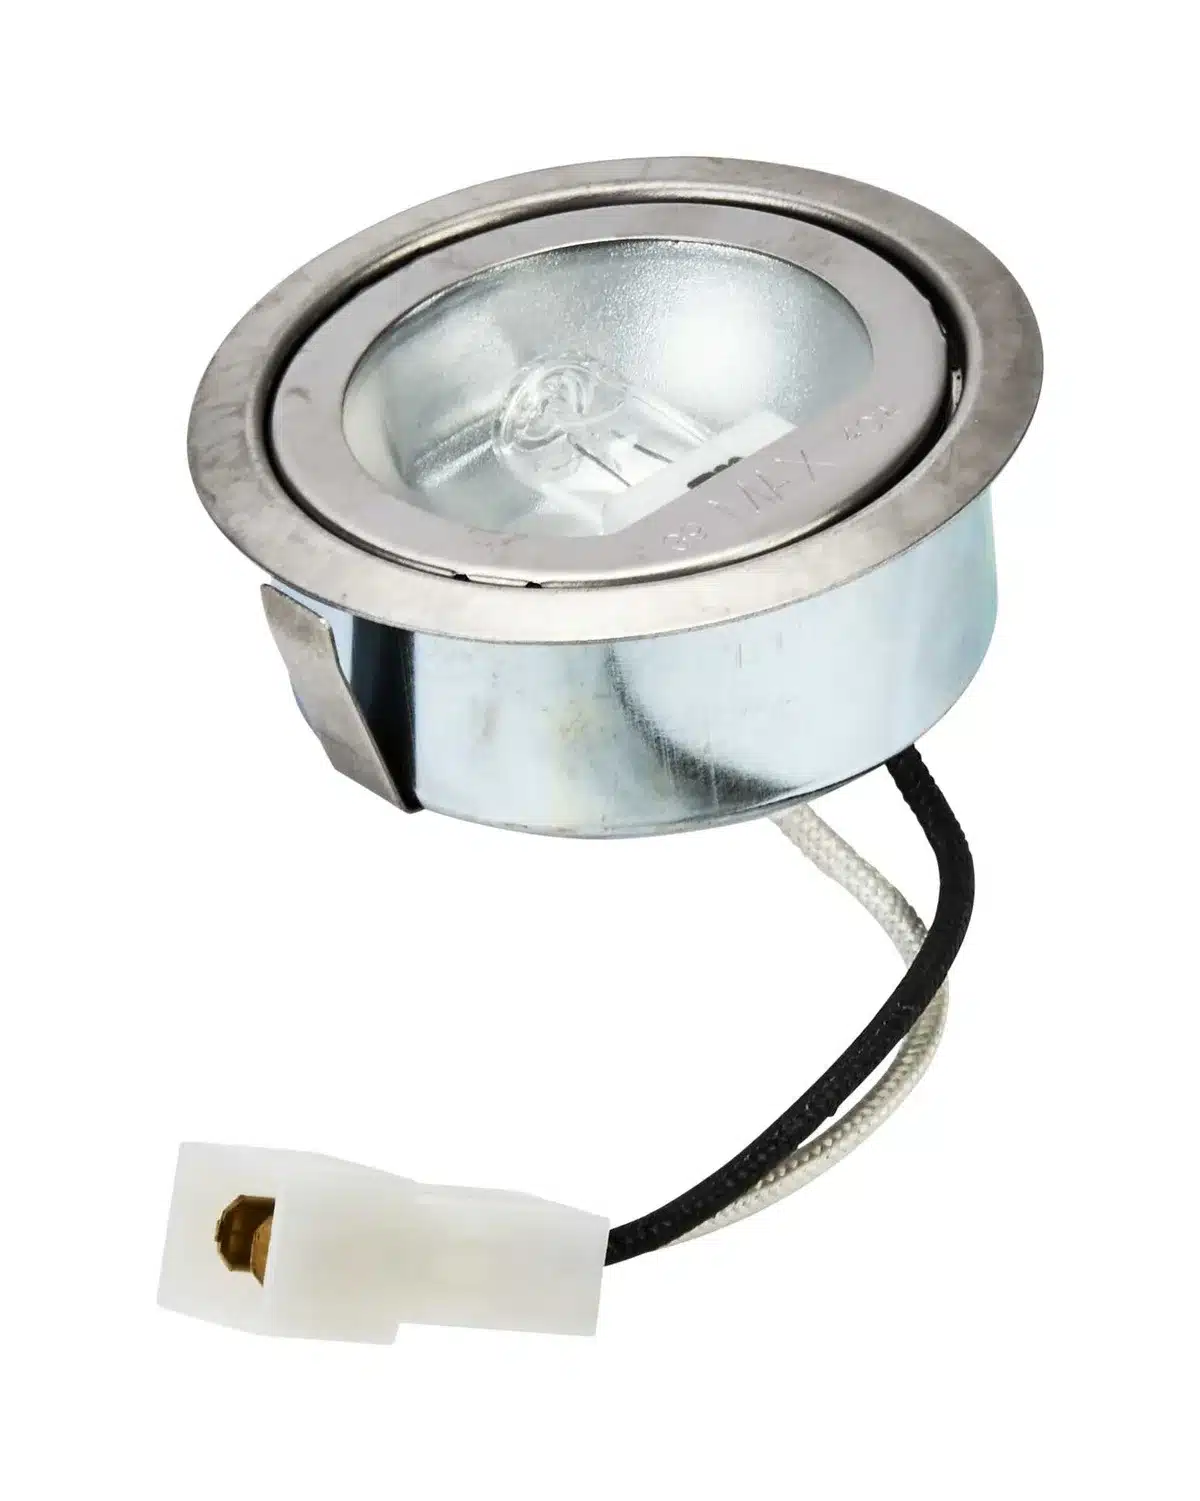
Image source: Web (Bing) / storage.googleapis.com (Web image (fair-use with source credit))
Identifying the Right Replacement Bulb
Check the old bulb for printed specs. Look for base type, wattage, and voltage. If the markings are worn, measure the base diameter with a ruler.
An E26 base measures roughly 26 millimeters across. A GU10 base shows two pins spaced 10 millimeters apart. Match the voltage exactly, 120 volts for North American models.
Choose LED for lower heat and longer life. Halogen runs hotter and fails faster. Aggregate reviews report LED replacements last three to five times longer than halogen originals.
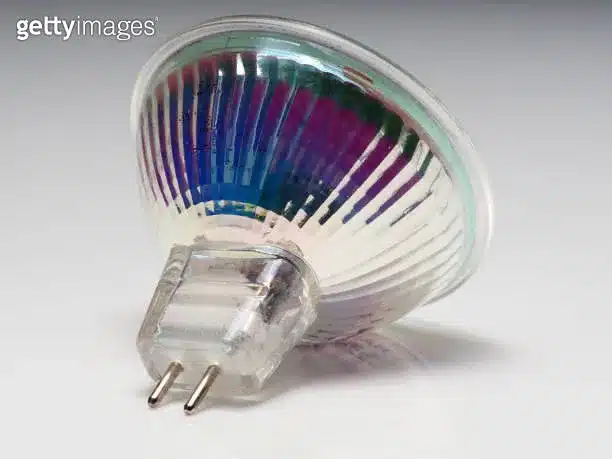
Image source: Bing (Web (fair-use with source credit))
Step-by-Step: Removing the Old Bulb
- Kill the power. Flip the dedicated breaker or unplug the hood. Verify the light stays off when you hit the switch.
- Wait for cooling. Halogen bulbs reach 300 degrees Fahrenheit. Ten minutes prevents burns and thermal shock to the new bulb.
- Protect the finish. Lay a soft towel on the cooktop or ladder step.
- Release the cover. Squeeze metal clips inward or unscrew the retainers. For twist rings, rotate counter‑clockwise until free.
- Set the cover aside. Place it on a stable surface lens‑side up.
- Grip the bulb. Use a clean cloth or rubber glove for traction.
- Turn counter‑clockwise. Apply steady pressure. If the base binds, wiggle gently, do not force.
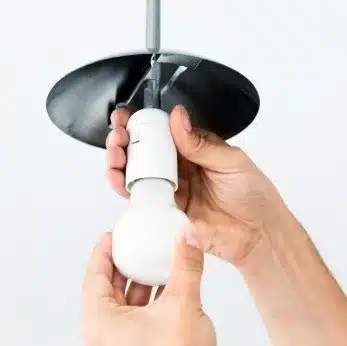
Image source: Web (Bing) / thriftyfun.com (Web image (fair-use with source credit))
If the bulb shatters, keep the power off. Use needle‑nose pliers to extract the base. Wear safety glasses during this step.
how to change my proline vent hood light blulb
Your kitchen hood light flickers then dies right when you need it most. Learning how to change my proline vent hood light blulb saves you a service call and keeps your cooktop visible. The job looks simple until you stare at a stuck cover or a bulb base that will not budge.
Most homeowners finish in fifteen minutes once they know the correct steps.
Proline hoods typically use a standard E26 screw base or a GU10 bi‑pin socket rated for 120 volts. Manufacturer specifications indicate a maximum of 50 watts for halogen or 10 watts for LED equivalents. Let us walk through the process from safety shutdown to final test.
Common Mistakes and How to Avoid Them
Forcing the cover is a top error. The lens clips can rust from grease. Use a soft‑rubber spatula to pry them gently.
Do not use a screwdriver for clips because it scratches the finish. If you feel resistance, stop and check alignment.
Buying the wrong bulb is another frequent slip. The base shape looks similar but wattage differs. Always compare the old bulb’s label.
Many buyers pick halogen when LED is better for heat. LED lasts longer and uses less power, which is ideal for frequent use.
Skipping the cooling step can cause thermal shock. Halogen bulbs reach 300 °F after use. Ten minutes of cooldown protects the new bulb and the socket.
Rushing this step can crack the glass and leave you without light.
Using metal tools near the socket invites short circuits. A screwdriver can contact live contacts if power is not off. Use plastic or nylon handles only when removing screws.
Keep water away from the electrical parts.
Ignoring grease buildup leads to poor contact. A dirty socket can cause flickering. Wipe the socket with a dry cloth before installing the new bulb.
Clean the cover monthly to prevent grime from seizing clips.
What Can Go Wrong After Installation
A flickering bulb after replacement often signals a poor connection. The socket may have corrosion from previous heat cycles. Inspect the contacts; a shiny surface indicates good contact.
If the contacts are green or powdery, clean them with a contact‑cleaning spray.
Dim light can result from using a lower‑wattage LED. The hood’s light assembly expects a certain lumen output. Compare the new bulb’s specs to the original.
If the light looks washed out, swap for a bulb with similar lumen rating.
Overheating of the new bulb can happen if the hood’s ventilation is blocked. Grease filters may be clogged, raising ambient temperature. Clean the filter per the manufacturer’s guide.
A blocked vent forces the bulb to work harder and shortens its life.
Water entering the socket causes rust and rusted contacts. Moisture can seep from a cracked cover or from cleaning sprays. Ensure the cover seals tightly after reinstallation.
Apply a small amount of silicone sealant to the cover’s edges if condensation persists.
Electrical shocks are rare but possible if power is not fully disconnected. A flickering light may indicate a live wire. Use a voltage tester on the socket before touching any components.
If the tester reads voltage, turn off the circuit at the breaker.
Bulb failure within weeks suggests a faulty socket. The socket may have been damaged during removal. Many pros replace the socket if it feels loose.
A loose socket can cause intermittent connections that stress the bulb.
Safety Essentials: Power, Heat, and Stability
Turn off the circuit breaker for the hood before you start. Verify the light is off by flipping the switch. Use a non‑contact voltage tester on the socket to confirm no live voltage.
Let the bulb cool for at least ten minutes. Halogen bulbs can exceed 300 °F. Cooling prevents burns and thermal shock to the new bulb.
Wear safety glasses to protect eyes from accidental glass fragments.
Use a sturdy step‑stool or a ladder with a wide base. Place a towel on the step to protect the hood’s finish. Never stand on a chair or unstable surface.
Keep the work area dry to avoid slips.
Avoid metal tools near the socket when power is off. A stray screwdriver can still cause a short. Use plastic or nylon handles for any screw removal.
Keep water and cleaning agents away from the electrical components.
Replace any cracked or warped cover immediately. A broken cover lets smoke escape and reduces airflow. A damaged cover can also cause moisture ingress.
Order a replacement cover from the manufacturer’s parts list.
After reinstalling the cover, double‑check that all clips are fully engaged. A loose cover can rattle and damage the bulb during operation. If the cover feels loose, re‑secure the clips or tighten screws.
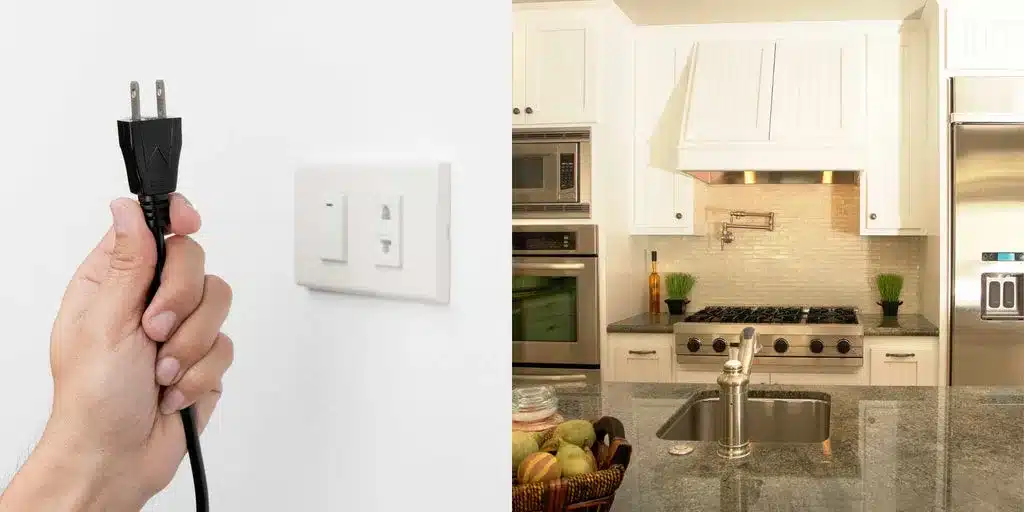
Image source: Web (Bing) / megafurniture.sg (Web image (fair-use with source credit))
Refer to UL standards for household appliance electrical safety. UL 1674 outlines requirements for lighting fixtures in kitchen hoods. Following these guidelines ensures compliance with national electrical codes.
Pro Tips from Appliance Technicians
Clean the socket contacts with a dry, lint‑free cloth before installing the bulb. Oxidation builds up over time and can cause intermittent light. A quick wipe removes residue and improves connection reliability.
Use a small brush or compressed air to clear dust from the bulb housing. Dust traps heat and reduces illumination. Keep the interior of the hood free of debris for optimal performance.
Replace the bulb in pairs if you notice frequent failures. Two bulbs on opposite sides of the assembly distribute load. This practice reduces strain on each individual bulb.
Inspect the mounting clips for wear each time you change the bulb. Cracked clips lose tension and may not hold the cover securely. Replace worn clips to prevent future unscheduled removals.
Consider upgrading to LED bulbs for lower heat and longer life. LED draws less current and stays cool to the touch. Many manufacturers offer LED equivalents that match halogen brightness.
Use a gentle twisting motion when installing the bulb. Over‑tightening can strip the screw threads in the socket. A snug fit is enough to secure the bulb without force.
Check the hood’s wiring for loose connections if the new bulb still flickers. Loose wires can cause voltage drops. Tighten any visible screws on the wiring harness with a screwdriver.
Link to Best Product For Cleaning Kitchen Grease for a recommended cleaner that removes buildup without harsh chemicals. Cleaning the area around the socket helps prevent future corrosion.
Refer to NFPA 70B for maintenance best practices on household appliances. This standard provides guidelines for routine inspections and safe handling of electrical components.
How to Keep Your Hood Light Running Longer
Clean the light cover monthly with mild soap and water. Grease accumulates quickly in a kitchen environment. A clean cover lets full light output through.
Inspect the bulb socket each quarter for signs of corrosion. A bluish-green residue signals oxidation. Wipe the contacts with a contact‑cleaning solution if needed.
Replace the bulb proactively before it burns out. Halogen bulbs typically last 2,000, 3,000 hours. LED bulbs can exceed 25,000 hours, so schedule replacements based on usage.
Monitor the hood’s voltage stability. Fluctuations can stress the bulb and shorten life. If you notice dimming lights elsewhere, check the home’s electrical panel.
Check the gasket around the cover for cracks. A damaged gasket lets steam in and accelerates rust. Replace the gasket to maintain a tight seal.
Use a dehumidifier in the kitchen if excess humidity is a problem. High humidity speeds corrosion on metal components. A dry environment extends the life of both bulbs and sockets.
Keep the hood’s ventilation clear. A blocked vent raises internal temperature. Clean the exhaust fan and filters regularly to maintain airflow.
Link to Best Terry Cloth Kitchen Towels for a soft cloth that won’t leave lint on the hood’s interior. A lint‑free cleaning tool helps keep the light assembly pristine.
Refer to the Proline model’s maintenance schedule in the user manual. Each model lists recommended service intervals. Following the schedule ensures warranty compliance and optimal performance.
Step-by-Step: Installing the New Bulb
Align the new bulb base with the socket. Push gently and turn clockwise until the bulb seats snugly. Do not overtighten.
LED bases strip easily under too much pressure.
Reattach the cover by positioning it over the bulb. Engage clips one side at a time or replace the screws. The cover should sit flush against the hood liner.
A gap lets grease escape and reduces light output.
Restore power at the breaker. Flip the hood switch to test the new bulb. If the light flickers, turn it off and check the socket contacts.
A loose fit causes intermittent connection.
Run the hood fan for a minute to let the bulb warm up evenly. Inspect the cover seal while the hood runs. Any rattle means the cover needs reseating.
Frequently Asked Questions
How do I know which replacement bulb to buy?
Check the markings on the old bulb for base type, wattage, and voltage. If the text is worn, measure the base diameter or count the pin spacing. Match the specs exactly before purchasing.
Can I use an LED bulb instead of halogen in my Proline hood?
Yes, if the base type matches. LED bulbs draw less power and run cooler. They last longer than halogen and reduce heat buildup in the housing.
Confirm the voltage rating matches your model.
Why does the new bulb flicker after installation?
Flickering usually means poor contact. Clean the socket contacts with a dry cloth. If that does not fix it, the socket may be worn.
A loose socket needs replacement by a technician.
How often should I replace the hood light bulb?
Replace halogen bulbs every 1,000 to 2,000 hours of use. LED bulbs can last 15,000 to 25,000 hours. Check the bulb monthly for dimming or discoloration.
Is it worth calling a professional for a simple bulb change?
Call a pro if the socket feels loose or shows scorch marks. Also call if the breaker trips after installation. Electrical issues beyond a bad bulb need expert attention.
The Bottom Line
Changing a Proline vent hood light bulb is a quick task once you know the steps. Safety comes first: cut power and let the bulb cool. Identify the correct replacement bulb by matching base type and voltage.
Remove the cover carefully to avoid breaking clips. Install the new bulb without forcing it. Test and reseat the cover if needed.
Most homeowners finish in under thirty minutes. The main pitfalls are buying the wrong bulb and forcing the cover. Avoid both by checking specs and using gentle pressure.
Keep the socket clean for reliable performance. A little maintenance goes a long way toward a bright, functional kitchen.
