
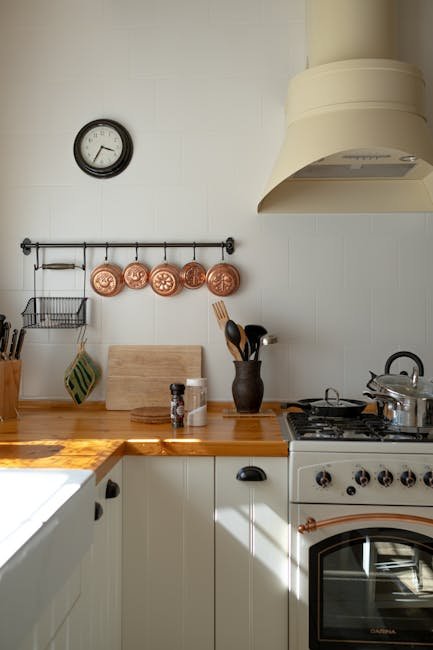
Your kitchen deserves better than lingering grease and cooking odors. An under cabinet range hood is one of the most effective upgrades you can make—it clears smoke, traps grease, and keeps your kitchen smelling fresh. While the idea of installation might feel intimidating, the reality is straightforward with the right preparation.
This guide walks through every phase of installing an under cabinet range hood, from choosing the correct model to final testing. Whether you're replacing an old unit or adding ventilation where none existed, these steps will help you complete the job safely and cleanly.
Choosing the Right Range Hood for Your Kitchen
Selecting the wrong hood is the most common mistake DIYers make. It leads to poor performance, awkward fits, and unnecessary returns. Focus on three things: type, size, and power.
Types of Range Hoods
Under cabinet hoods mount directly beneath your upper cabinet and are the most space-efficient choice for standard kitchens. They blend in without taking up visual space.
Wall-mounted hoods attach to the wall above a stove when there is no cabinet above—common in open layouts or older homes.
Island hoods hang from the ceiling for cooktops positioned away from walls. These require more complex ductwork and usually need professional help.
For a standard kitchen setup, an under cabinet model is the practical winner.
Size and Power Considerations
Your hood should match the width of your cooktop. A 30-inch stove needs a 30-inch hood. Going smaller leaves cooking zones uncovered; going larger looks odd and costs more.
Power is measured in cubic feet per minute (CFM). For light cooking, 400–600 CFM is sufficient. For heavy frying or wok cooking, aim for 600–900 CFM. A common guideline is 100 CFM per burner, but your actual needs depend on cooking habits.
If you regularly sear steaks or deep-fry, prioritize higher CFM. For occasional simmering, a lower rating works fine.
Gathering Necessary Tools and Materials
Laying out everything beforehand prevents frustrating mid-project runs to the hardware store.
Basic Tools Required
- Drill with assorted bits (including a ⅛-inch pilot bit)
- Screwdriver set (Phillips and flathead)
- Tape measure
- Level
- Pencil
- Stud finder
- Safety glasses
- Stepladder
Additional Materials Needed
- Range hood unit (verify dimensions)
- Mounting brackets and screws (included with most hoods)
- Ductwork (rigid metal duct preferred)
- Duct tape or foil tape (not standard duct tape)
- Wire nuts
- Electrical cable (if hardwiring)
- Charcoal filters (if using recirculating mode)
Check your manufacturer's manual for specific requirements. Some models include everything except basic tools.
Preparation Steps
Rushing preparation leads to misaligned holes and crooked hoods. Take the time to get this right.
Measuring the Space
Measure the width of the space under your cabinet. Confirm your hood matches that width.
Measure the depth from the wall to the front edge of the cabinet. The hood should sit flush or slightly recessed—protruding past the cabinet looks unfinished.
Measure the height between the cooktop and the bottom of the cabinet. For gas stoves, the minimum clearance is typically 24–30 inches. For electric cooktops, 18–24 inches is standard. Check your stove manual for exact recommendations.
Ensuring Proper Ventilation
You have two options: ducted (vents outside) or ductless (recirculates through filters).
Ducted is more effective. It removes heat, moisture, and odors completely. This requires running ductwork through your cabinet, ceiling, or wall to the exterior.
Ductless is simpler to install. Air passes through charcoal filters and returns to the kitchen. It's adequate for light cooking but does nothing for heat or humidity.
For a permanent, high-performance solution, go ducted. If you rent or cannot cut exterior holes, the ductless path works as a solid alternative. For more detail on this approach, check out our guide on ductless hood installation.
Mounting the Range Hood
This stage determines whether your hood stays level and secure for years.
Marking the Mounting Points
Hold the hood against the underside of the cabinet. Use a level to ensure it's straight.
Mark the screw holes through the hood's mounting brackets onto the cabinet. If your hood uses a separate mounting plate, attach that first and mark through its slots.
Double-check alignment with the cooktop center. A hood that's off-center looks wrong and performs poorly.
Drilling Holes and Securing Brackets
Drill pilot holes at your marks. Use a bit slightly smaller than your screws.
If you hit a stud, great—screw directly into it. If there's no stud, use toggle bolts or wall anchors rated for the hood's weight. A typical 30-inch hood weighs 20–40 pounds. Undersized anchors will fail.
Attach the mounting brackets securely. Tighten with a screwdriver—don't overtighten and strip the holes.
Lift the hood into place, aligning it with the brackets. Lock it in according to your model's instructions. Many hoods slide onto brackets and lock with a final screw.
Installing Ductwork
Proper duct routing is what separates an efficient hood from a noisy, weak one.
Choosing the Right Duct Type
Rigid metal duct is always better. It moves air efficiently, doesn't sag, and resists grease buildup.
Flexible aluminum duct is easier to route around obstacles but reduces airflow by up to 30% due to its ribbed interior. Avoid it unless absolutely necessary.
Use smooth, round duct if possible. Rectangular duct works but requires transition fittings that can restrict airflow.
Connecting the Duct to the Vent
Route the duct from the hood's exhaust outlet to your exterior wall cap or roof vent. Keep the path as straight as possible—every bend reduces performance.
Seal every joint with foil tape (not standard duct tape, which degrades over time). Screw the seams together first, then tape.
If your installation requires running duct through cabinetry, you'll need to cut holes in cabinet shelves or the cabinet top. Measure carefully. For a detailed walkthrough of connecting ductwork, see our full guide on range hood duct installation.
Insulate ductwork in unconditioned spaces (attics, garages) to prevent condensation.
Electrical Connections
Electricity demands respect. If any step here feels uncomfortable, hire a licensed electrician.
Wiring the Range Hood
Turn off power at the circuit breaker. Confirm with a voltage tester before touching any wires.
Most hoods have a junction box with three wires: black (hot), white (neutral), and green or bare (ground).
Connect house black to hood black with a wire nut. Connect white to white. Connect ground to ground.
If your hood has a plug, you may only need to plug into an existing outlet under the cabinet. Some jurisdictions require GFCI protection for kitchen outlets—check local codes.
Ensure all connections are tight. Push wires into the junction box and secure the cover.
Testing the Electrical System
Restore power. Turn the hood on.
Listen for smooth motor operation. Test every speed setting. Check that lights work (if included). Feel for strong airflow at the vent opening.
If the hood hums but doesn't spin or trips the breaker, turn off power immediately and recheck your wiring and connections.
Final Adjustments and Testing
The hood is mounted and powered. Now confirm it performs as intended.
Checking for Leaks
With the fan running, feel around duct joints for air escaping. Listen for whistling sounds—they indicate gaps.
Seal any leaks with foil tape. Even small gaps reduce efficiency and allow grease to seep into cabinets.
Verifying Proper Functionality
Place a piece of tissue paper near the intake area. It should pull toward the hood firmly. If not, check for duct blockages or insufficient fan speed.
Test the hood with steam from a boiling pot. It should pull steam away, not let it curl upward.
Adjust the hood's position if needed. Even a slight tilt can ruin the look. Tighten all mounting screws.
Maintenance Tips
A range hood only works well if you maintain it. Neglect leads to poor performance, noise, and fire risk from grease buildup.
Cleaning the Filters
Metal mesh filters trap grease. Remove them every month (more often if you cook heavily). Soak in hot, soapy water and scrub with a soft brush. Some are dishwasher safe—check your manual.
Charcoal filters (used in ductless installations) cannot be cleaned. Replace them every 6–12 months depending on cooking frequency.
A clean filter makes a noticeable difference in airflow and noise. For other useful kitchen maintenance tips, you might also benefit from knowing how to clean a dishwasher filter and how to clean a stainless steel dishwasher interior—both share the same grease-cutting principles.
Routine Maintenance Schedule
- Monthly: Clean or replace metal filters. Wipe hood exterior.
- Quarterly: Check duct connections for leaks. Inspect fan for wobbling or unusual noise.
- Annually: Remove and clean the fan blades (if accessible). Replace charcoal filters. Lubricate motor bearings if your model requires it.
Keep the exterior clean to prevent grease from hardening into stubborn residue.
Frequently Asked Questions
Do under-cabinet range hoods need to be vented?
Not necessarily. Ducted hoods are more effective at removing heat and moisture. Ductless hoods recirculate cleaned air back into the kitchen. Choose based on your kitchen's structure and cooking habits.
How much does it cost to install an under-cabinet range hood?
DIY installation costs $150–$500 for the hood and materials. Professional installation adds $150–$400 depending on complexity. Total cost averages $300–$800. Hardwiring or difficult duct routing increases the bill.
Can you install a range hood yourself?
Yes, with basic tools and careful attention to manufacturer instructions. This guide covers the process thoroughly. For complex electrical work or roof venting, consider professional help.
Do you need an electrician to install a rangehood?
Not always. If your hood plugs into an existing outlet, you can handle it. If new wiring or a dedicated circuit is needed, hire a licensed electrician for safety.
Conclusion
Installing an under cabinet range hood is a weekend project that dramatically improves your kitchen's air quality and comfort. The key steps—choosing the right hood, measuring accurately, mounting securely, running ductwork efficiently, and wiring safely—are all within reach for a confident DIYer.
Take your time with measurements. Verify power is off before touching wires. Seal duct joints thoroughly. And once it's running, commit to regular filter cleaning.
Your kitchen will stay fresher, your cabinets will collect less grease, and you'll enjoy cooking without that lingering smell throughout your home. For related kitchen upgrades, you might also want to read about what causes musty smells under your kitchen sink or how to handle a leaking pipe under your sink—both common issues in busy kitchens.
With the right preparation and this guide, you can complete your range hood installation confidently and enjoy the results for years.
