
If you’ve ever opened the cabinet under your kitchen sink and stared at a tangle of pipes, you’re not alone. That cramped space holds the entire drainage and water-supply system for one of the busiest fixtures in your home. A small leak or a slow drain can quickly turn into a flooded cabinet or a costly emergency call. Understanding what those pipes do, how to maintain them, and when you can fix things yourself will save you stress, money, and time.
This guide walks you through everything from the basic anatomy of the plumbing to hands‑on repair steps, the right tools, and clear signs that it’s time to call a professional. No plumbing degree required — just a willingness to look, learn, and act early.
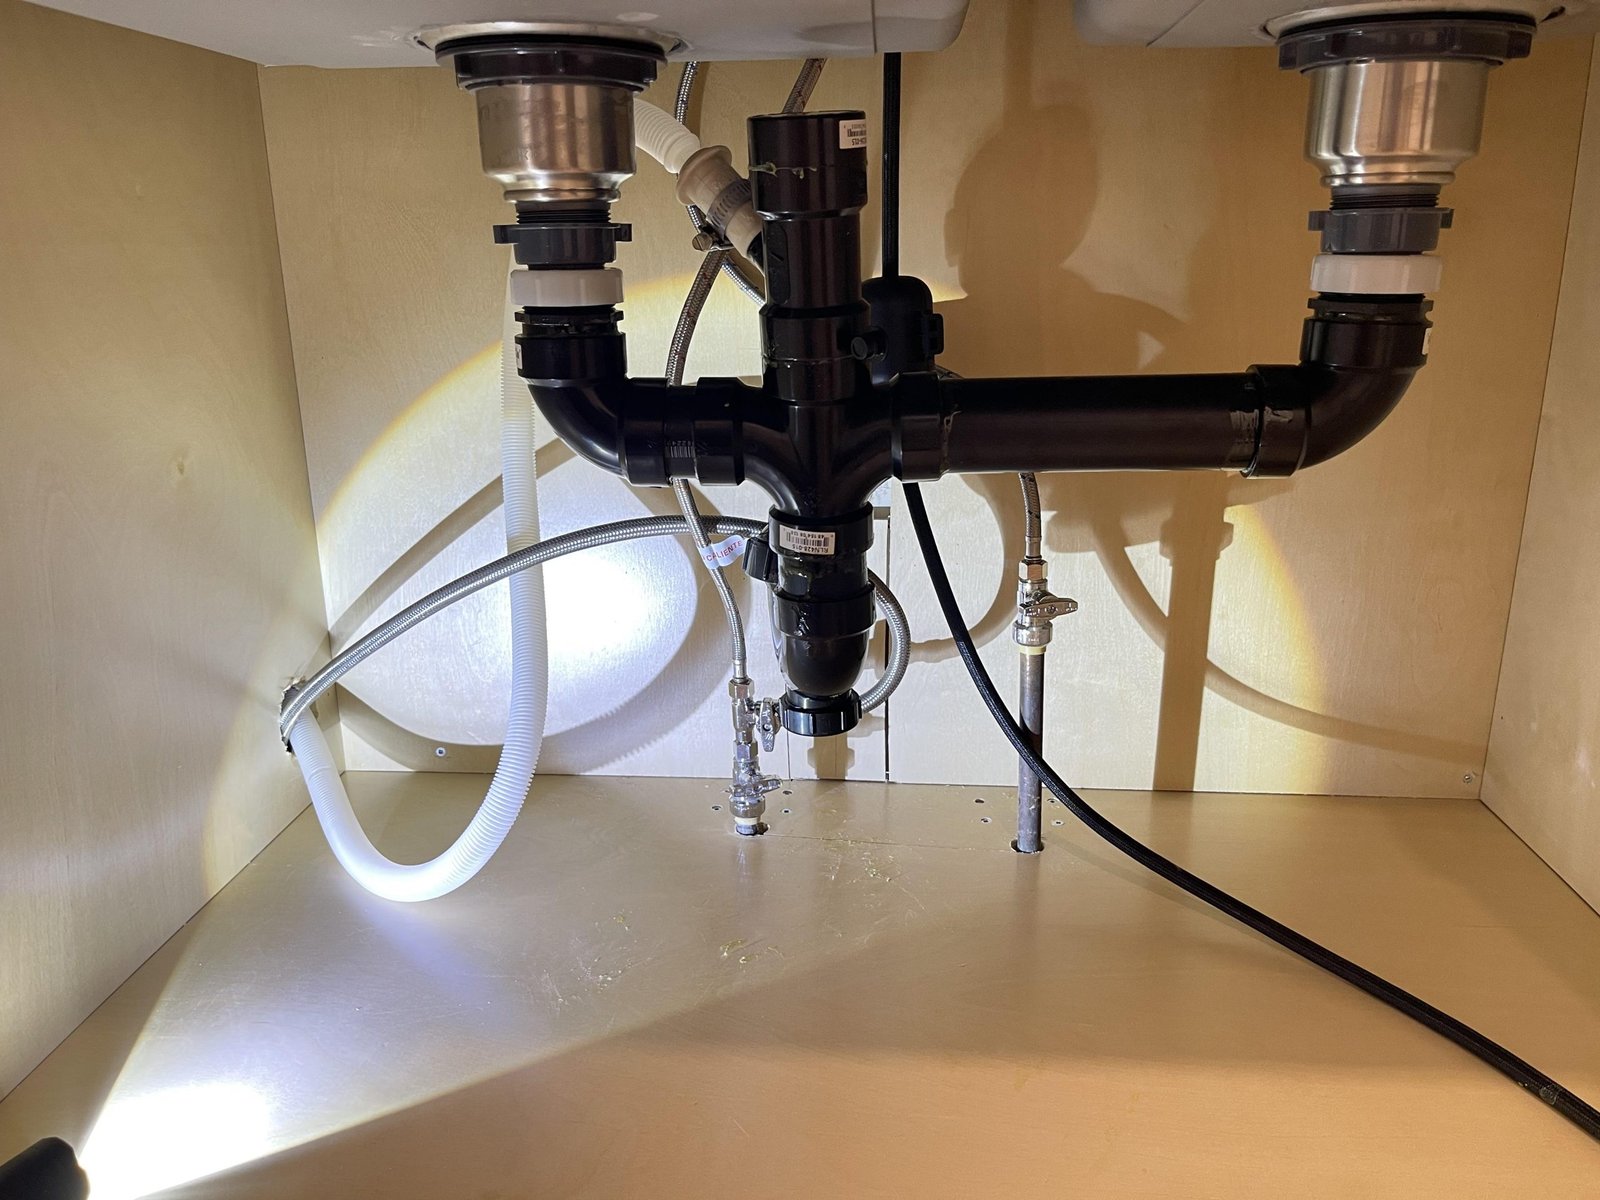
 A typical under‑sink layout showing the P‑trap, drain pipe, and supply lines.
Know the Anatomy: What’s Under There?
Before you can fix or maintain anything, you need to know the parts. The system under your kitchen sink has two main branches: water supply (fresh water coming in) and drainage (waste water going out).
Water Supply Lines
These bring hot and cold water to your faucet. Modern homes usually use:
- Braided stainless‑steel flex lines — durable, rust‑resistant, and easy to install.
- PEX tubing — flexible, color‑coded (red for hot, blue for cold), and resistant to freezing damage.
- Copper pipe — rigid, long‑lasting, but requires soldering for connections.
Each supply line has a dedicated shut‑off valve. Knowing where those valves are — and keeping them easy to turn — is your first line of defense against a leak emergency. For a detailed guide on those valves, see our separate article on shutting off the water supply.
Drainage System
The drain side consists of several components that work together to carry wastewater away while blocking sewer gases:
- Sink strainer / flange — the metal piece at the bottom of the sink basin.
- Tailpiece — the straight pipe that drops from the strainer.
- P‑trap — the curved section that holds water to seal out odors. It also catches small objects you accidentally drop.
- Drain arm — the horizontal pipe leading from the P‑trap into the wall.
- Tee fitting — often connects a dishwasher drain line or a second sink basin.
A clear diagram of this layout can really help. Check out our plumbing diagram with dishwasher for a visual reference.
Pipe Materials: What You Need to Know
The original article covered PVC, copper, and galvanized steel, but the advice deserves more depth and a few additions.
PVC (Polyvinyl Chloride)
- Pros: Lightweight, corrosion‑proof, affordable, easy to cut and glue.
- Cons: Brittle in freezing temperatures; not rated for hot water above 140°F (most kitchen sinks are fine, but dishwashers can push water near that limit).
- Best use: Drain and vent lines. If you have a garbage disposal, make sure the PVC drain pipe is compatible — some older codes require metal.
ABS (Acrylonitrile Butadiene Styrene)
- Pros: Slightly more impact‑resistant than PVC; simpler solvent‑welding.
- Cons: Degrades under direct sunlight (not an issue under the sink); may not be allowed in all local plumbing codes.
- Best use: Older homes and areas where ABS is the standard for DWV (drain‑waste‑vent). Check local code before mixing materials.
Copper
- Pros: Very long lifespan (50+ years), naturally antimicrobial, handles hot water easily.
- Cons: Expensive, requires soldering skills, can corrode in acidic water (pH below 6.5).
- Best use: Supply lines in high‑quality plumbing. Not typical for modern drain pipes.
Galvanized Steel
- Pros: Extremely strong, physically resistant.
- Cons: Prone to internal rust and mineral buildup that reduces water pressure over time. Common in houses built before 1960. Replacing it is often necessary.
- Best use: None, for new work. If you still have galvanized pipes, plan to replace them with copper or PEX.
PEX (Cross‑Linked Polyethylene)
- Pros: Flexible, freeze‑tolerant (expands slightly without cracking), fewer fittings needed.
- Cons: Cannot be reused once crimped; can be chewed by rodents if exposed.
- Best use: Supply lines for new construction and retrofits. Increasingly popular due to ease of installation.
A common mistake is mixing materials without the right transition fittings. Always use a dielectric union when joining copper to galvanized steel to prevent electrolytic corrosion. The U.S. Environmental Protection Agency offers general guidance on corrosion in household plumbing, but check your local code for specific requirements.
Common Problems and How to Spot Early
Leaks and Drips
Leaks happen most often at threaded connections and slip‑joint nuts. Even a slow drip — one drop per second — wastes over 3,000 gallons of water a year. That’s enough to fill a small swimming pool and will add noticeable dollars to your water bill.
Where to look:
- At the P‑trap slip nuts (hand‑tighten first).
- Under the supply‑line shut‑off valves.
- At the sink strainer flange (water collects under the sink on the shelf).
A flashlight and a dry paper towel are all you need. Wipe everything clean, then check again in 24 hours. If you see fresh moisture, you’ve found the spot.
Clogs and Slow Drains
Clogs are usually a gradual buildup of grease, soap scum, and food particles inside the drain arm or P‑trap. Coffee grounds and rice are common offenders.
Signs:
- Water takes longer than usual to drain.
- Gurgling sounds after the sink empties.
- Water backing up into the opposite sink basin if you have a double sink.
If your dishwasher drains into the same pipe, a clog can cause dirty water to flow back into the dishwasher. Our guide on cleaning a Frigidaire dishwasher filter offers steps for preventing that.
Corrosion and Metal Fatigue
Metal pipes, especially older copper or galvanized, can fail at the joint where the pipe enters the shut‑off valve. Look for greenish oxidation (copper) or orange‑brown flakes (galvanized). If you see any, replacement is safer than a patch.
Bad Odors
A foul smell under the sink usually means:
- The P‑trap has dried out (rare if used daily, but possible in a guest sink).
- A biofilm has grown inside the drain arm.
- A crack in the P‑trap is letting sewer gas escape.
Pour a bucket of water down any seldom‑used sink every few weeks to keep the trap seal intact. For persistent smells, remove and clean the P‑trap (see DIY section below).
Regular Maintenance Routine (Do This Monthly)
A five‑minute check each month can prevent 90% of under‑sink emergencies.
- Visual inspection. Shine a flashlight on every joint and valve. Look for water droplets, rust stains, or white mineral deposits.
- Hand‑tighten nuts. Slip‑joint nuts on the P‑trap often loosen slightly over time. Tighten them just until snug — overtightening can crack the plastic.
- Flush with hot water. Run the hottest tap water for 30 seconds once a week to melt grease buildup in the drain arm.
- Baking soda and vinegar treatment. Pour ½ cup baking soda down the drain, follow with ½ cup white vinegar, wait 15 minutes, then flush with boiling water. This breaks down early clogs without harsh chemicals. (Never use this trick immediately after a chemical drain cleaner — it can create toxic fumes.)
- Check supply‑line hoses. Braided stainless lines can bulge or fray at the end. Replace any that look worn — they cost less than $10 and failure can flood your kitchen in minutes.
DIY Repair: Step‑by‑Step for the Most Common Fixes
You do not need to be a plumber to handle the repairs below. Always turn off the water supply first — both shut‑off valves under the sink. Then run the faucet to relieve pressure.
Fixing a Leaky P‑Trap
The P‑trap is the most‑repaired part under a sink because it’s all threaded joints.
- Place a bucket under the trap.
- Unscrew the two slip‑nuts (hand‑turn counterclockwise; use pliers only if stuck).
- Remove the trap and empty any debris.
- Check the rubber washers inside each nut — they often flatten or crack. Replace them with new ones from a hardware store.
- Reassemble: hand‑tighten the nuts, then give them an extra quarter‑turn with pliers. Do not overtighten.
- Run water and check for drips.
Clearing a Stubborn Clog Without Chemicals
If baking soda and vinegar didn’t work, try the “P‑trap disassembly” method above. For clogs deeper in the drain arm, use a drain snake (also called a plumber’s auger):
- Insert the cable into the drain opening until you feel resistance.
- Crank the handle while pushing gently.
- When you break through, pull the cable out (wear gloves — it will be messy).
- Flush with hot water.
For a visual walkthrough of the entire process, see our article on replacing pipes under the sink, which also applies to removal and cleaning.
Replacing a Worn‑Out Supply Line
Braided stainless‑steel supply lines have a lifespan of about 10–15 years. If yours are rusty, bulging, or date back to your home’s original build, replace them.
- Shut off the water. Turn on the faucet to drain the line.
- Use two wrenches: one to hold the valve body, one to loosen the compression nut on the supply line.
- Remove the old line and take it with you to the hardware store for size matching.
- Install the new line — hand‑tighten the nuts, then give them a snug turn with a wrench (about one full turn past hand‑tight).
- Slowly open the valve and check for leaks. Tighten slightly if needed.
Tools Every Homeowner Should Keep Under the Sink (Almost)
You don’t need a huge toolbox, but having these four items within easy reach makes maintenance fast:
| Tool | Why you need it |
|---|---|
| Adjustable wrench (8‑inch or 10‑inch) | Tightens and loosens almost every nut under the sink. |
| Slip‑joint pliers | Grips pipe fittings without damaging them. |
| Plumber’s tape (PTFE tape) | Wraps around threaded connections to seal tiny gaps. |
| Bottle brush or small drain snake | Cleans biofilm from the P‑trap without disassembly. |
A small bucket and a flashlight are also essential. Keep them in a zippered pouch taped to the inside of the cabinet door — you’ll always know where they are.
When to Stop and Call a Professional
Some problems are best left to a licensed plumber, even if you’re handy.
- You smell natural gas. If a gas line runs near the sink (rare, but possible in older layouts), evacuate and call the gas company immediately.
- Leak is coming from inside the wall. That means a pipe behind the drywall has failed. Opening the wall and repairing the leak requires drywall repair and possibly a permit.
- The main shut‑off valve won’t turn. Corroded main valves can break off if forced. A plumber has the tools to replace it safely.
- You’ve tried multiple fixes and the leak returns. This often indicates a systemic problem — such as high water pressure wearing out fittings — that a professional can diagnose with a pressure gauge.
Persistent clogs that don’t clear after snaking the drain arm might be caused by a collapsed pipe or tree root intrusion (in houses with basement or slab plumbing). That’s beyond the scope of DIY.
Preventive Measures That Really Work
Long‑term pipe health is about habits, not hardware.
- Install a sink strainer. The mesh kind catches scraps before they enter the drain. Empty it into the trash, not the garbage disposal.
- Never pour grease down the sink. Pour cooled grease into a jar and throw it away. Liquid grease solidifies inside the drain pipe and traps food particles.
- Run cold water when using the garbage disposal. Cold water keeps fats solid so they get chopped and flushed. Hot water melts them, allowing fat to deposit deeper in the pipe.
- Replace supply lines every 10 years. Mark a date on the inside of the cabinet door with a permanent marker.
- Consider upgrading to PEX or push‑fit fittings if you have old copper or galvanized steel. Push‑fit connections (like SharkBite) are DIY‑friendly and allow future changes without soldering. Our article on changing pipes under the kitchen sink covers the process step by step.
Frequently Asked Questions
What’s the purpose of a P‑trap under the kitchen sink?
The curved “P” shape holds a small amount of water that acts as a barrier. This water seal prevents smelly sewer gases from rising into your kitchen. Without a working P‑trap, your sink would become an open vent to the sewer line.
Can I mix PVC and ABS pipes?
No — they require different solvent cements and are not compatible without a special transition fitting. If your home has both materials, use a mechanical coupling designed for the transition. Check local code; some jurisdictions require all drain pipes to be the same material.
Why does my sink drain slowly even after I cleared the P‑trap?
The blockage is likely further down the drain arm or in the wall. Try a drain snake. If that doesn’t work, the problem could be a partially blocked vent pipe on your roof. That’s a job for a professional.
How often should I replace the rubber washers in the P‑trap?
Every 2–3 years, or whenever you disassemble the trap. They cost pennies and prevent leaks that can damage cabinet floors. Our guide on installing a P‑trap includes proper washer selection.
Conclusion
The pipes under your kitchen sink don’t have to be a mystery or a source of anxiety. With a little knowledge of the components, a monthly check‑up, and a small set of basic tools, you can handle the vast majority of everyday issues yourself. Leaks get caught early, clogs are cleared without harsh chemicals, and you’ll know exactly when to call a plumber — saving you hundreds of dollars in unnecessary service calls.
Start today: open that cabinet, look around, and tighten any loose nuts. That single action could be the difference between a dry floor tomorrow and a soaked cabinet six months from now. Your kitchen — and your wallet — will thank you.
