
The intricate network of pipes and connections hidden beneath your kitchen sink can seem daunting, but understanding its basic layout is key to tackling common issues. Whether you're facing a slow drain, a persistent leak, or just curious about how it all works, this guide breaks down the essential components and provides you with the knowledge to perform simple DIY repairs. Familiarity with your under-sink plumbing not only empowers you to handle minor problems but also helps you communicate effectively with professionals if a complex issue arises. Let's demystify the plumbing beneath your kitchen sink.
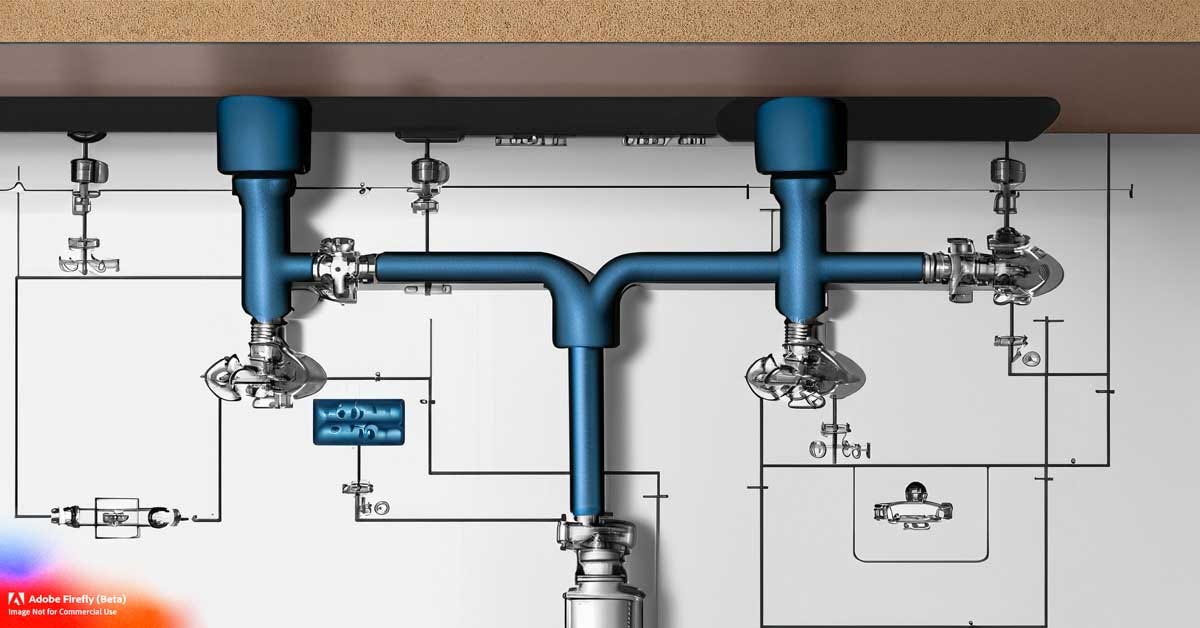 A typical arrangement of plumbing components found under a kitchen sink.
Key Components Under Your Kitchen Sink
Identifying the various parts beneath your sink is the first step toward understanding their function and diagnosing potential problems. Each component plays a crucial role in water supply, drainage, and preventing unpleasant odors from entering your home.
Water Supply Lines
These flexible or rigid tubes carry hot and cold water from your home's main supply directly to your kitchen faucet. They are typically made of braided stainless steel (for flexible lines) or PEX (cross-linked polyethylene), Copper, or CPVC (for rigid lines). The two shut-off valves, one for hot and one for cold, are connected to these supply lines.
Shut-Off Valves
Essential for maintenance and emergencies, these valves allow you to isolate the water flow to your faucet without shutting off the water to your entire house. You'll usually find two of them: a red-marked valve for hot water and a blue-marked valve for cold water. Turning these valves clockwise shuts off the water supply. In practice, these are often the first place to check if you need to stop water flow for a repair. If your existing valves are difficult to turn or show signs of corrosion, consider learning more about how to install shut off valve under kitchen sink.
Faucet Connections
The supply lines connect directly to the underside of your faucet assembly. These connections often utilize threaded fittings, secured with nuts. Leaks can occur here if the connections are loose or if the gasket or O-ring inside the fitting has degraded.
Drainpipe Assembly
This system transports wastewater away from your sink. It typically includes:
- Tailpiece: The vertical pipe extending down from the sink drain.
- Flange: The piece that fits into the sink drain opening, often secured with plumber's putty or a rubber gasket.
- Basket Strainer: The perforated insert that prevents larger food particles from entering the drain.
- Sink Tailpiece: A horizontal extension from the tailpiece to the P-trap.
The P-Trap
This is the U-shaped or S-shaped section of pipe directly below your sink. Its primary function is to hold a small amount of water, creating a seal that prevents sewer gases from rising through your drain and into your kitchen. This is a very common culprit for foul odors, often indicating a need for a deeper clean or addressing under kitchen sink smells musty.
Garbage Disposal (If Applicable)
Many modern kitchens feature a garbage disposal unit fitted between the sink drain and the P-trap. This appliance grinds food waste to prevent clogs in the drainpipe. It has its own inlet for drain connection and an outlet that connects to the P-trap.
Dishwasher Drain Hose Connection
If you have a dishwasher, its drain hose will typically connect into the sink drain assembly, often via a specially designed nipple on the tailpiece or P-trap, or sometimes directly into the garbage disposal unit.
Common Plumbing Issues and How to Spot Them
Recognizing the signs of plumbing problems early can prevent minor inconveniences from escalating into costly disasters. Vigilance beneath the sink can save you significant stress and expense.
Leaky Pipes and Fittings
The most common symptom of a leak is the presence of water or dampness under the sink. Look for:
- Drips: Small droplets of water forming on pipes, connections, or the cabinet floor.
- Puddles: Standing water beneath the sink, which could indicate a more significant leak or a clog backing up.
- Water Stains: Discoloration on the cabinet floor or walls, indicating past or ongoing moisture.
- Mold or Mildew: The musty smellassociated with persistent moisture is a strong indicator. In practice, leaks often occur at threaded connections or where pipes join. A loose fitting might be tightened, but a cracked pipe or a failed seal will require repair or replacement.
Slow or Clogged Drains
A sink that drains slowly is a clear sign of a partial blockage. If water backs up completely, it's a full clog. Common causes include:
- Grease Buildup: Kitchen grease solidifies in pipes, trapping food particles.
- Food Scraps: Large or fibrous food remnants can accumulate, especially if a garbage disposal is improperly used or absent.
- Soap Scum: Over time, soap residue can harden and contribute to clogs. Pay attention to gurgling sounds, which often precede a complete backup. Persistent slow drainage can also be a precursor to under kitchen sink smells musty, as trapped water in the P-trap can stagnate.
Strange Noises
Unusual sounds coming from your plumbing are not to be ignored.
- Gurgling: Usually indicates air being forced through water in the drainpipes, often a sign of a blockage further down the system or a venting issue.
- Banging (Water Hammer): This can occur when water flow is abruptly stopped, causing pipes to vibrate. While often related to the faucet, it can sometimes originate from issues within the supply lines or valves.
- Whistling: A high-pitched sound might suggest a restriction in water flow or an issue with a specific fixture.
Essential DIY Tools for Under-Sink Repairs
Having the right tools on hand can make a significant difference when you need to perform basic repairs or maintenance. Investing in a few key items will save you time and frustration.
Adjustable Wrenches and Pliers
- Adjustable Wrenches: Essential for gripping and turning nuts and bolts of various sizes. A medium-sized adjustable wrench (e.g., 8-10 inches) is versatile for most under-sink tasks.
- Pipe Wrench: While less common for routine sink repairs, a pipe wrench offers superior grip on cylindrical objects like pipes, useful for stubborn connections.
- Slip-Joint Pliers: These provide a quick adjustment for gripping a wide range of diameters and are useful for holding nuts or fittings steady.
- Basin Wrench: A specialized tool with a long shaft and a pivoting head, designed to reach and turn the nuts that secure a faucet in place, often in tight spaces.
Plunger
A simple cup plunger is incredibly effective for clearing minor clogs in sinks and drains. The suction and pressure it creates can dislodge blockages caused by food particles or grease. For sinks with an overflow drain, aflange over the overflow opening can improve its effectiveness.
Plumber's Tape (Teflon Tape) and Pipe Dope
These sealing compounds are crucial for creating watertight threads on pipe connections.
- Plumber's Tape: A thin, pliable PTFE tape that you wrap around the male threads of a pipe fitting. It compresses to form a seal. Use 3-4 wraps in a clockwise direction.
- Pipe Dope (Thread Sealant Paste): A thicker paste applied to threads that also helps lubricate them for easier assembly and seals gaps.
Bucket or Drain Pan
Always have a bucket or drain pan placed beneath the P-trap and any other joints you plan to loosen. This will catch residual water, preventing a mess on your cabinet floor.
Drain Snake (Auger)
For more stubborn clogs that a plunger can't resolve, a drain snake is indispensable. This flexible metal cable can be fed into the drainpipe to break up or retrieve blockages located deeper within the system. For sink drains, a small hand-crank auger is usually sufficient. If you're experiencing frequent clogs, it might be time to consider changing pipes under kitchen sink.
Rags and Towels
Plenty of old rags or towels are necessary for wiping up drips, cleaning components, and drying areas after a repair.
Step-by-Step DIY Repairs: Common Fixes
With the right tools and a clear understanding of the components, many common under-sink issues can be resolved yourself. Remember to always turn off the water supply before starting any repair involving water lines.
Fixing a Leaky P-Trap or Drainpipe Connection
- Prepare: Place a bucket directly under the P-trap to catch water and debris. Clear out items stored under the sink for better access.
- Locate the Leak: Thoroughly dry the area around the suspected leak with a rag. Turn on the faucet briefly (if there's no leak from the supply lines) and observe where the water appears first. Leaks often originate at the slip-nut connections that join the trap to the tailpiece and the wall pipe.
- Tighten Connections: Gently try tightening any loose slip nuts by hand. If that doesn't work, use pliers or an adjustable wrench, but be careful not to overtighten, which can crack plastic fittings.
- Disassemble and Inspect: If tightening doesn't help, loosen the slip nut, remove the P-trap, and check the plastic washers inside. These washers are directional and can become deformed or brittle over time, leading to leaks. Ensure they are seated correctly and are free from cracks or damage. If worn, they need replacement. You can often purchase universal replacement kits at hardware stores.
- Reassemble: Clean the pipes and fittings. Reassemble the P-trap, ensuring the washers are in place and the nuts are snug. Run water to test for leaks.
Clearing a Clogged Drain
- Try a Plunger: Ensure there's enough water in the sink to cover the plunger cup. Create a tight seal around the drain opening. Vigorously pump the plunger up and down several times. If you have a double sink, block the other drain with a wet rag or stopper.
- Clean the P-Trap: If plunging fails, the clog is likely in the P-trap. Loosen the slip nuts on either side of the trap (as described above) and remove it. Empty the trap's contents into the bucket and clean out any accumulated gunk using a brush or wire.
- Use a Drain Snake: If the trap is clear but the sink still drains slowly, the clog is further down the line. Feed the drain snake into the pipe opening where the trap was connected. Crank the handle to push the snake through the blockage, or rotate it to hook and pull debris out.
- Flush: After clearing the clog, reassemble the P-trap and run hot water down the drain for a few minutes to flush away any remaining debris. If you have a garbage disposal, run it with plenty of cold water after clearing the sink drain. For persistent clogs or if you're uncomfortable, consult resources on how to replace the pipes under a kitchen sink.
Replacing a Faulty Shut-Off Valve
Replacing a shut-off valve is a more advanced DIY task that requires caution.
- Turn Off Main Water Supply: Locate your home's main water shut-off valve and turn it off completely. Open the kitchen faucet to drain any residual water from the pipes.
- Disconnect Supply Line: Use an adjustable wrench to disconnect the flexible supply line from the faulty shut-off valve. Have a bucket ready for any drips.
- Remove Old Valve: Use a pipe wrench or adjustable wrench to unscrew the old valve from the pipe stub-out coming from the wall. You may need to hold the pipe stub-out steady with another wrench to prevent turning.
- Prepare New Valve: Apply plumber's tape (3-4 wraps clockwise) or pipe dope to the threaded end of the pipe stub-out. Ensure you have a new valve that matches the connection type and size.
- Install New Valve: Screw the new shut-off valve onto the pipe stub-out. Tighten it securely with wrenches, ensuring it's straight and not cross-threaded.
- Reconnect Supply Line: Reconnect the flexible supply line to the new valve, tightening the nut securely.
- Test: Slowly turn the main water supply back on. Check the new valve and the supply line connection for any leaks. Once you're confident there are no drips, turn on the faucet to test the hot and cold water flow.
Preventive Maintenance for Your Under-Sink Plumbing
Regular maintenance can significantly reduce the likelihood of plumbing emergencies and prolong the life of your pipes and fixtures.
Regular Inspections
Periodically (every few months) visually inspect all pipes, fittings, and connections under the sink. Look for:
- Any signs of moisture, drips, or puddles.
- Corrosion or discoloration on metal pipes or fittings.
- Cracks or wear on plastic pipes or flexible supply lines.
- Loose fittings.
P-Trap Cleaning
Before clogs become a major issue, periodically clean out your P-trap. This can be done with a brush or by briefly disassembling it as part of your routine cleaning. This is particularly important if you frequently wash down greasy foods or coffee grounds.
Gentle Cleaning Practices
- Avoid Pouring Grease Down the Drain: Always dispose of grease and cooking oil in the trash or a dedicated container.
- Use Strainers: Ensure your sink strainers are clean and in place to catch food particles.
- Run Hot Water: After running the dishwasher or washing dishes, let hot water run for a minute or two to help flush any residual grease or soap scum through the system.
- Chemical Use Caution: While readily available, harsh chemical drain cleaners can damage pipes and seals over time. Opt for mechanical methods like plungers, snakes, or natural solutions whenever possible. For cleaning up grime, learning how to make degreaser can be a safer, more effective alternative.
Checking Supply Lines
Flexible braided supply lines, while convenient, have a finite lifespan. Check for any signs of fraying, kinking, or bulging, and consider replacing them every 5-10 years as a preventative measure, similar to how one might maintain other kitchen appliances like dishwashers – for instance, remember to how to clean filter in frigidaire dishwasher regularly.
Safety Precautions for DIY Plumbing
Working with water and plumbing components requires careful attention to safety to prevent injury and property damage.
Water Shut-Off is Paramount
Always confirm that the water supply (either individual shut-off valves or the main supply) is completely turned off before attempting any repair that involves disconnecting pipes or valves. Turning off the water is the most critical safety step.
Protect Yourself
- Eye Protection: Wear safety glasses or goggles to protect your eyes from potential splashes of water, debris, or chemicals.
- Gloves: Plumbing work can involve sharp edges, gritty debris, and potentially unsanitary conditions. Wear sturdy gloves to protect your hands.
- Proper Footwear: Wear closed-toe shoes to protect your feet from dropped tools or objects.
Manage Water Spills
Have plenty of rags and towels ready to immediately clean up any water spills. Standing water can create slip hazards and lead to property damage or mold growth. Be prepared to contain and remove any water that escapes.
Ventilation
If you are using any chemical drain cleaners or dealing with a situation that might release sewer gases, ensure the area is well-ventilated. Open windows and turn on the kitchen exhaust fan if available. For more extensive work or persistent odors, consider the health implications of sewer gases, and consult local building codes or resources like those from the EPA for proper ventilation guidelines.
Tool Safety
- Use the correct tool for the job. Forcing a tool can damage the tool and the fitting.
- Ensure tools are in good working condition.
- Keep your work area clear of clutter to avoid tripping hazards.
Frequently Asked Questions
What is an "Under the Kitchen Sink Plumbing Diagram"?
An under the kitchen sink plumbing diagram is a visual representation of the pipes, valves, and components that manage water supply and drainage beneath your kitchen sink. It’s a schematic that shows how everything connects, from the faucet's water inlets to the drainpipe leading to your home's main sewer line. Understanding this visual layout demystifies the plumbing system, aiding in troubleshooting and repair.
How do I read a plumbing diagram for under the sink?
To read a diagram, familiarize yourself with the common symbols used for pipes, valves, and fittings. Trace the path of water: starting from the supply lines (usually red for hot, blue for cold) coming from the shut-off valves, leading to the faucet, and then following the drain assembly (tailpiece, P-trap, drainpipe) away from the sink. Look for connections to appliances like dishwashers or garbage disposals.
Why is understanding this diagram important for DIY repairs?
This understanding is fundamental for DIY repairs. It allows you to accurately identify the source of leaks or clogs, determine which parts need servicing or replacement, and plan your repair steps logically. It also helps you communicate precisely with a plumber if you need to call one, using correct terminology and pointing out specific components on the diagram or in the plumbing itself.
What are the most common plumbing components depicted in such diagrams?
Common components include hot and cold water supply lines, shut-off valves, faucet connections, the sink tailpiece, the P-trap (the curved pipe designed to hold water and block sewer gas), the drainpipe leading to the wall, and connections for a garbage disposal or dishwasher drain hose. Vent pipes may also be indicated, which allow air into the drainage system to prevent siphoning.
Conclusion
The plumbing beneath your kitchen sink, while often overlooked, is a vital system. By familiarizing yourself with its components through a diagram and understanding common issues, you're empowered to take on many minor repairs yourself. This knowledge not only saves money and time but also provides the confidence to efficiently address leaks, clogs, and other problems. Regular maintenance and a proactive approach are your best allies in keeping your kitchen plumbing running smoothly and preventing larger, more costly repairs. Don't let the complexity of under-sink plumbing deter you; with this guide, you're well-equipped to manage it. For more insights on various kitchen maintenance tasks, exploring our blog can offer further practical advice.
